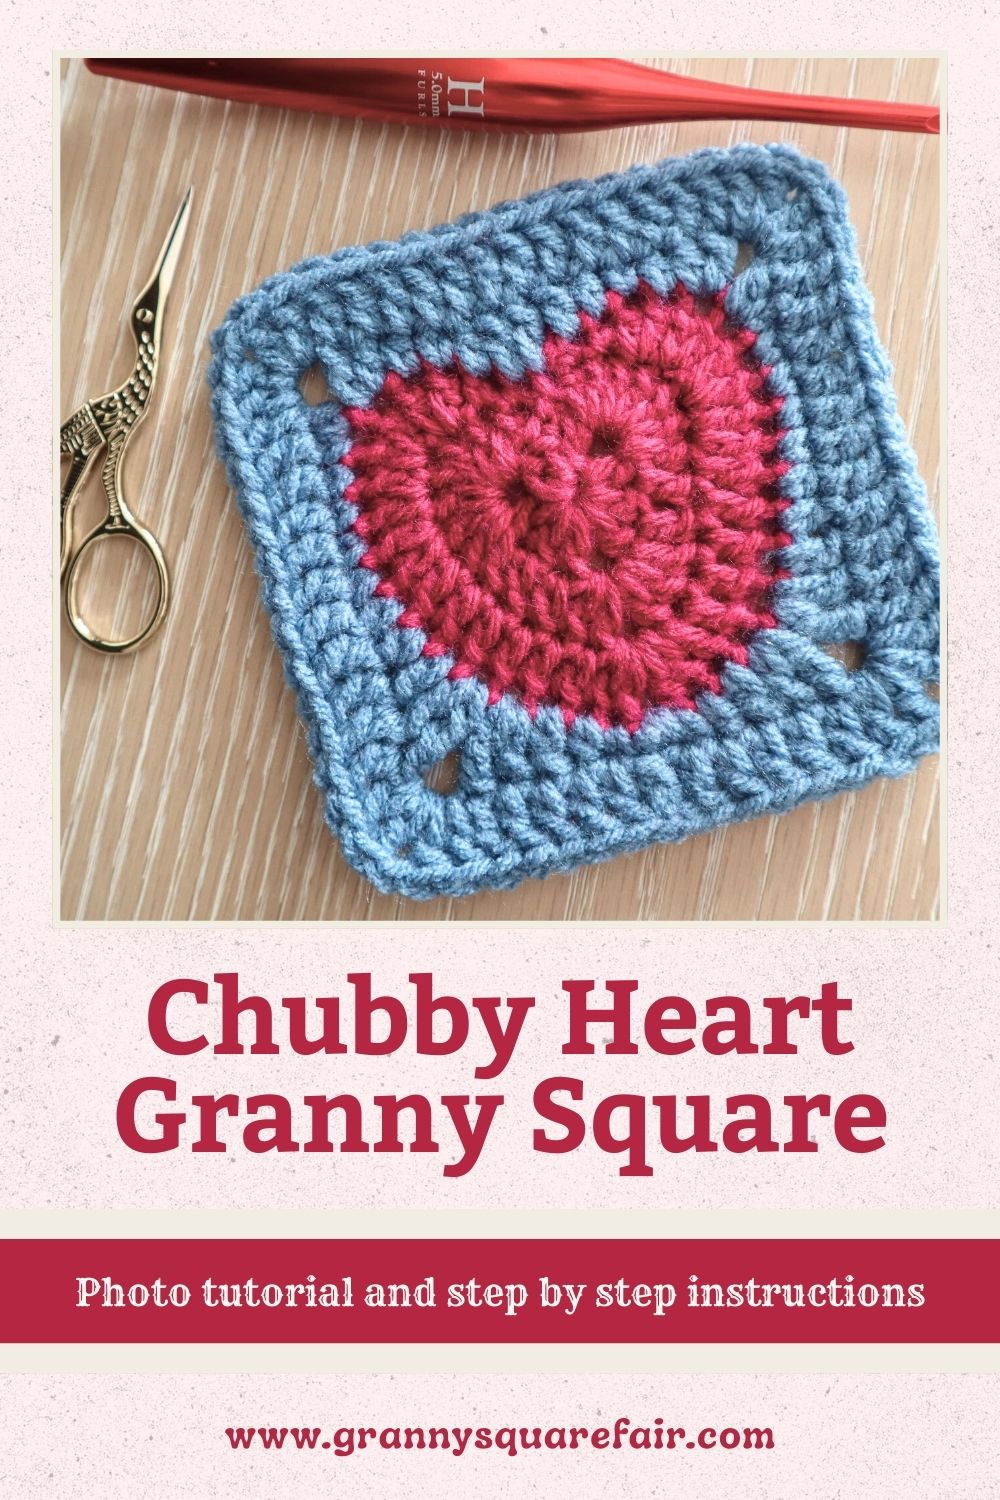
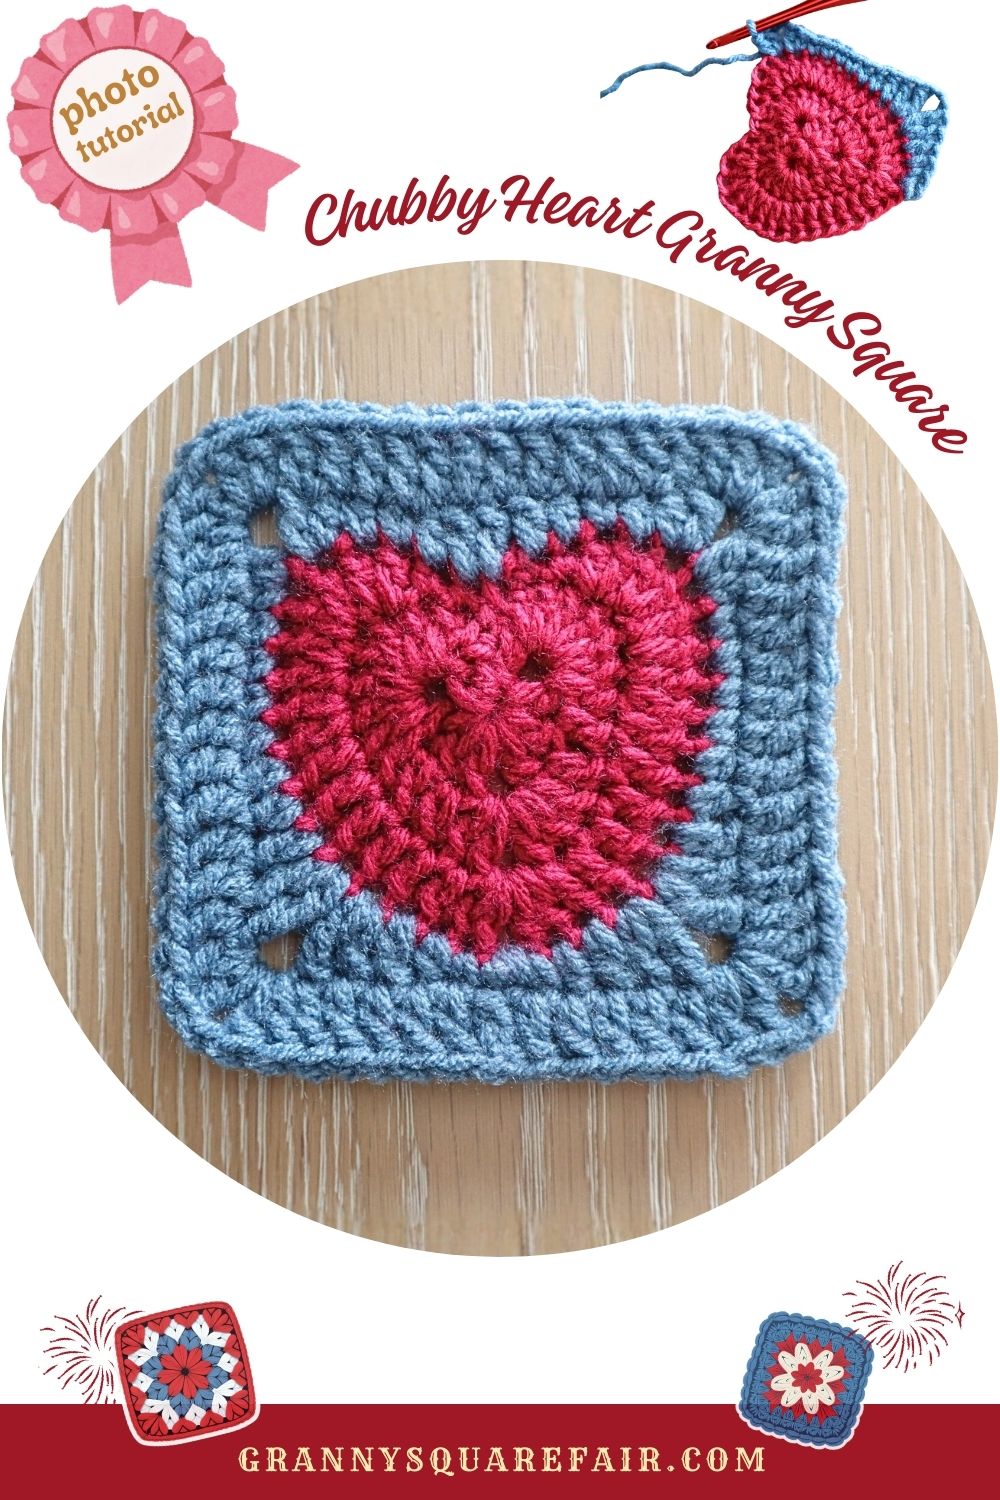
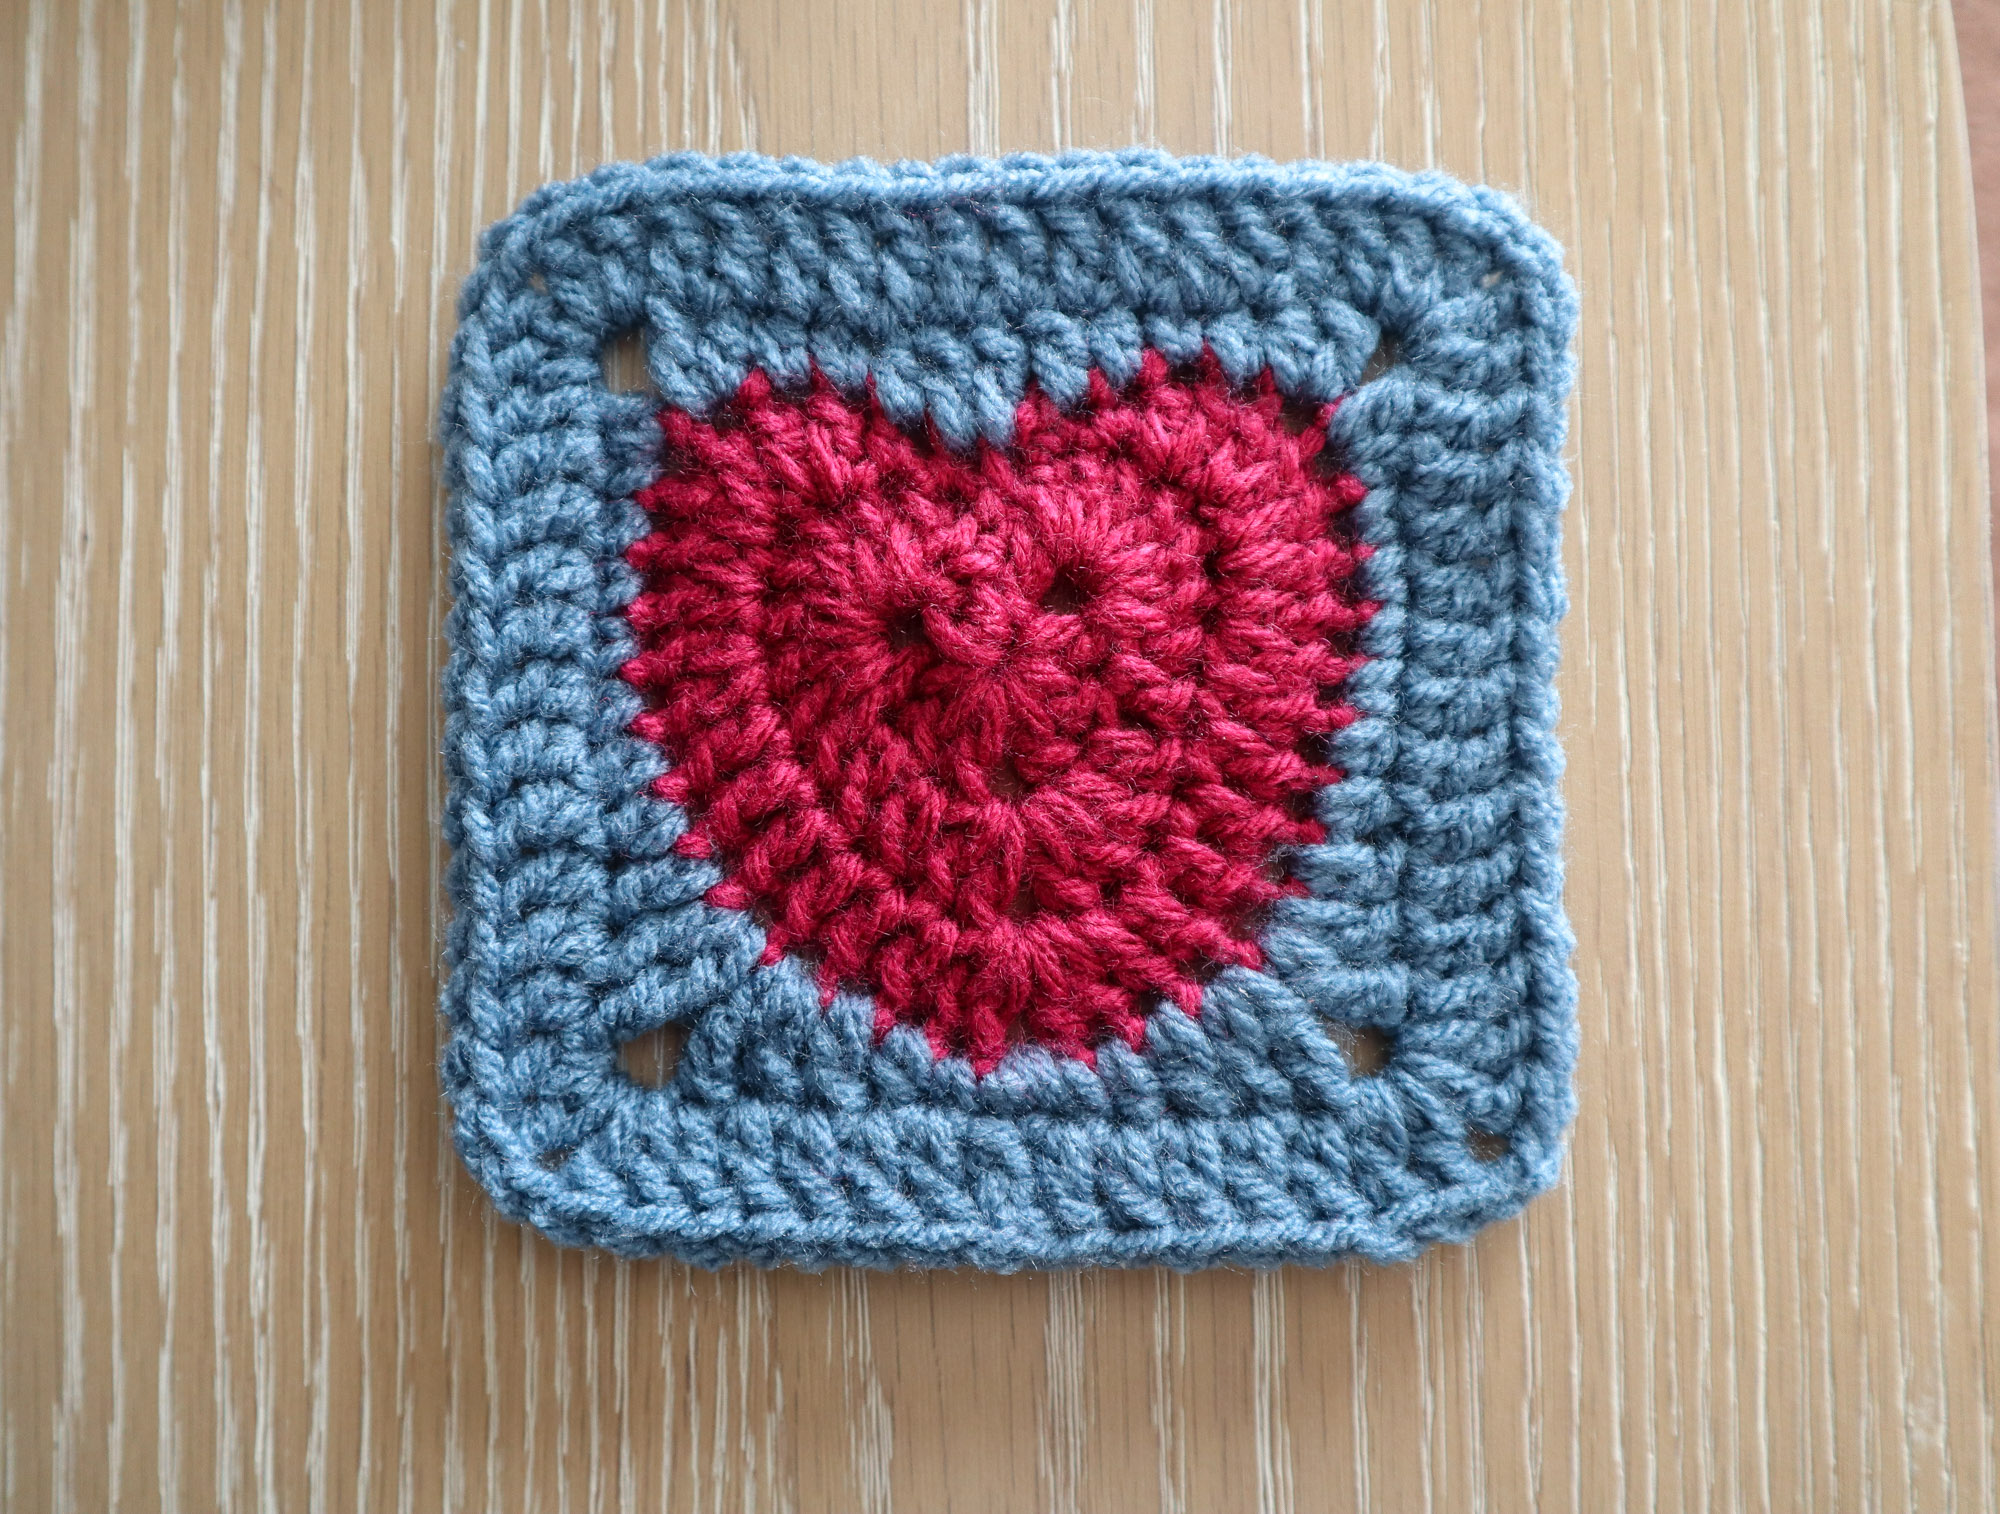
Chubby Heart Granny Square
There’s definitely more than one way to make a granny square heart! With this variation, you get a solid granny square with a large, chubby, heart motif in the middle that is worked from the center-out.
It’s a great heart granny square for baby items or anything where an extra chubby, rounded heart is called for. And it also pairs wonderfully with other solid granny square motifs.
Skill Level
Intermediate — While this granny square only uses basic stitches (single crochet, double crochet, treble crochet, chains and slip stitches), it does require you to have a good handle on counting your stitches and keeping track of where to put them.
Stitch Abbreviations Used in the Pattern (U.S. Terms)
| Abbreviation | Stitch Name |
|---|---|
| ch | chain |
| sl st | slip stitch |
| sc | single crochet |
| dc | double crochet |
| tc | treble (triple) crochet |
| st(s) | stitch(es) |
| sp | space |
| rep | repeat |
What You’ll Need
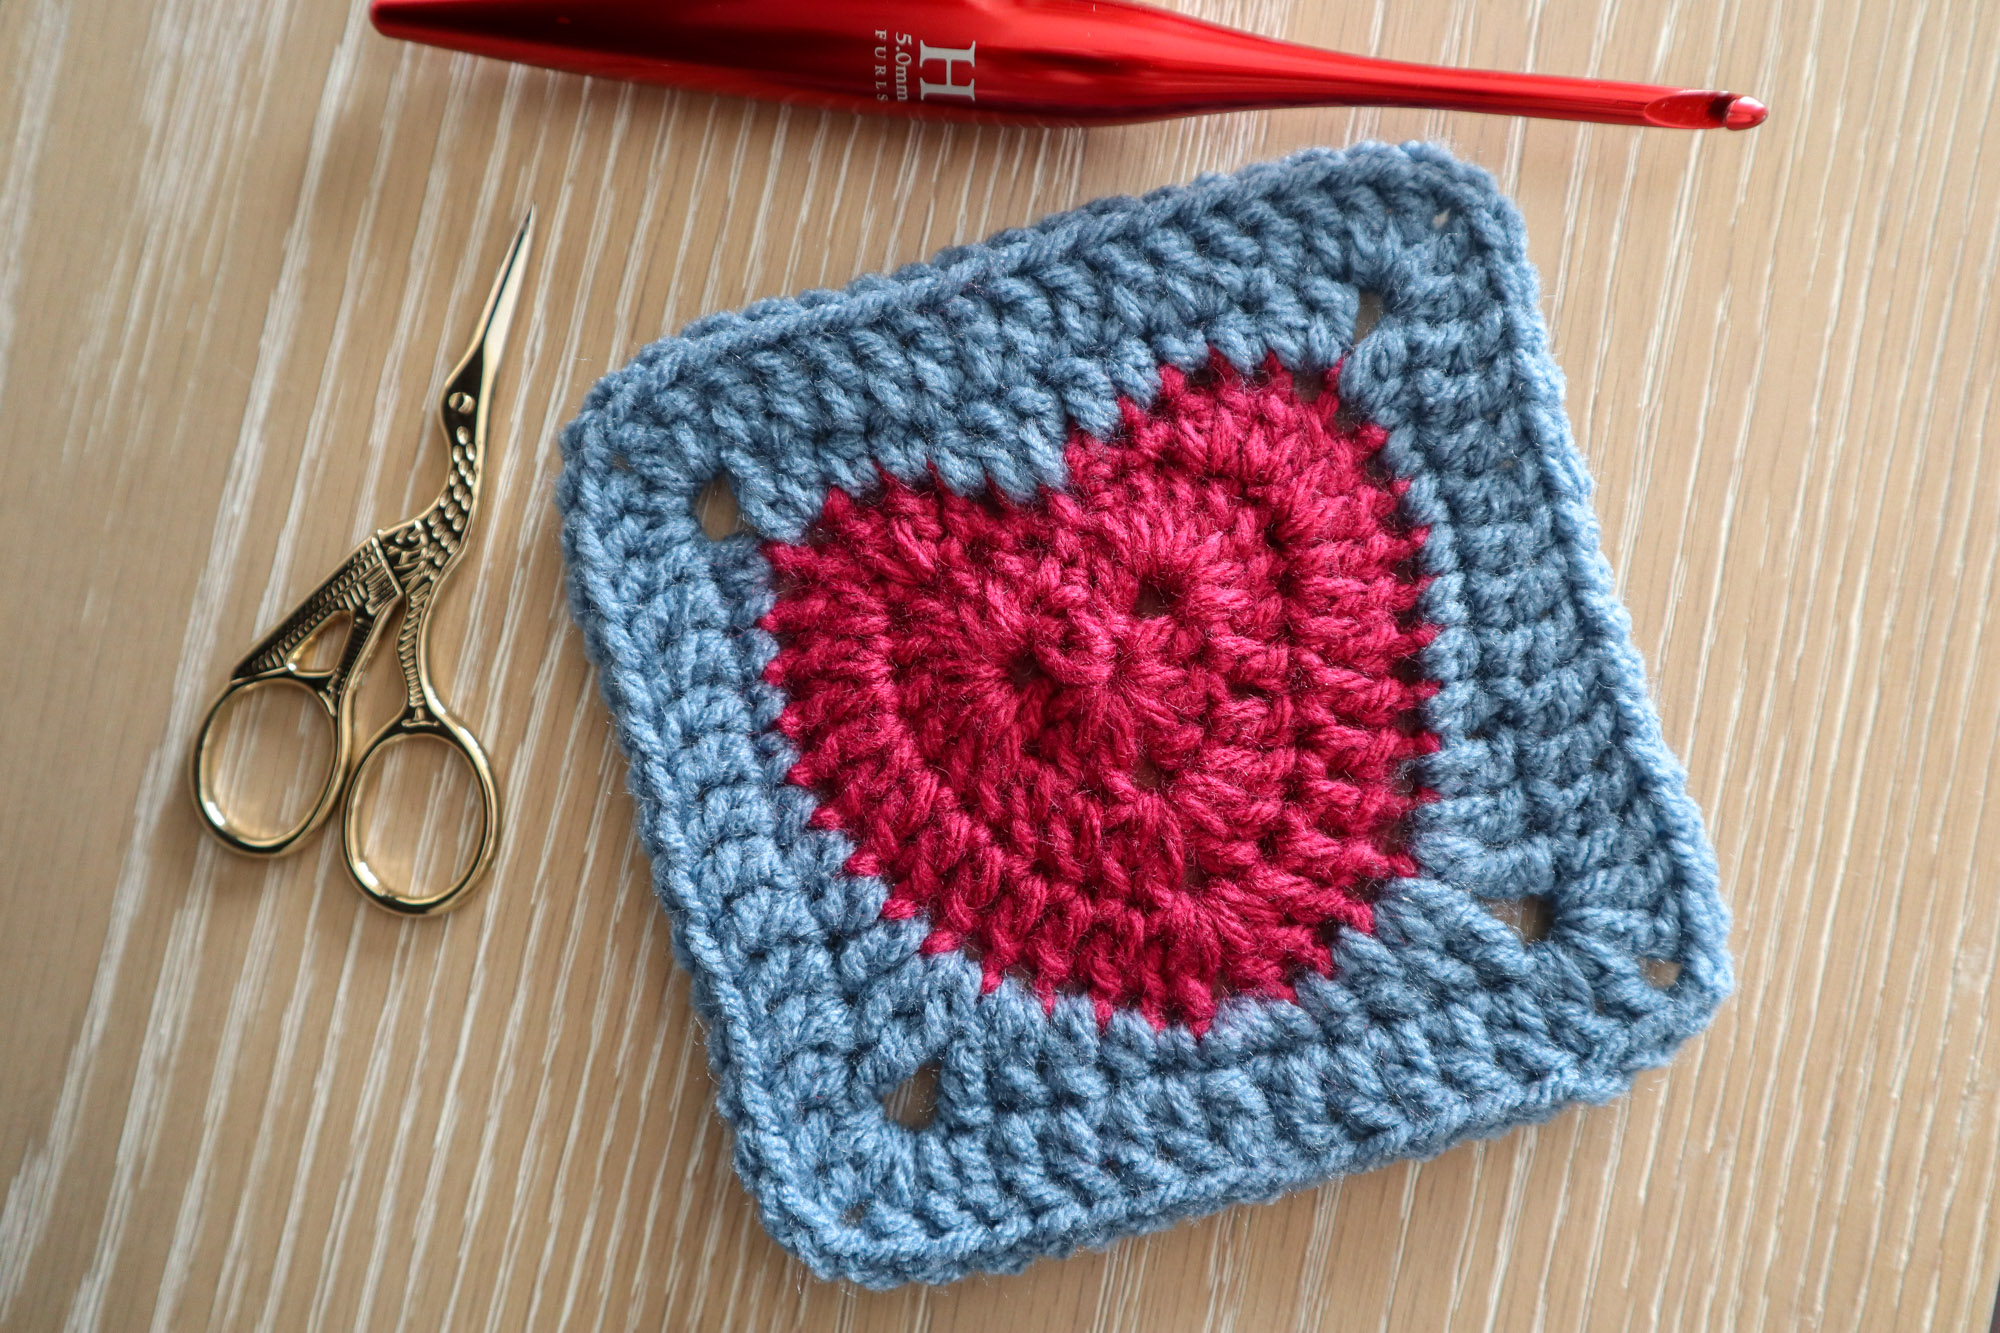
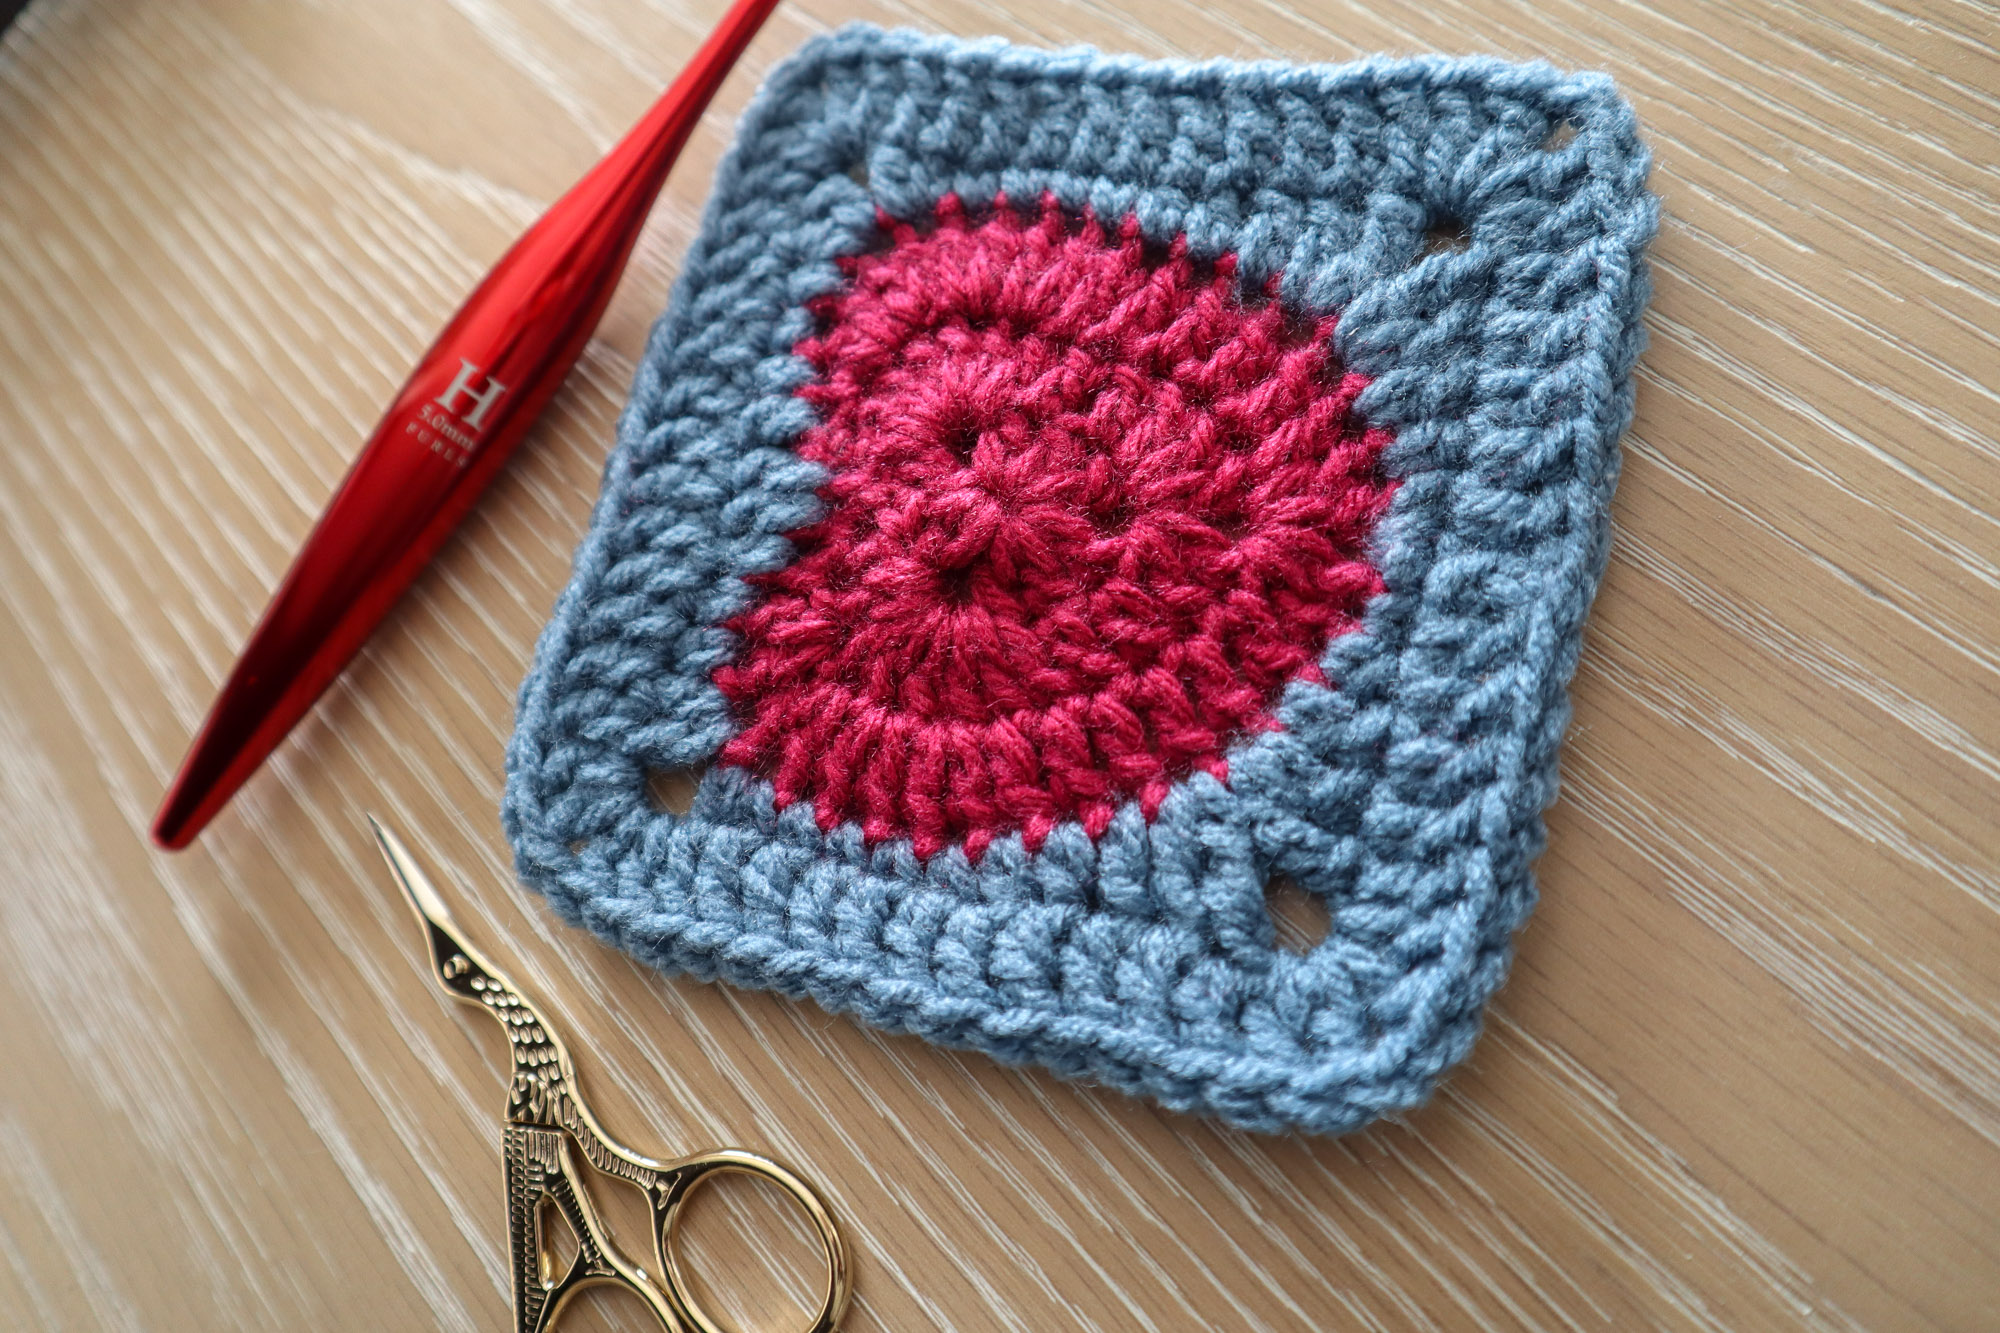
- Yarn: Any weight yarn you love – I used two colors of worsted (4) weight acrylic.
- Hook: Use a hook that matches your yarn label’s recommendation. I used a 5 mm hook.
- Notions: Scissors, a sweetie pie to crochet this heart for (it can be yourself!)
Gauge & Size
Gauge is up to you and your yarn and hook size! After 5 rounds, in my 4 weight yarn and 5mm hook, my square was a little over 4″ across.
Pattern Notes
- This pattern is worked in the round, joining at the end of each round with a slip stitch.
- We will not turn our work at the start of each round.
- We work the heart motif first, then change yarn color and square the heart to add the border and turn it into a granny square!
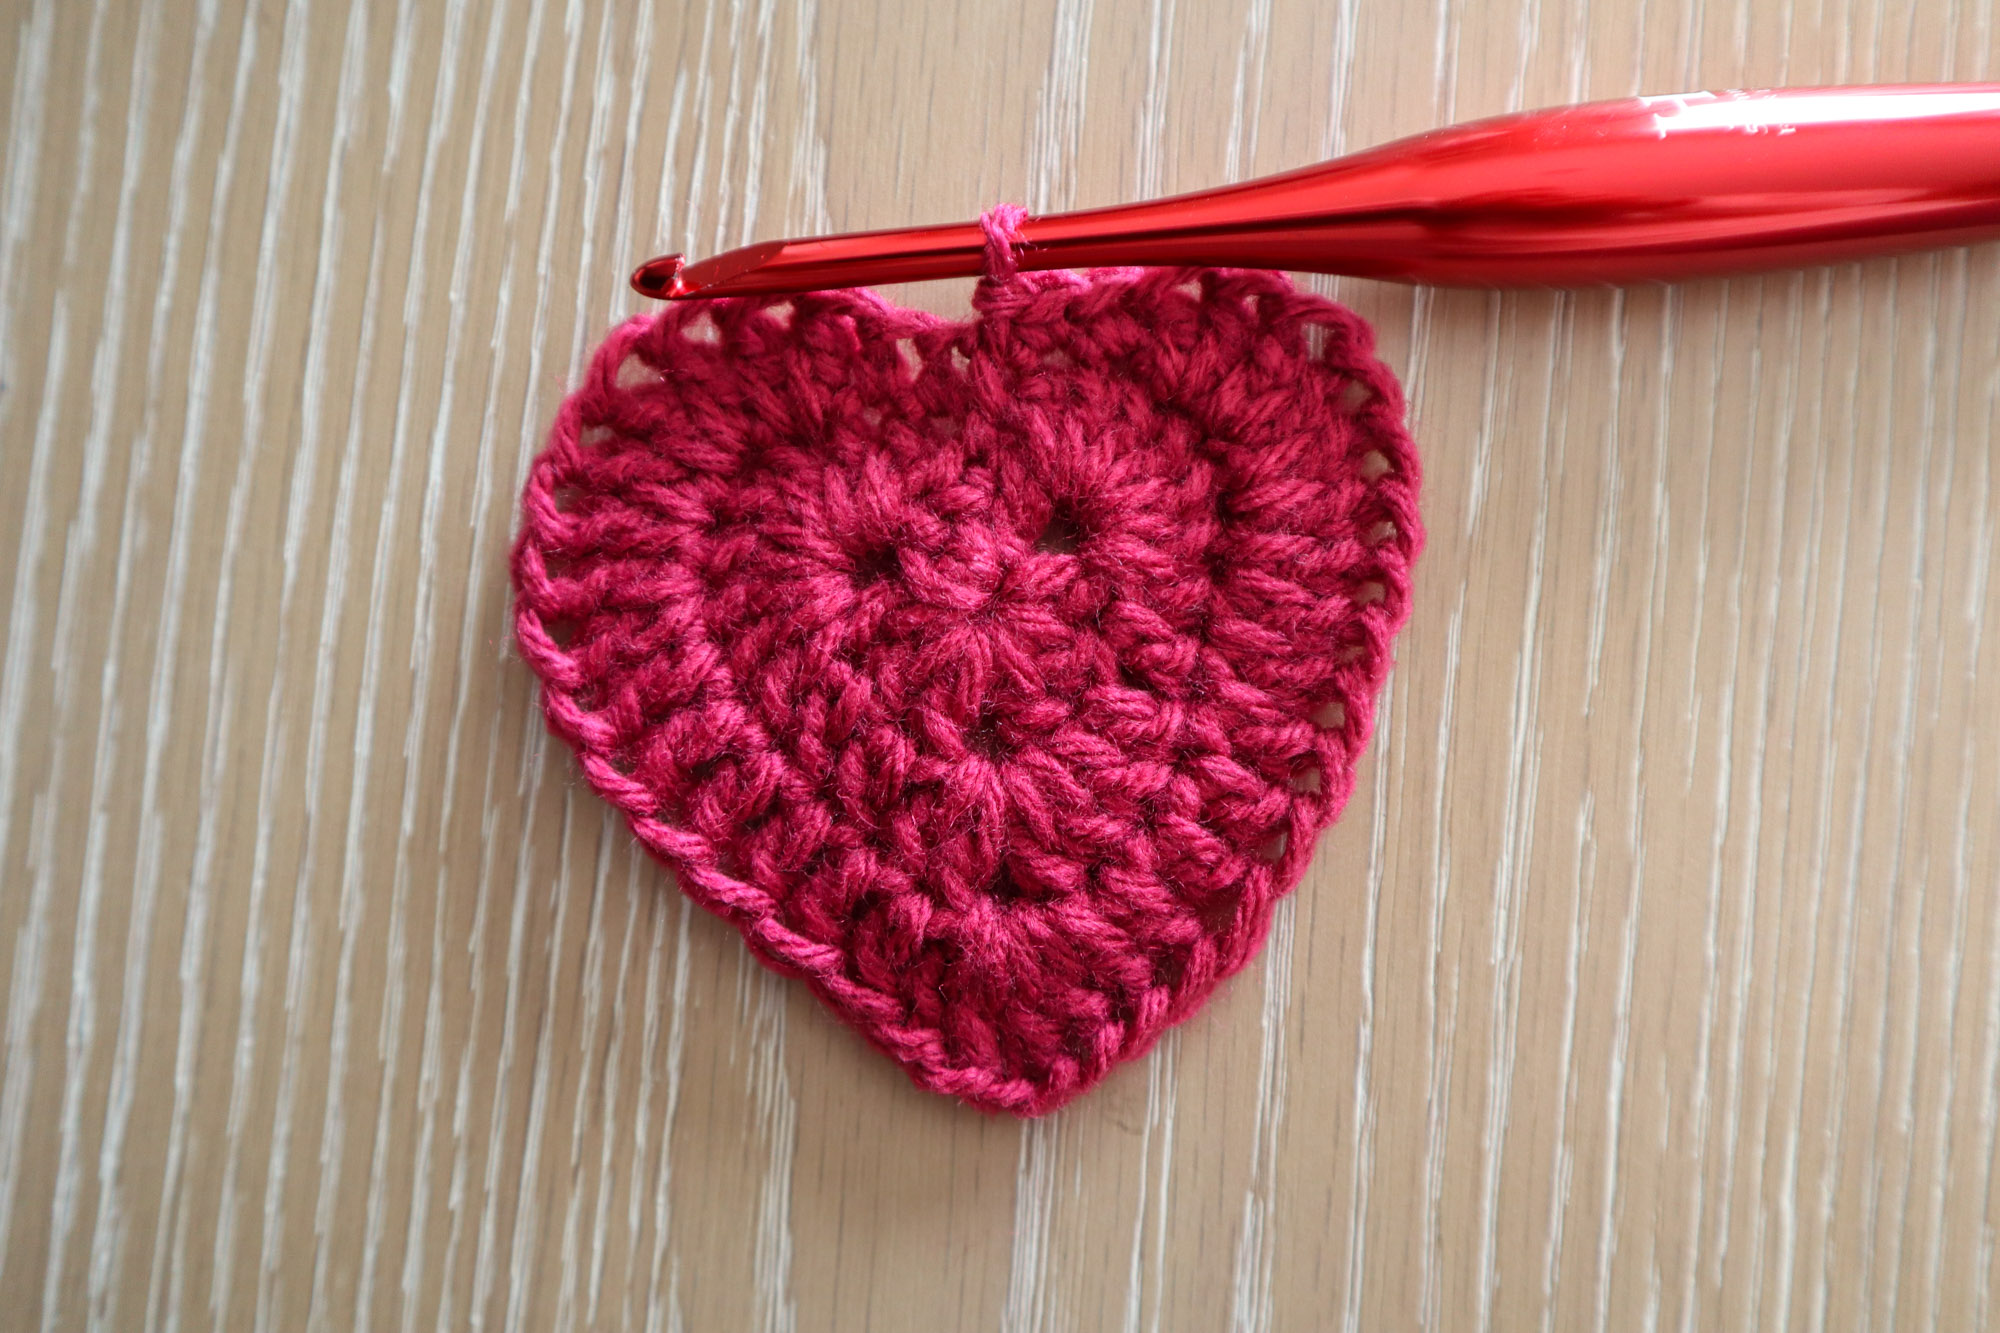
Inner Heart Motif
To begin, with heart color yarn, ch4, sl st to the first chain to create a ring.
Round 1
Ch3 (counts as 1dc) and make 2 more dc into the ch4 ring. *Ch1, 3dc into the ring* repeat once more. Ch1 and sl st to top of starting ch3 to complete the rnd.
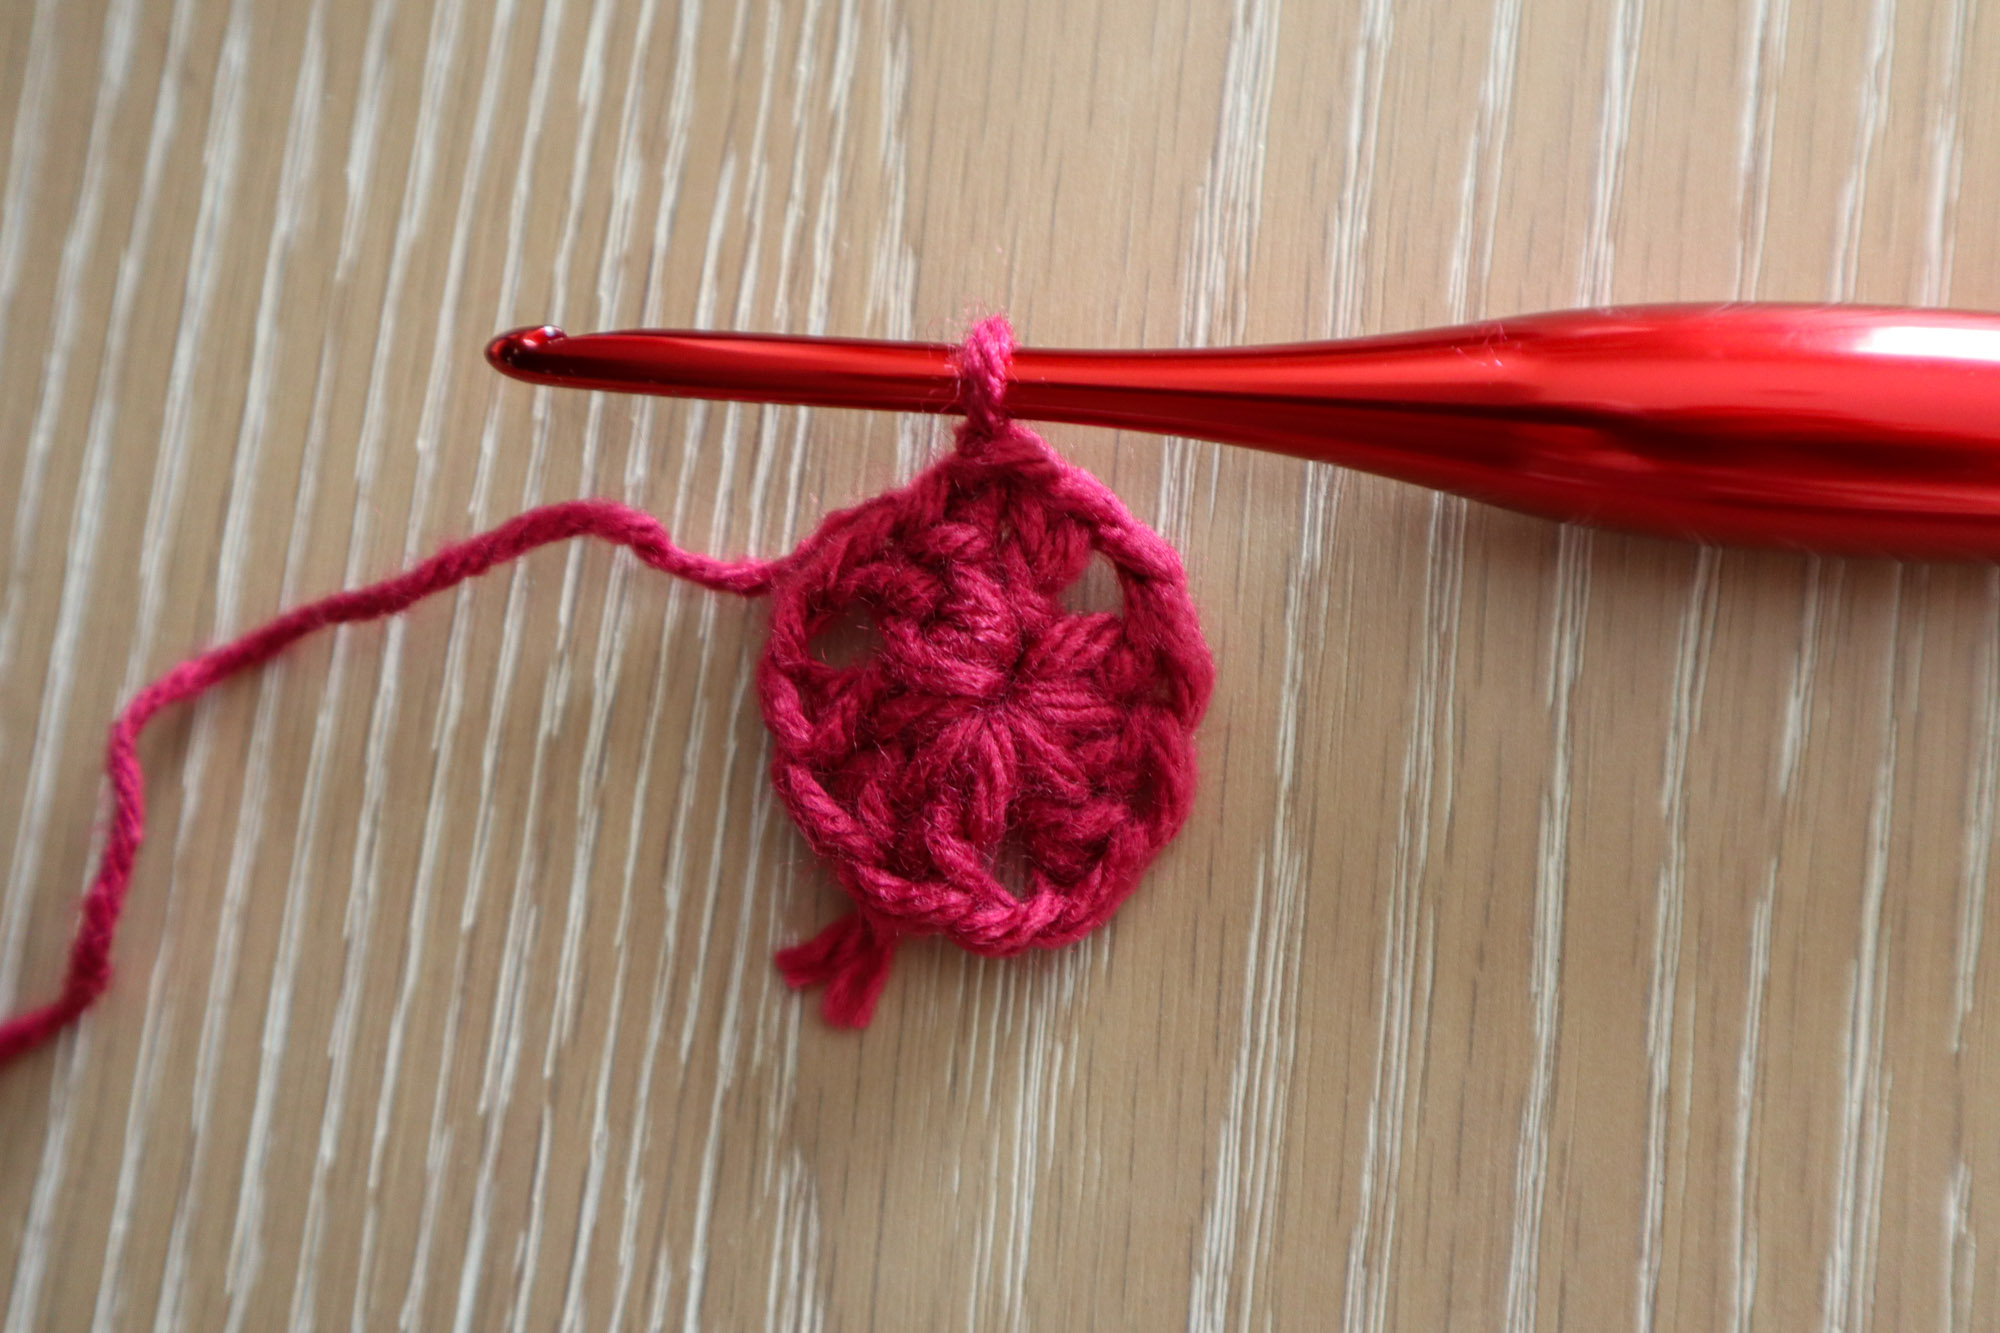
Round 2
Sl st into the next stitch to reposition the yarn. Skip 1dc, Work 7dc in the next ch sp. Make 1dc in each of the next 3 sts. Into the next ch sp, work 2dc, ch1, 2dc. Make 1dc in each of the next 3 sts. Work 7dc in the next ch sp. Sl st to the first sl st to complete the rnd.
Round 3
1Sc in each of the next 2 sts. 2dc in each of the next 4 sts.
1dc in each of the next 6 sts. Into the ch sp, 2dc, ch1, 2dc.
1dc in each of the next 6 sts. 2dc in each of the next 4 sts. 1sc in each of the next 2sts. Sl st to the slst from prev rnd to complete the rnd. Fasten off.
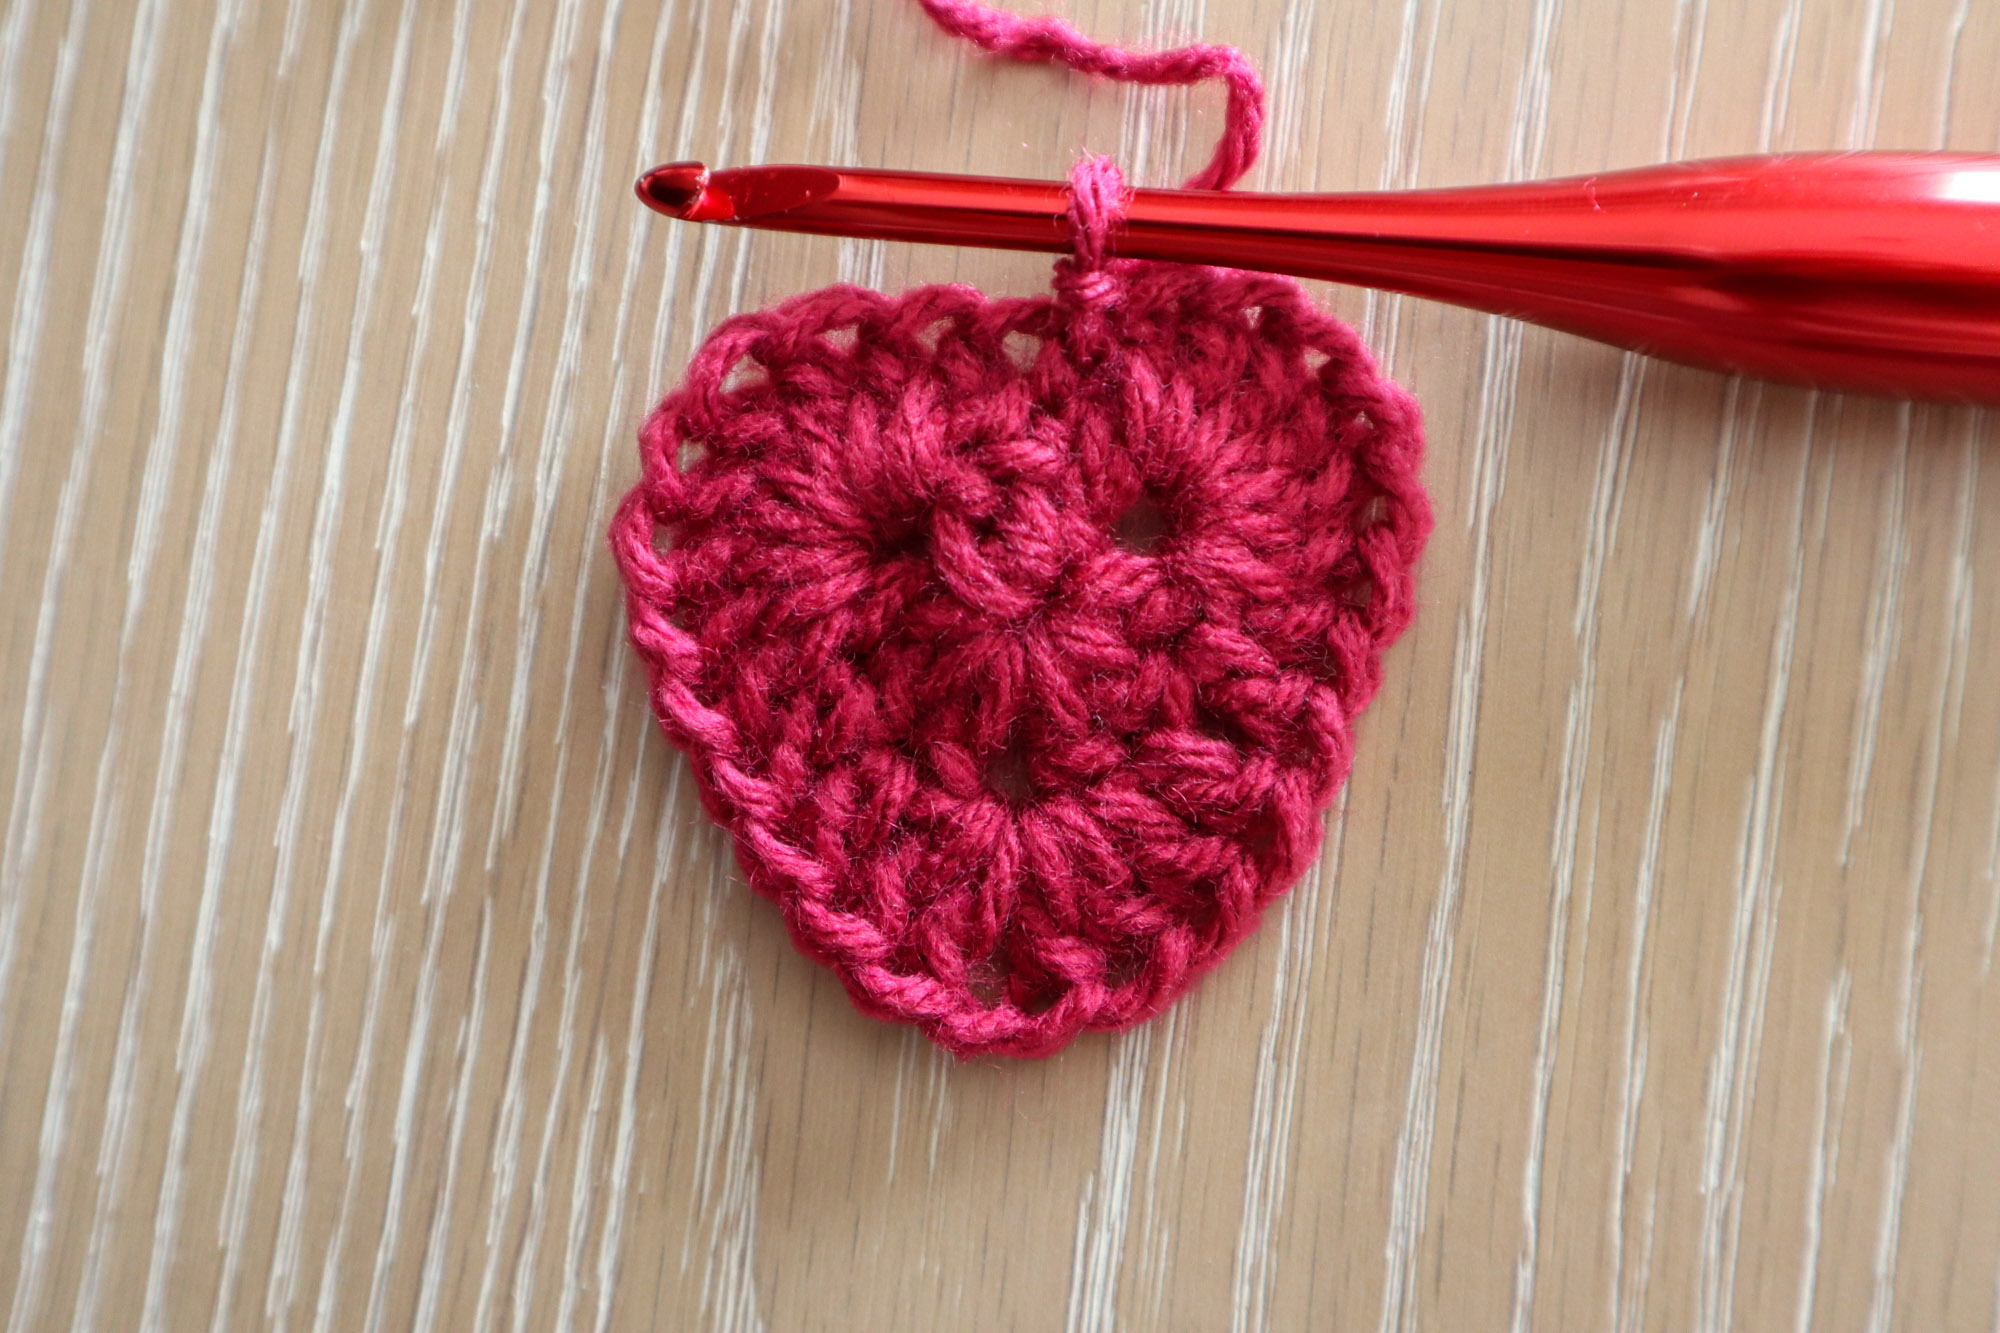
Squaring The Heart
Fasten on a new color at ch 1 sp (bottom of heart). 1sc in ch sp. 1sc in next st. 1hdc in next, 1dc in next. In the next stitch, make 1dc and 1tc. Ch2 and make 1tc and 1dc in the next st. 1dc in next. 1 hdc in each of next 2 sts.
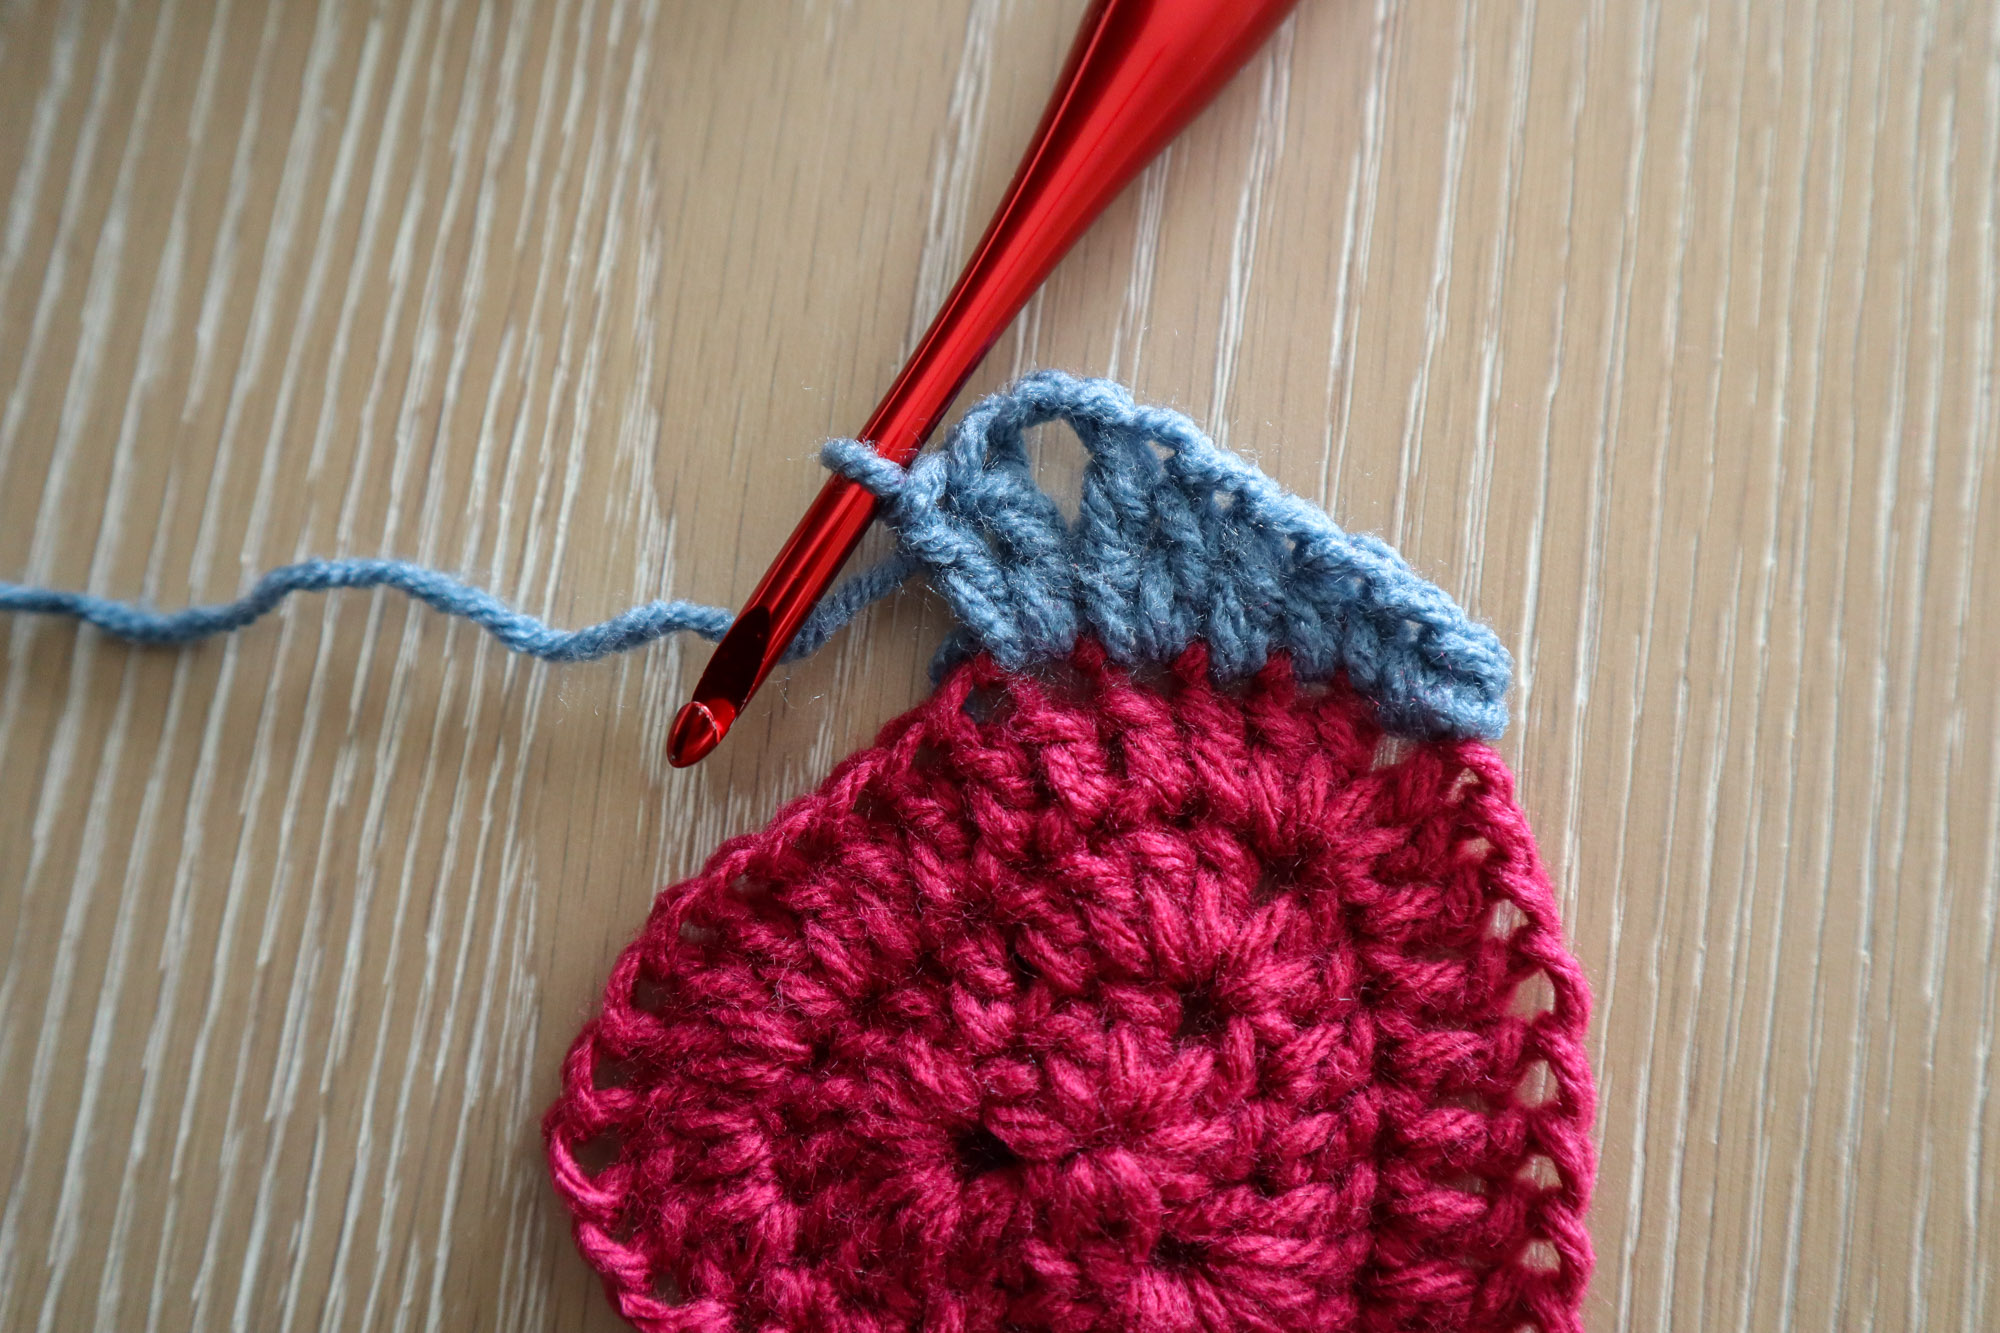
You’ve worked the first corner and are half way up the side of the heart
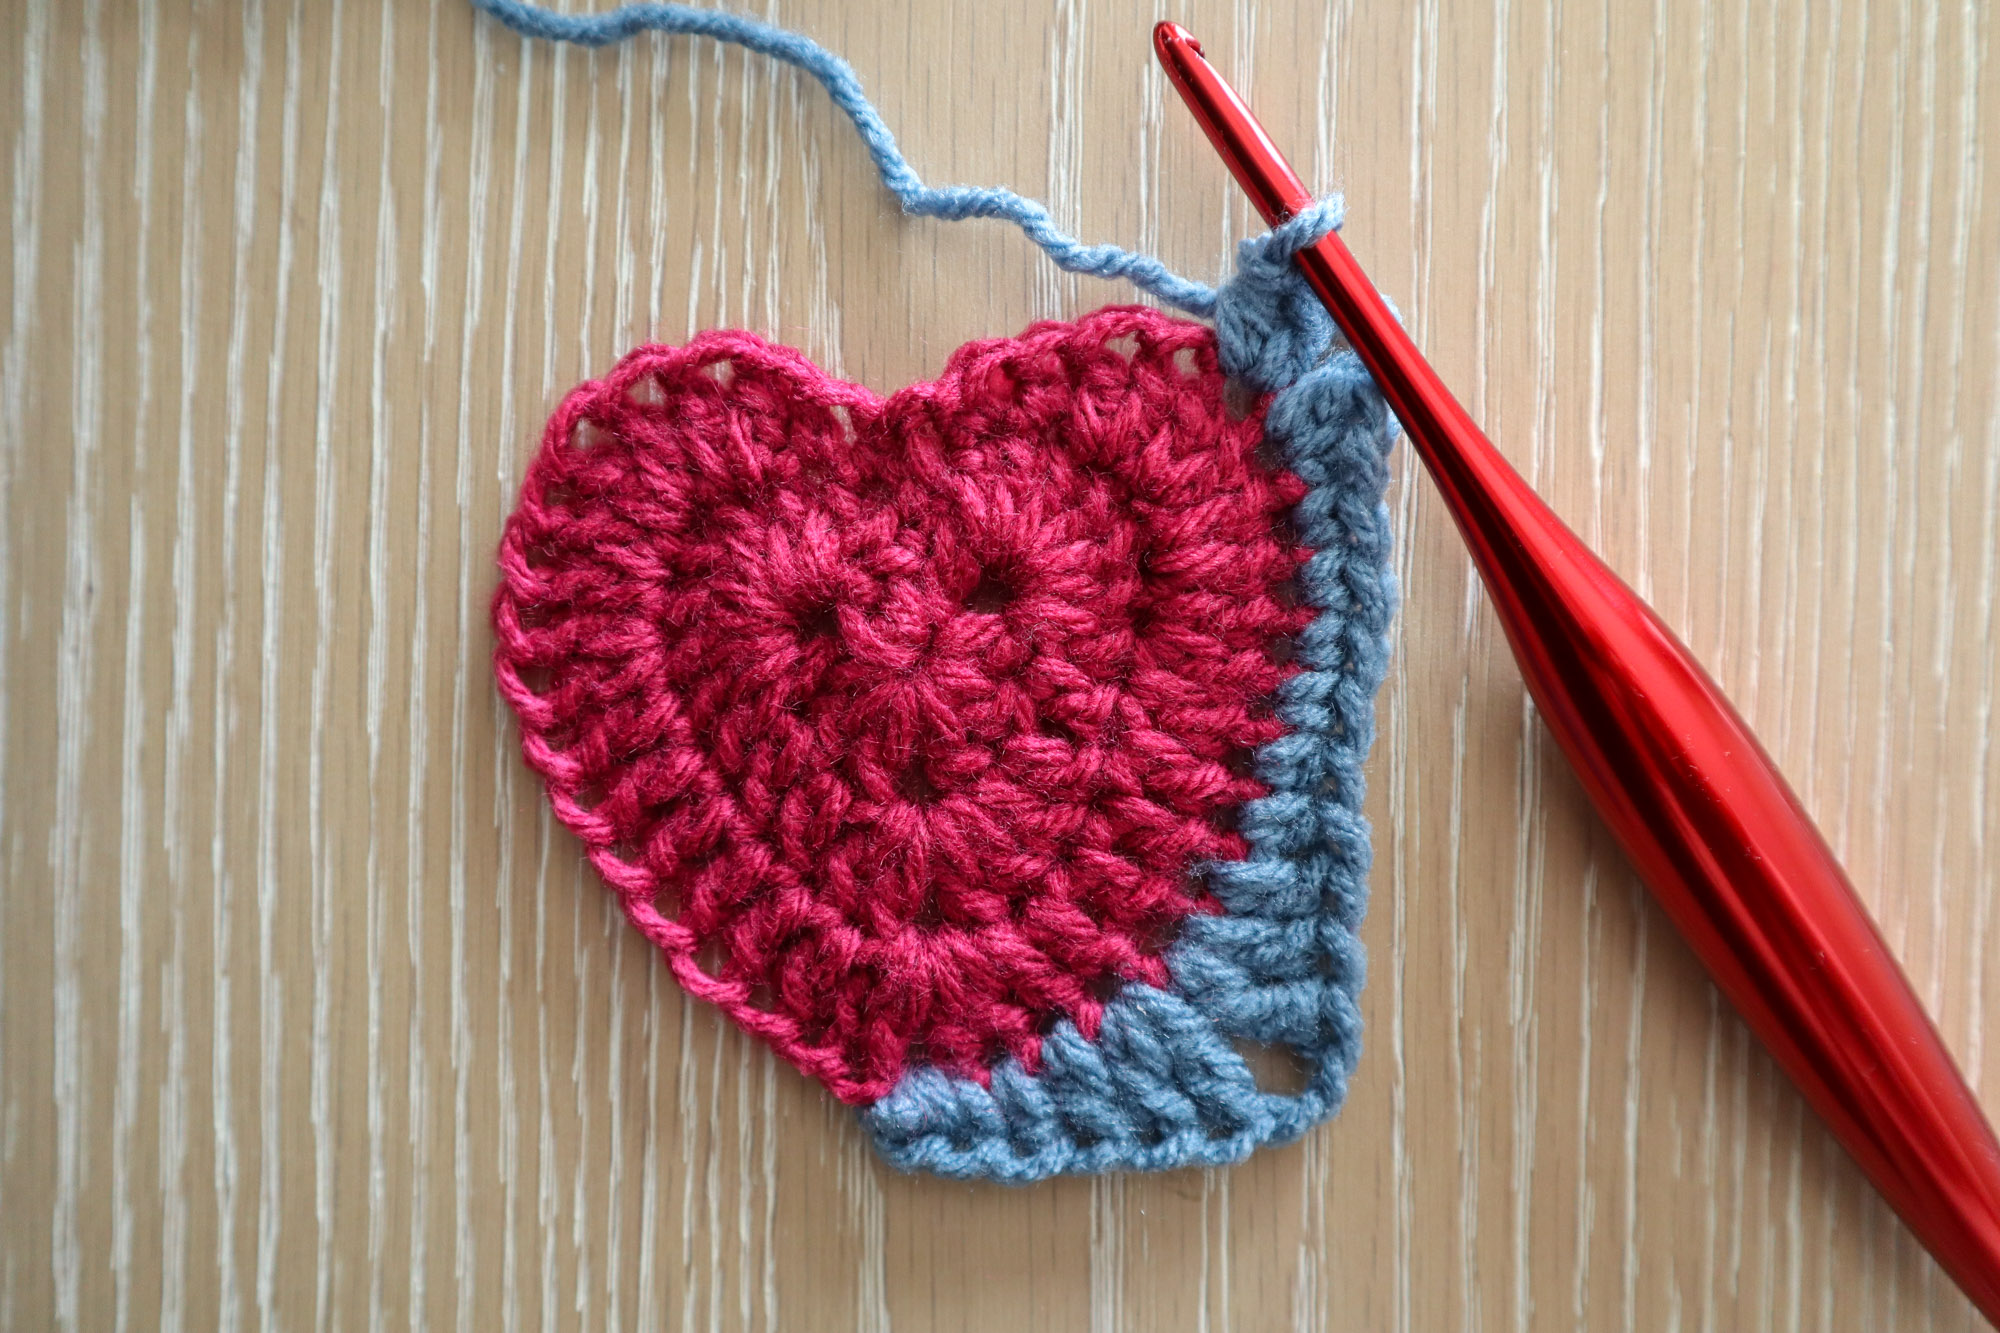
1sc in each of next 4 sts. In next st work 1sc and 1hdc. Ch2, 1dc and 1hdc in next st. 1hdc in next st. 1sc in next st. 1hdc in the next stitch. 1dc in the next stitch.1dc in the sl st of the prev rnd.
You’ve reached the center top of the heart shape
1dc in the next st, 1hdc in the next st, 1sc in the next st. 1hdc in the next stitch. Into the next stitch, work 1hdc and 1dc. Ch2, 1hdc and 1sc into the next st. 1sc in each of the next 4 sts.
You’ve just worked your 3rd corner and are half way down the other side of the heart
1hdc in each of the next 2 sts. 1dc in the next st. Into the next st, work 1dc and 1tc. Ch2, 1tc and 1dc in the next st. 1dc in the next st. 1hdc in the next st. 1sc in the next st. Sl st to the top of your first sc to complete the rnd.
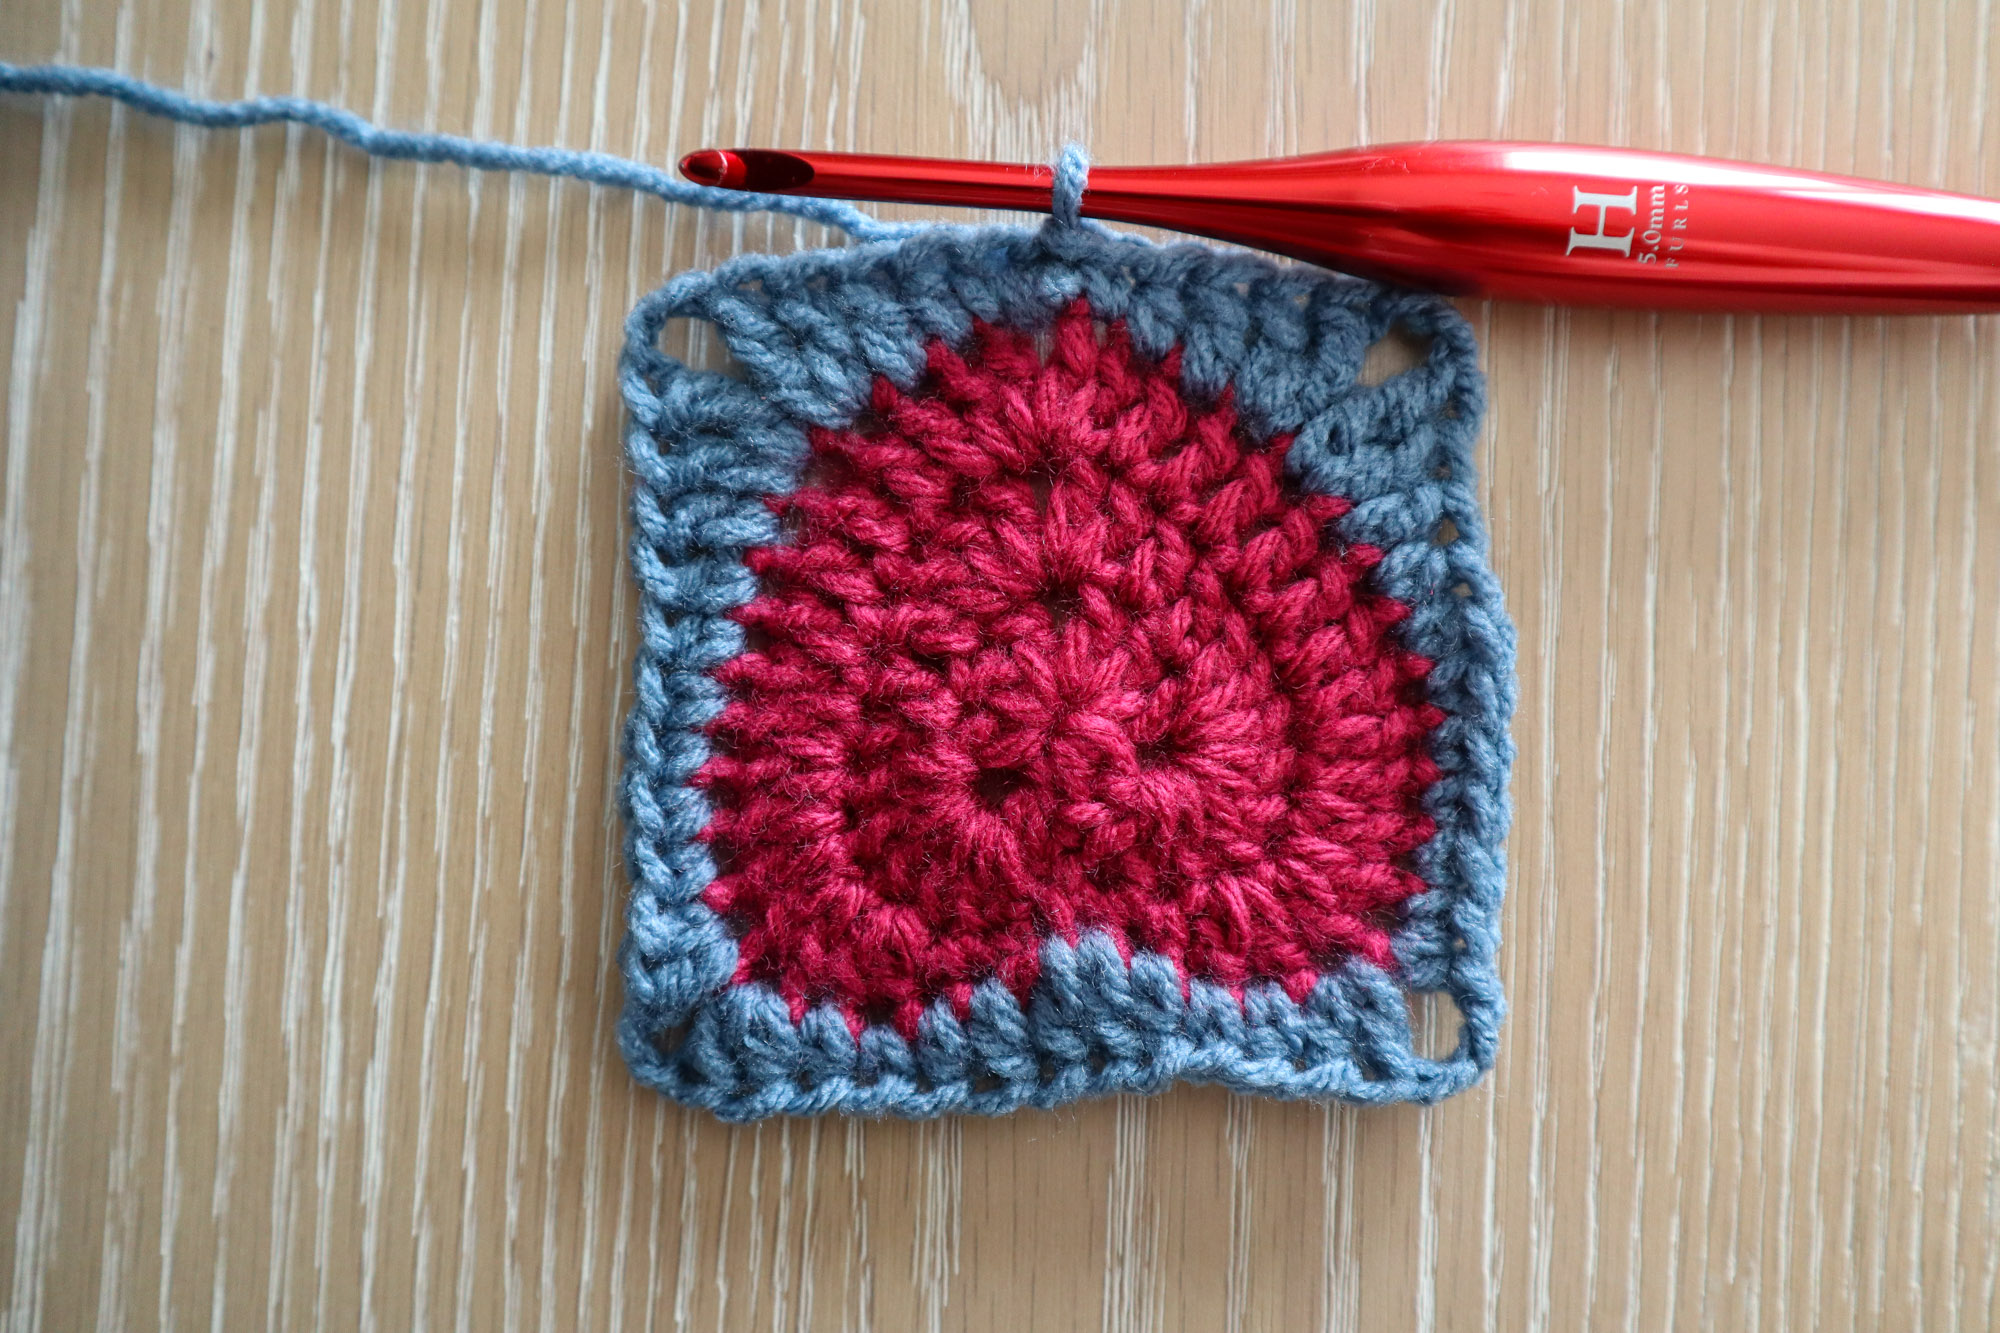
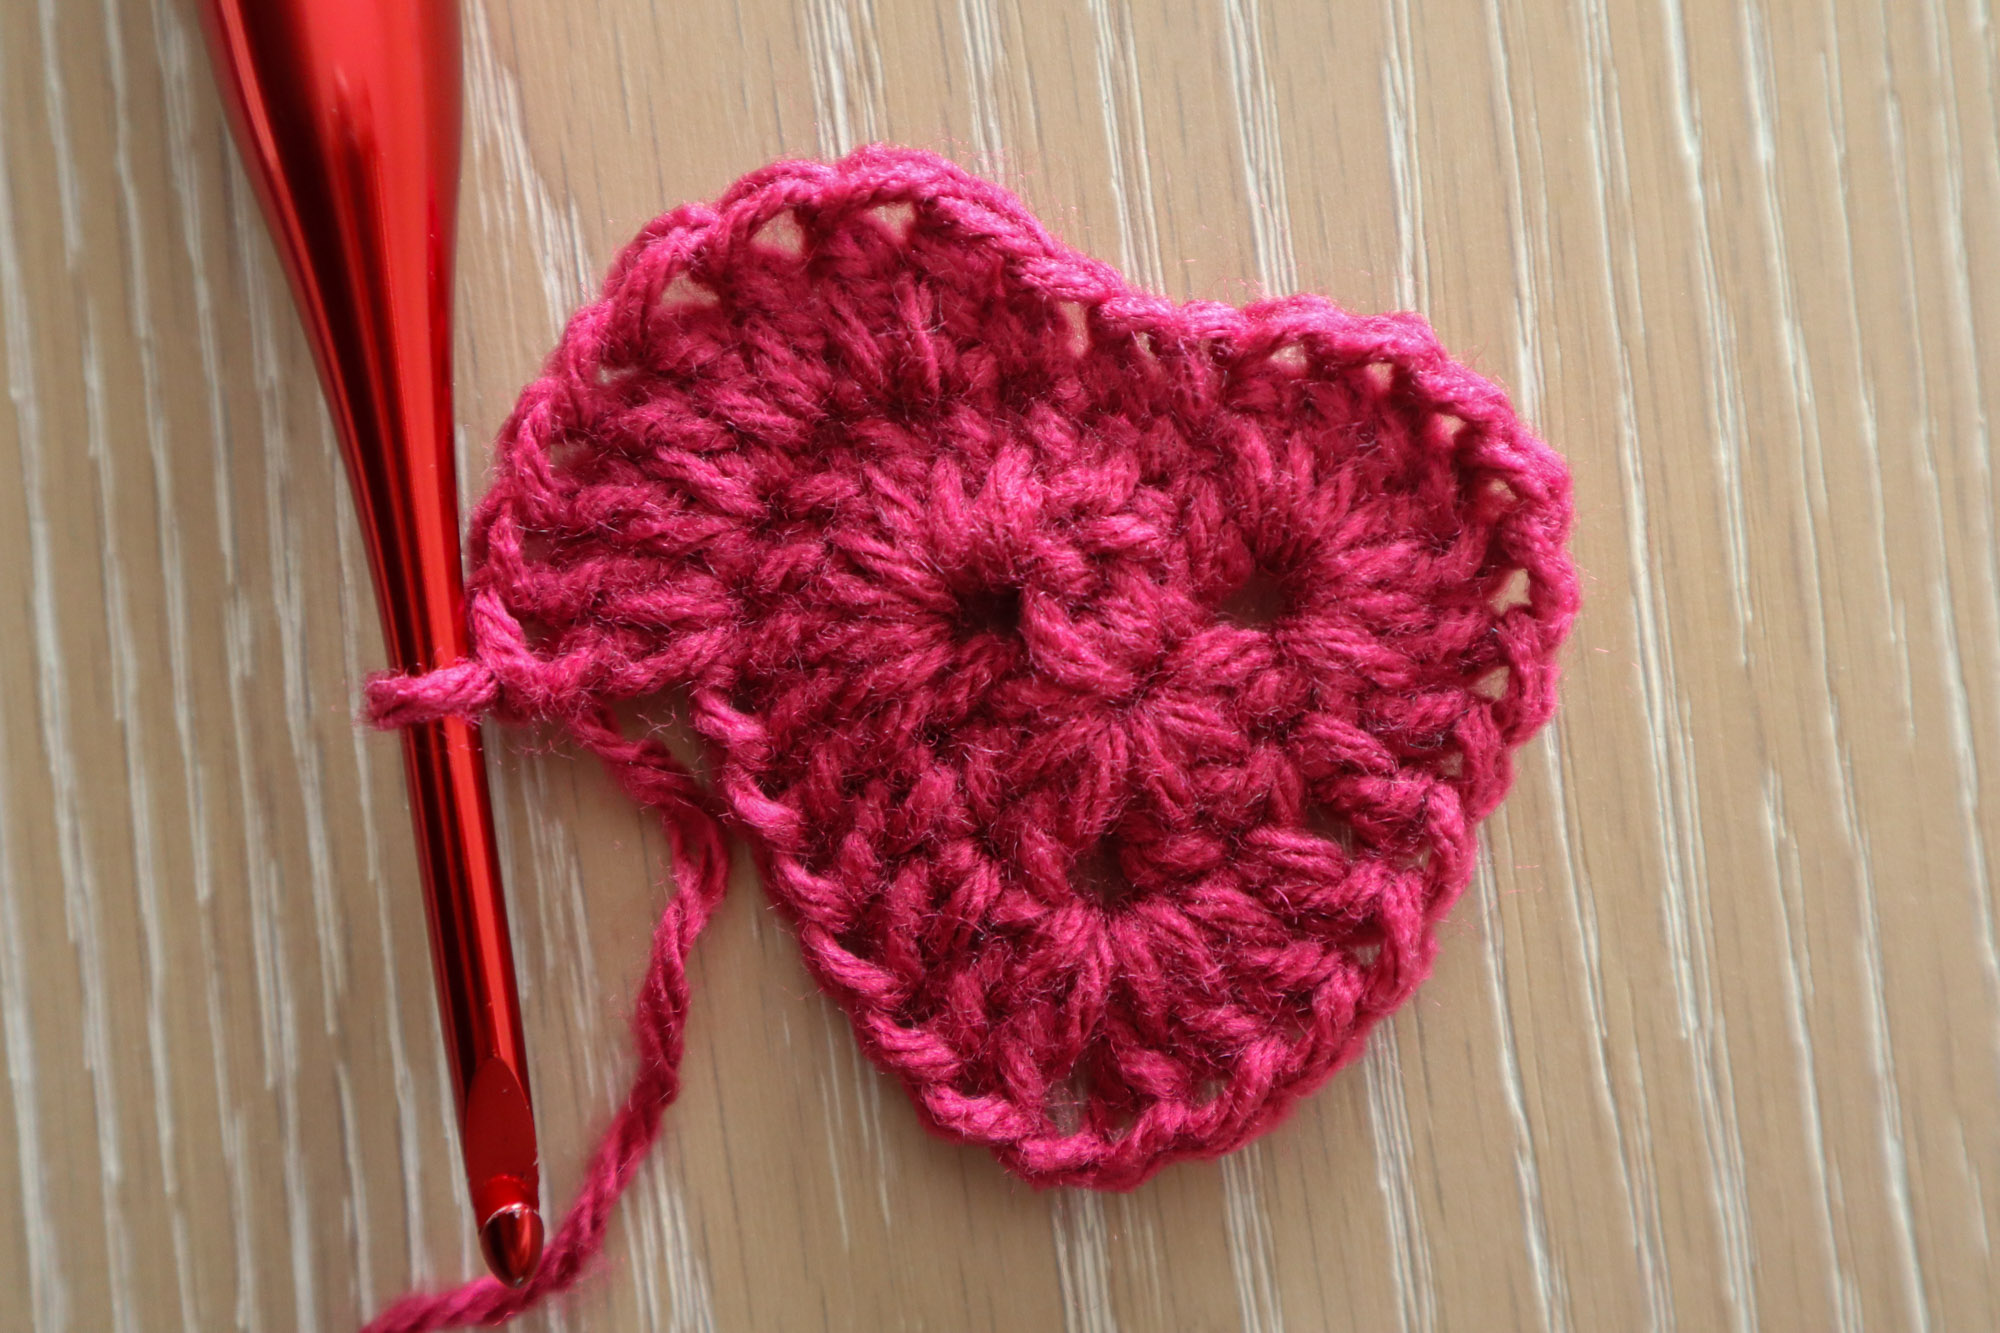
Round 5
Ch3 (counts as 1dc) and work 1dc in each stitch from the prev rnd. Into the ch2 corner, work 2dc, ch2, 2dc.
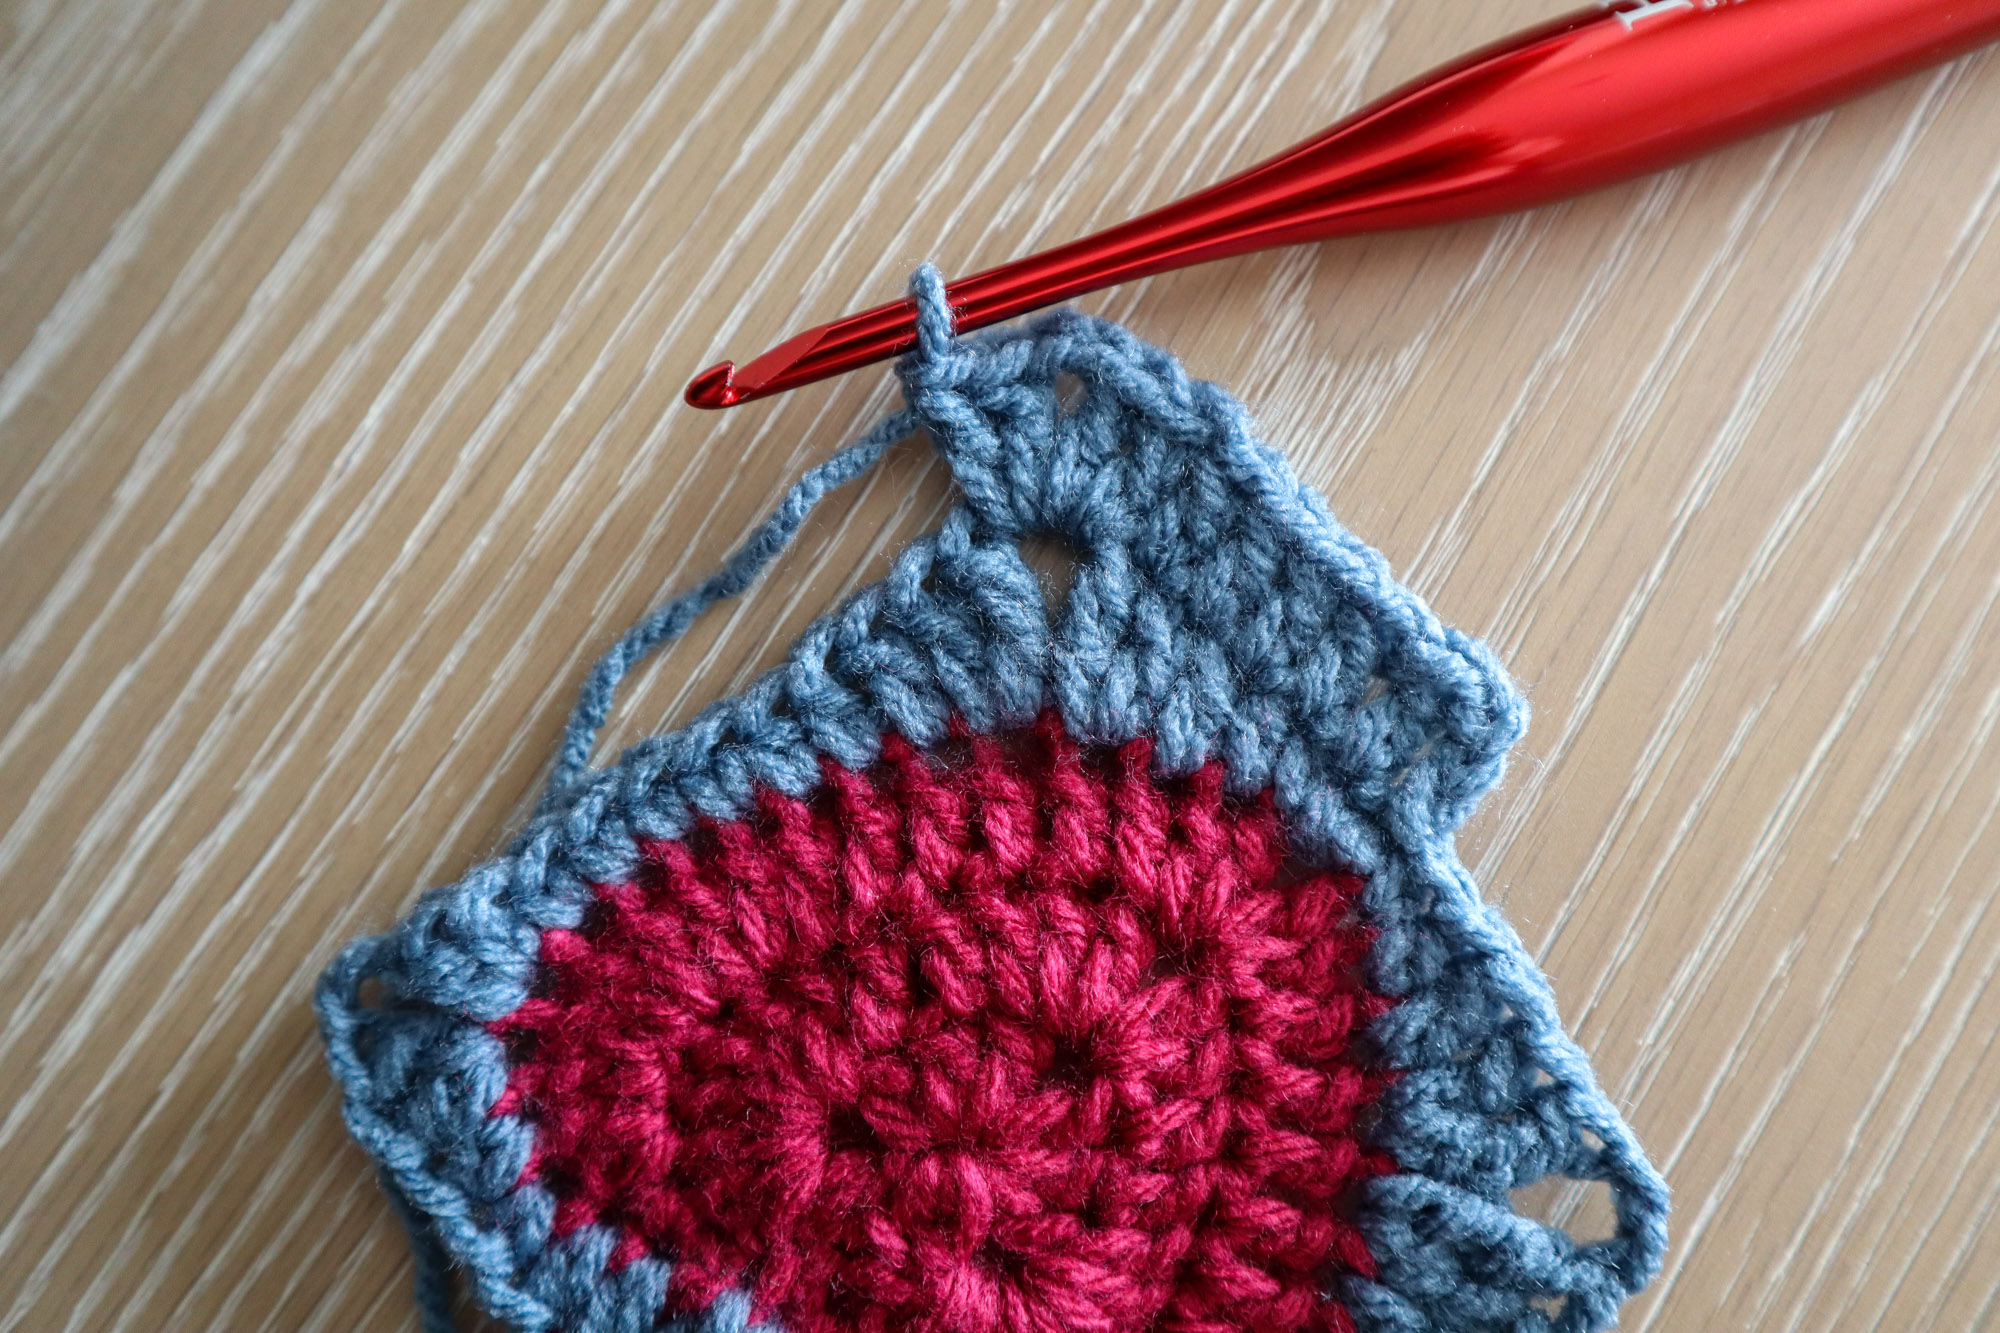
Work 1dc in each stitch along the side of the heart. Into the first top ch2 corner, work 2dc, ch2, 1dc.
Continue working 1dc in each st from prev rnd. in 2nd top ch2 corner, work 1dc, ch2, 2dc. Work 1dc in each stitch along the other side of the heart. Into the last, bottom ch2 corner, work 2dc, ch2, 2dc. Work 1dc in each rem stitch and sl st to starting ch3 to complete the rnd. (15dcs between each corner)
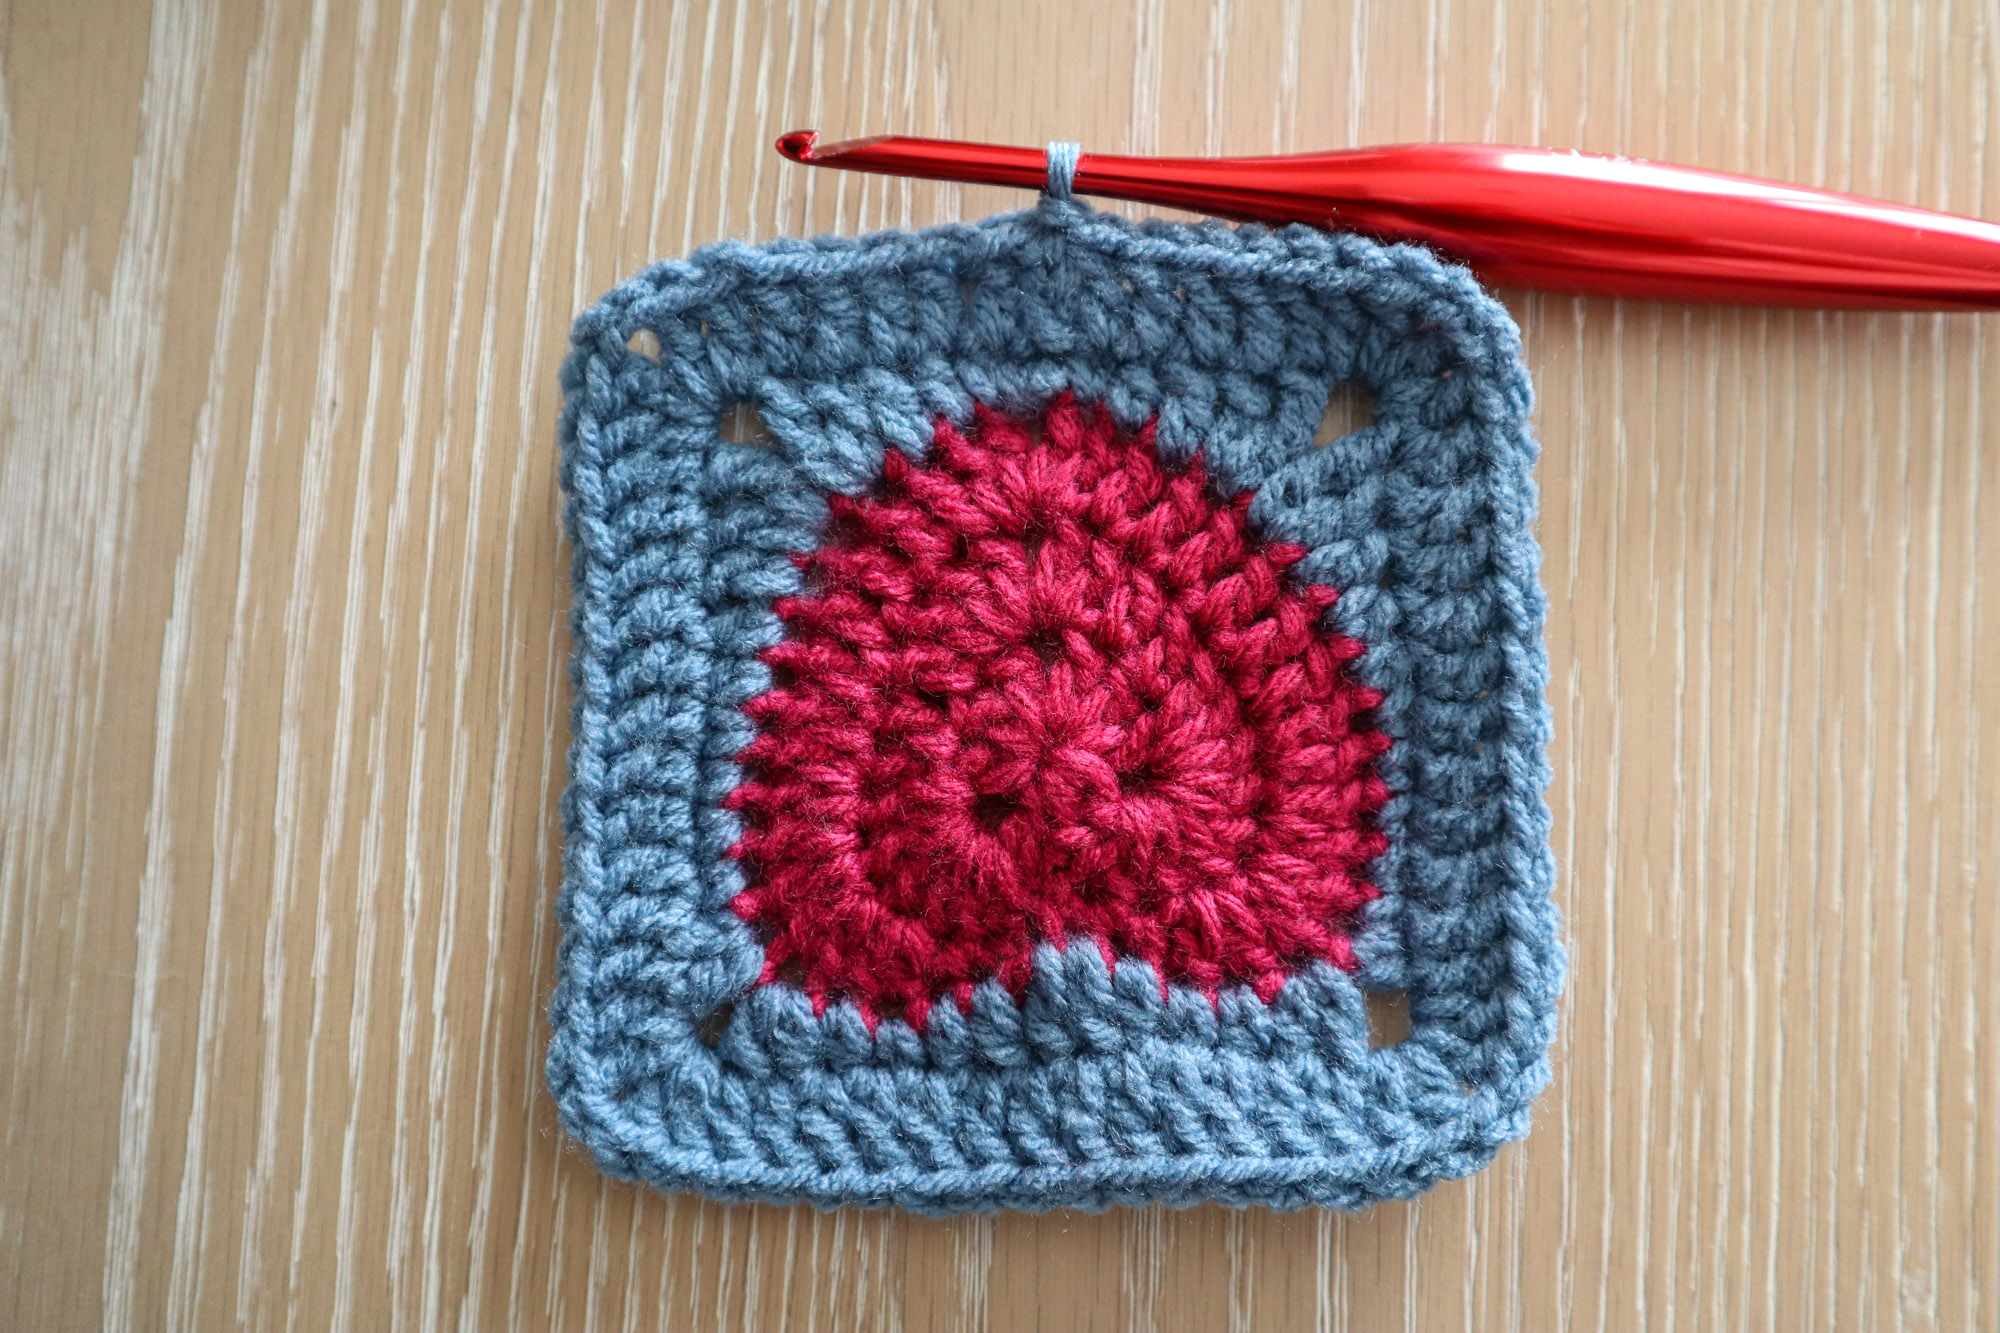
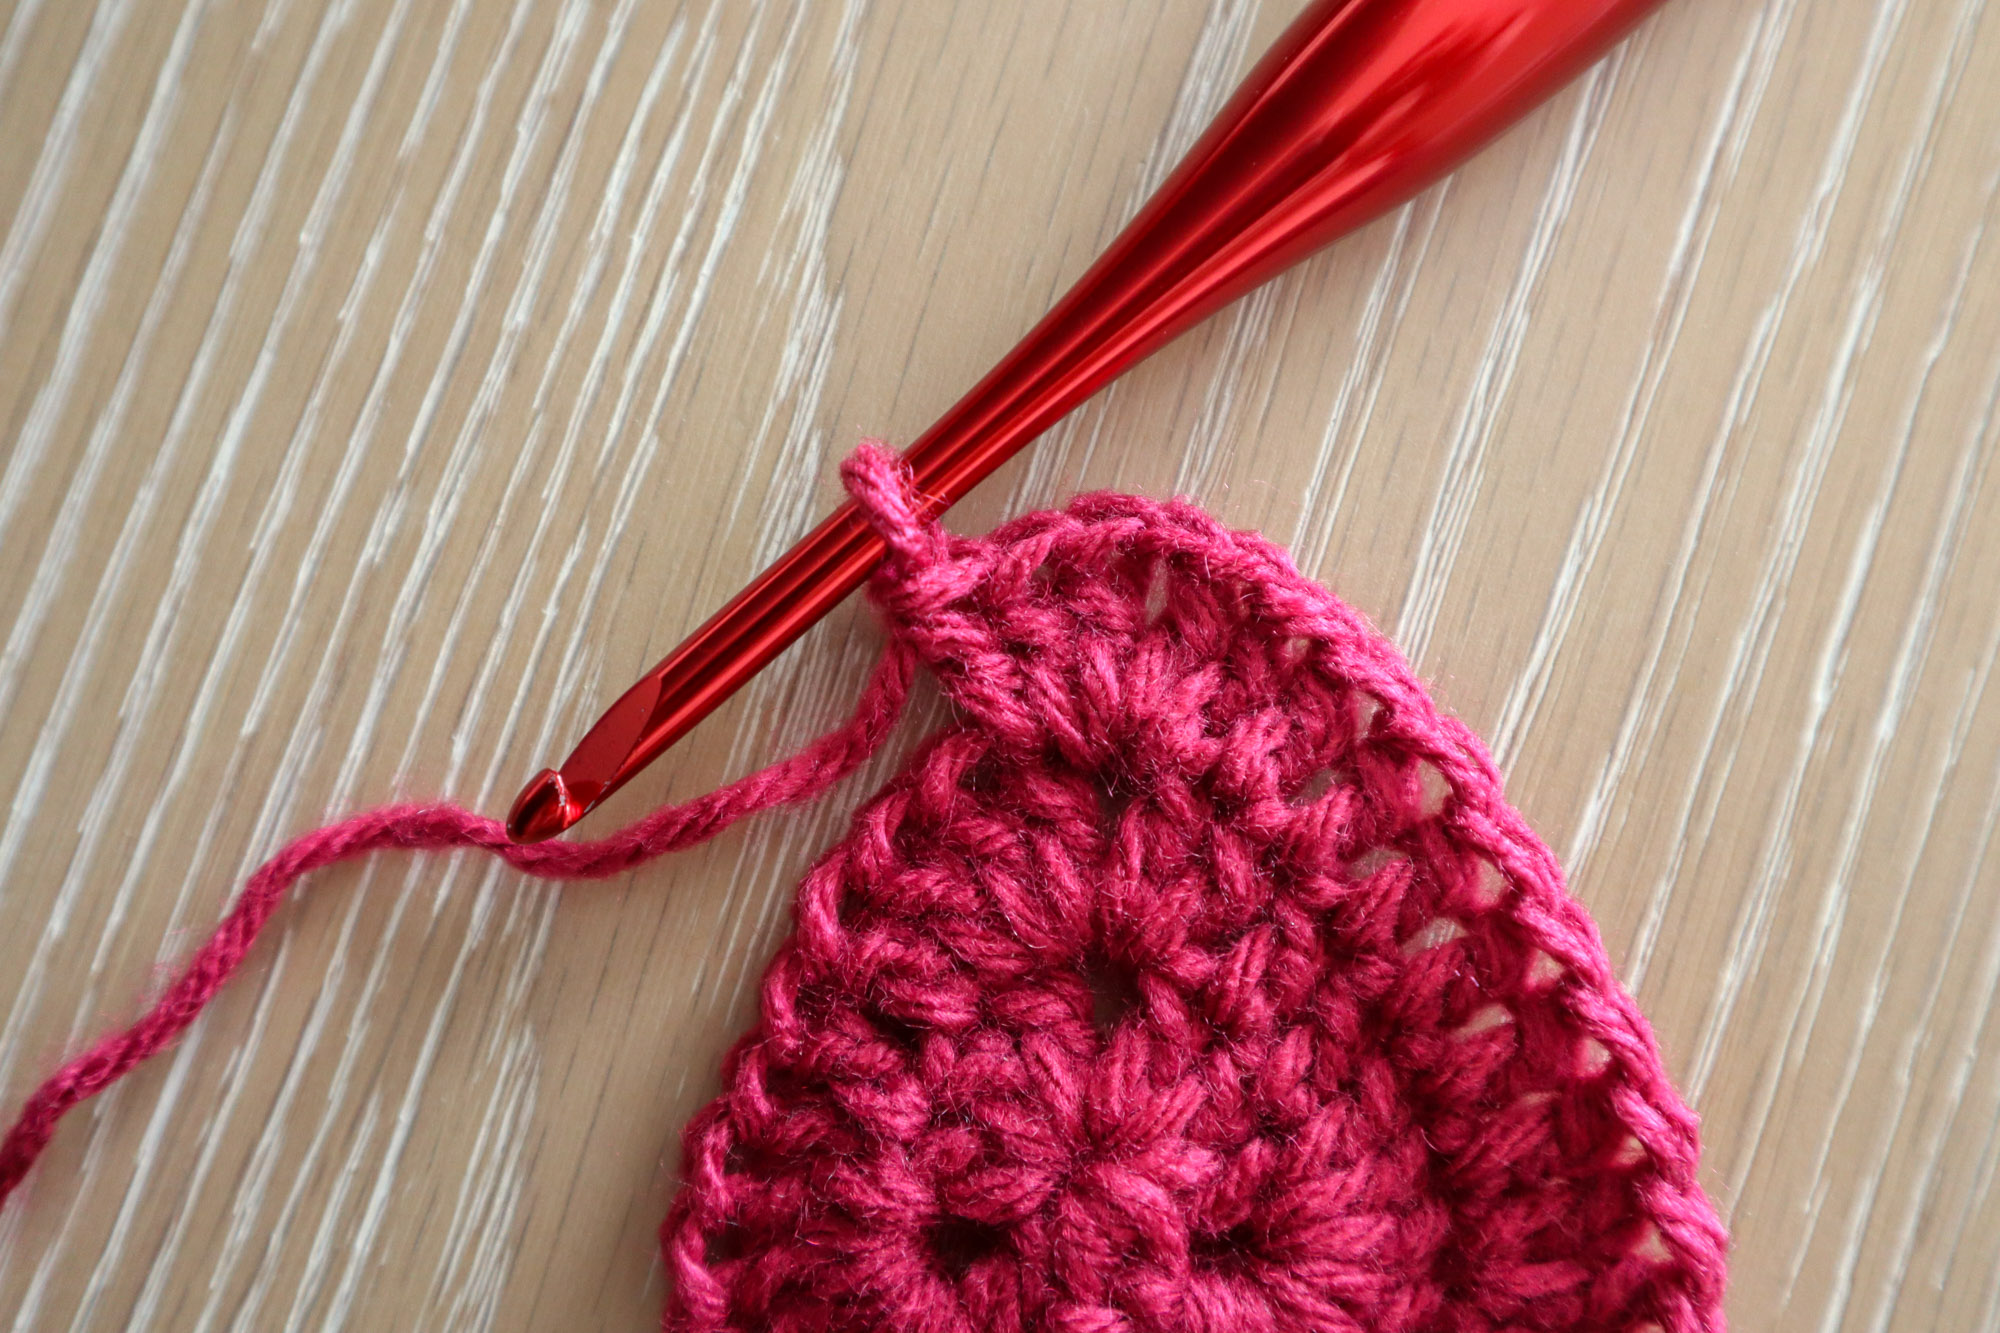
Optional Round 6 And Beyond
Grow the square by working 1dc in each dc from prev rnd and 2dc, ch2, 2dc in each corner ch2 space.
And there you have it
Your very own chubby-hearted granny square, ready to win hearts and blue ribbons alike! This little beauty works up into something truly special, with that plump center motif just begging to be part of a baby blanket, a cozy throw, or even a charming table runner for your craft room.
Don’t be surprised if your first square takes a little concentration — counting those stitches and keeping track of where you are is part of the learning adventure! But by your third or fourth heart, your hands will know exactly what to do, and you’ll be churning out these darlings faster than you can say “best in show!”
Pin for later!