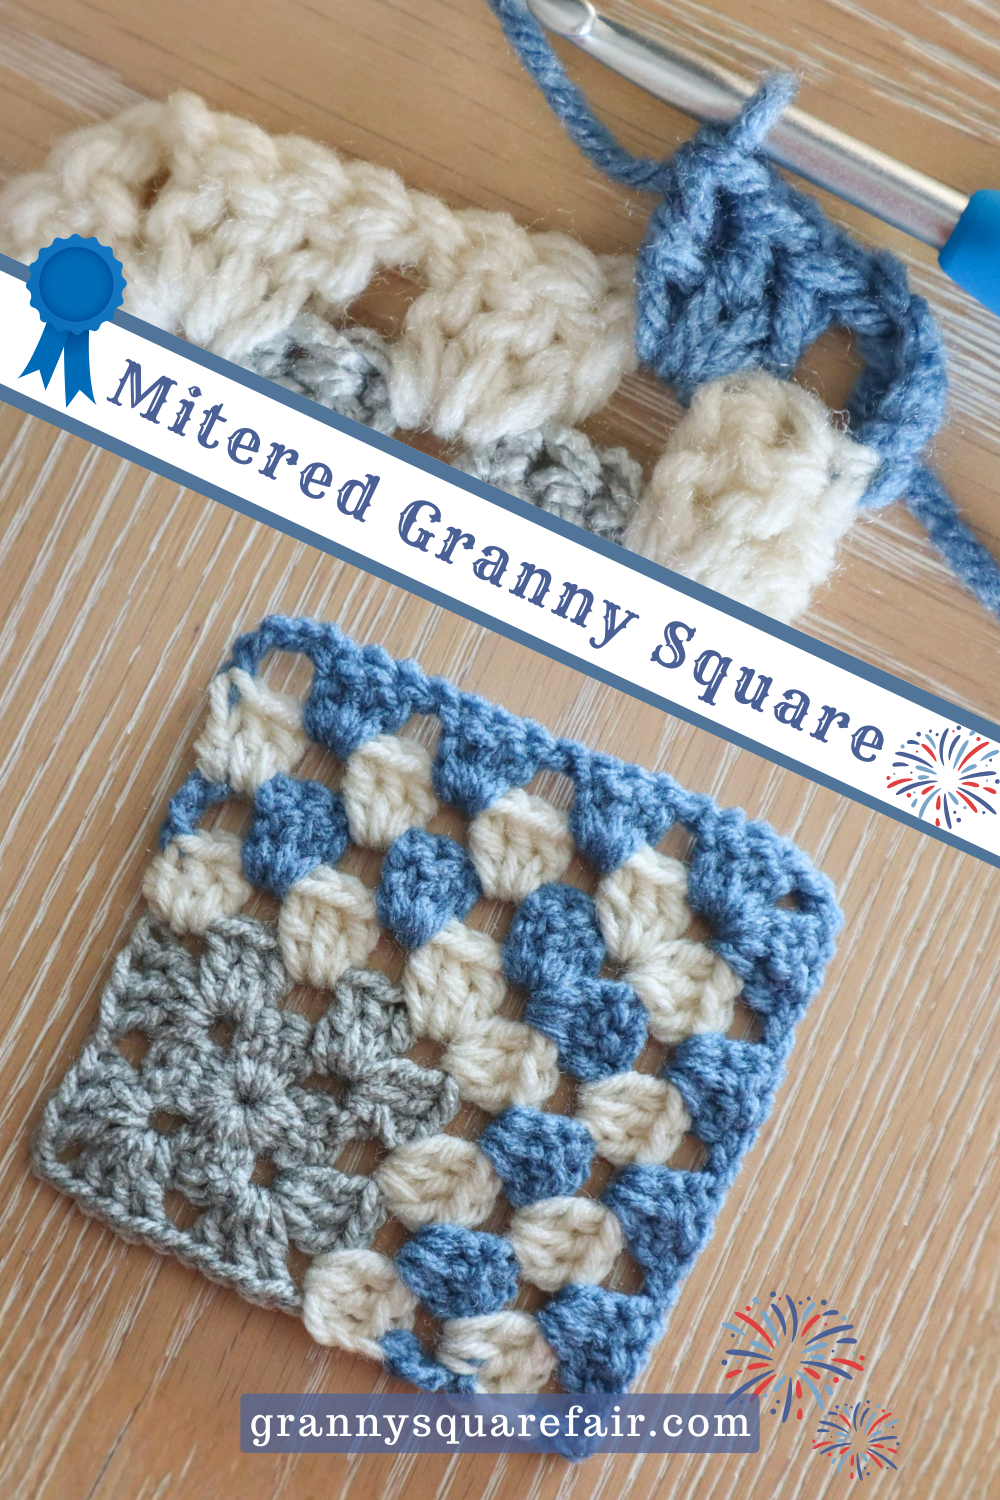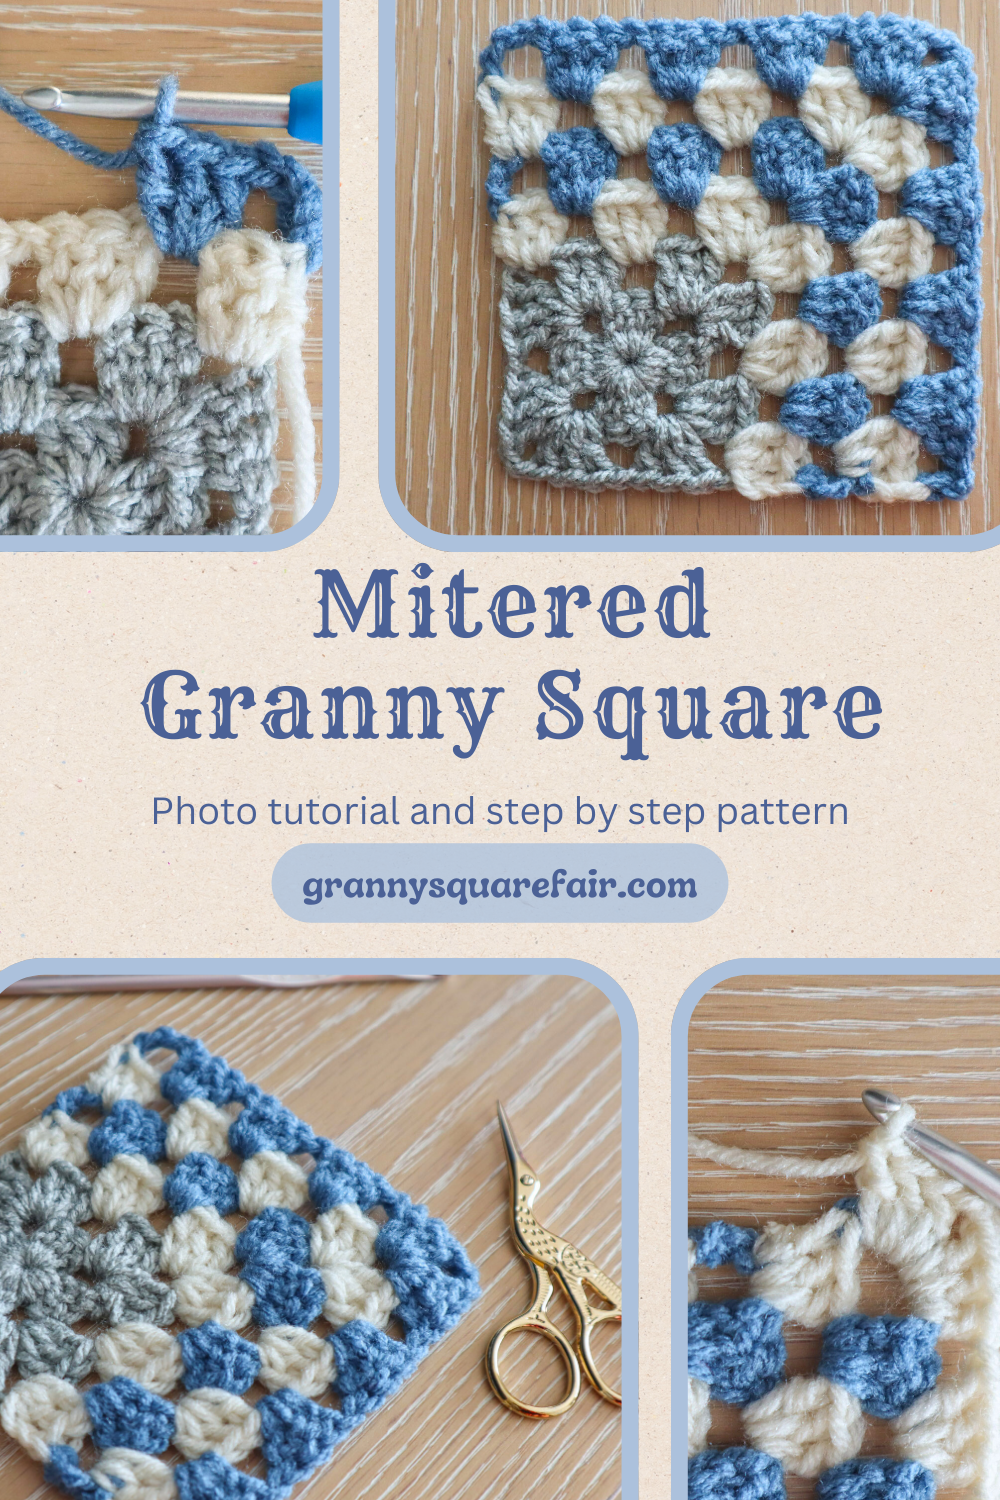

Mitered Granny Square
As usual, at The Granny Square Fair, we’ve got a clever twist on a classic waiting for you! The Mitered Granny Square takes everything you love about the traditional granny and adds a dash of geometric flair with that eye-catching diagonal construction.
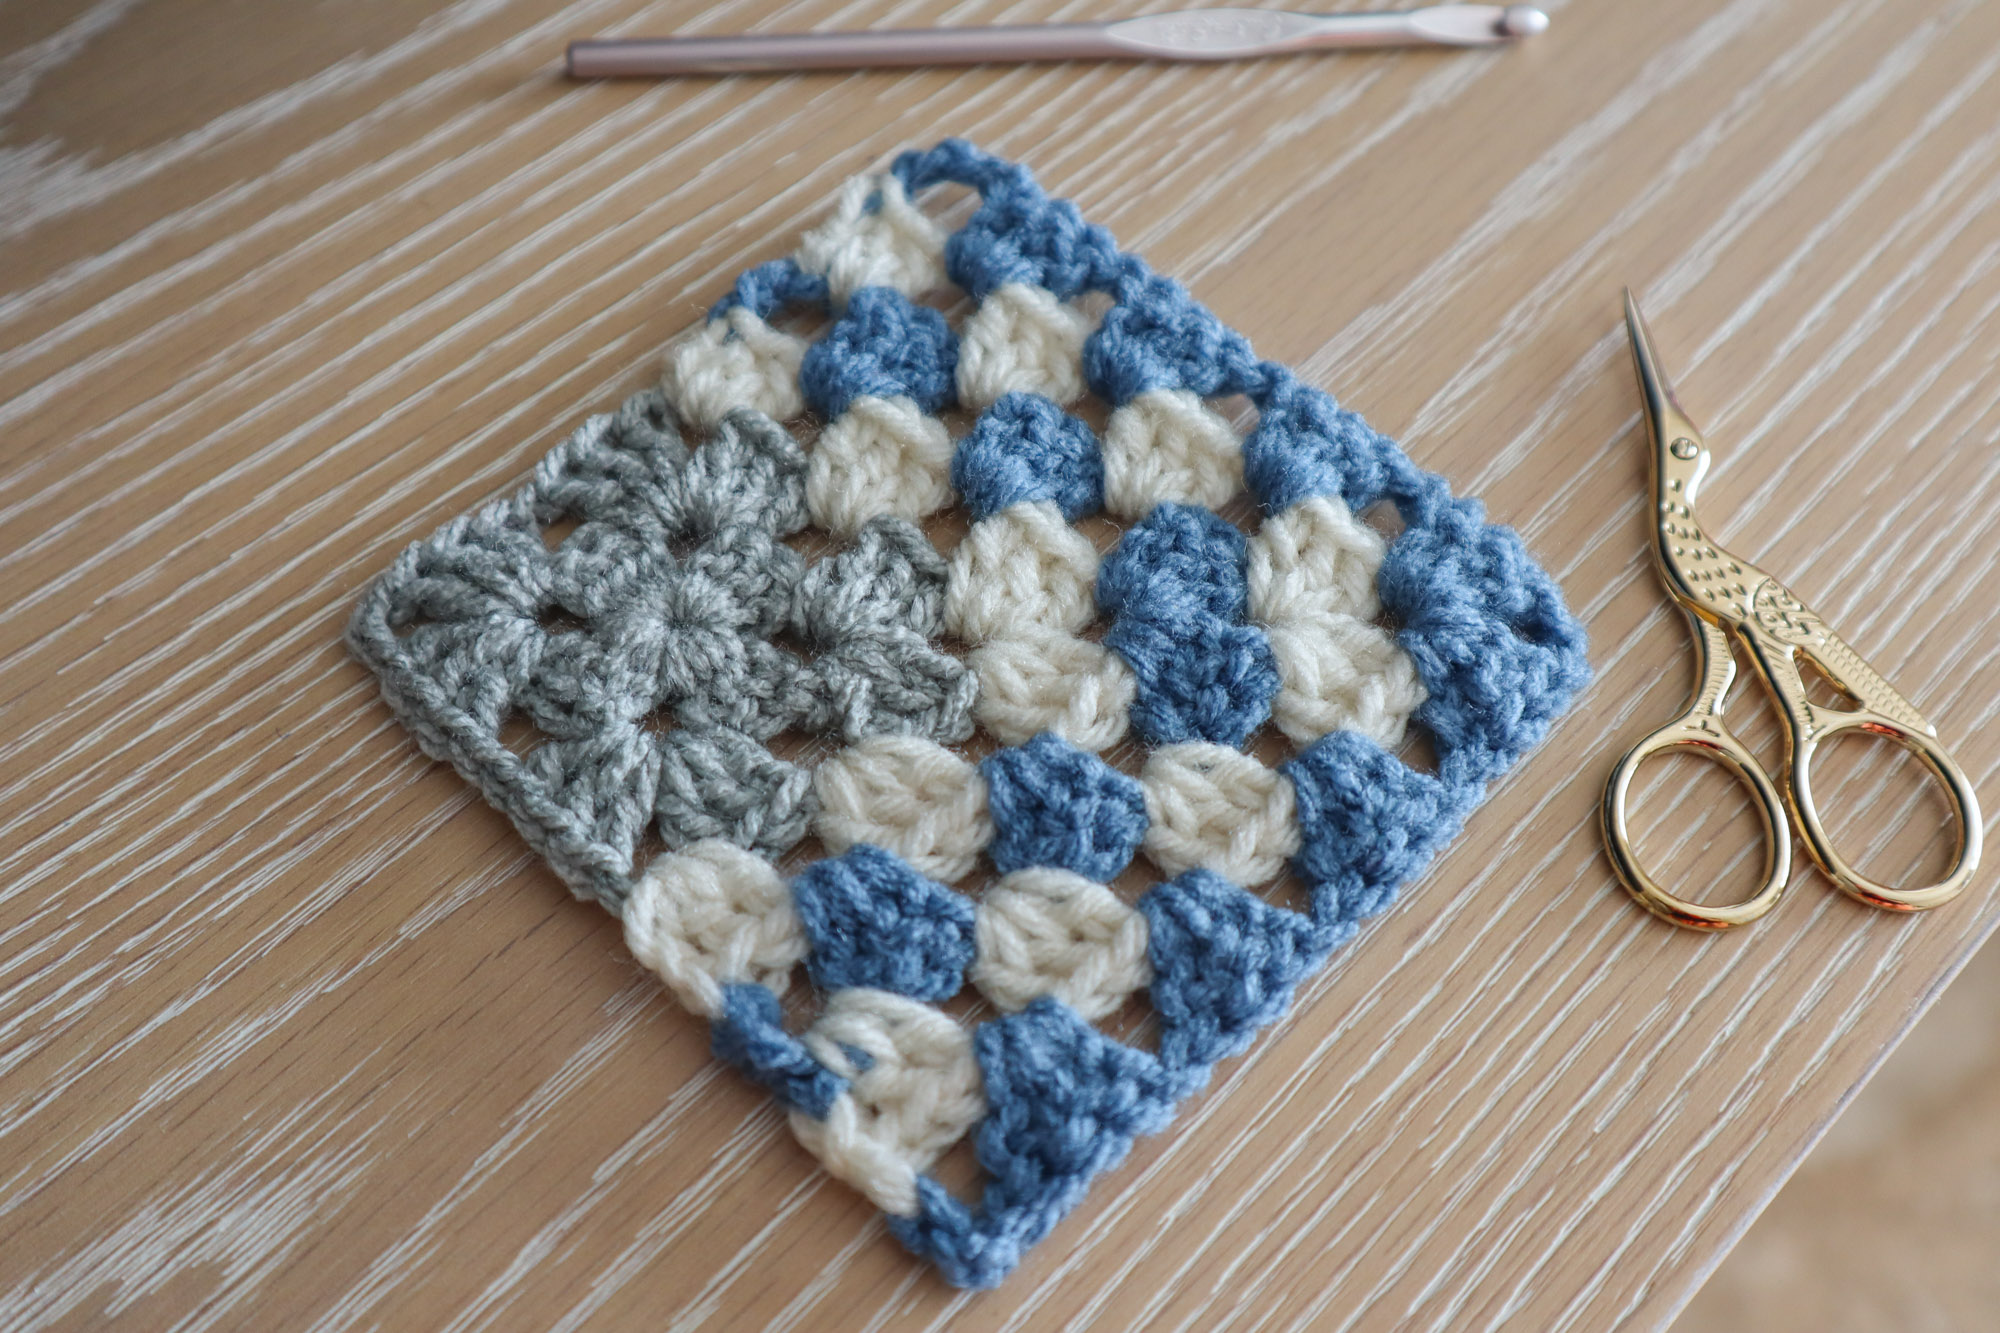
This pattern starts with a mini basic granny square, then builds outward in rows to create that striking mitered corner effect. It’s a fun technique that gives your square a whole new personality while still feeling familiar and cozy in your hands.
Whether you’re looking to add some visual interest to your next blanket project or just want to try something a little different, this mitered variation is sure to earn a blue ribbon in your crochet repertoire!
Skill Level
Confident Beginner — If you can double crochet, chain and work in the round as well as back and forth in rows, then you have all the skills needed to tackle this type of square!
Stitch Abbreviations Used in the Pattern (U.S. Terms)
| Abbreviation | Stitch Name |
|---|---|
| ch | chain |
| sl st | slip stitch |
| dc | double crochet |
| sp | space |
| st(s) | stitch(es) |
| rep | repeat |
| rnd | round |
What You’ll Need
- Yarn: Any weight yarn you like — I used basic acrylics in a worsted 4 weight.
- Hook: Use the hook size suggested on your yarn label. Go up a size for a looser, drapier square or down a size for a denser square with less noticeable gaps.
- Notions: Scissors, and maybe some light background music.
Gauge & Size
Gauge isn’t critical for this pattern. With a 4-weight yarn and 5mm (H) hook, your finished square will measure around 4½ inches across after the 6 total rows/rounds I made in my sample.
Pattern Notes
- You’ll initially work in-the-round and then switch to working flat in rows.
- We’ll make a small basic granny square and then build rows off of it in a “mitered corner” style. This method can be followed for any size granny square by adding rows and rounds as desired.
- Chain 3 will count as a double crochet stitch throughout the pattern.
Mitered Granny Square Instructions
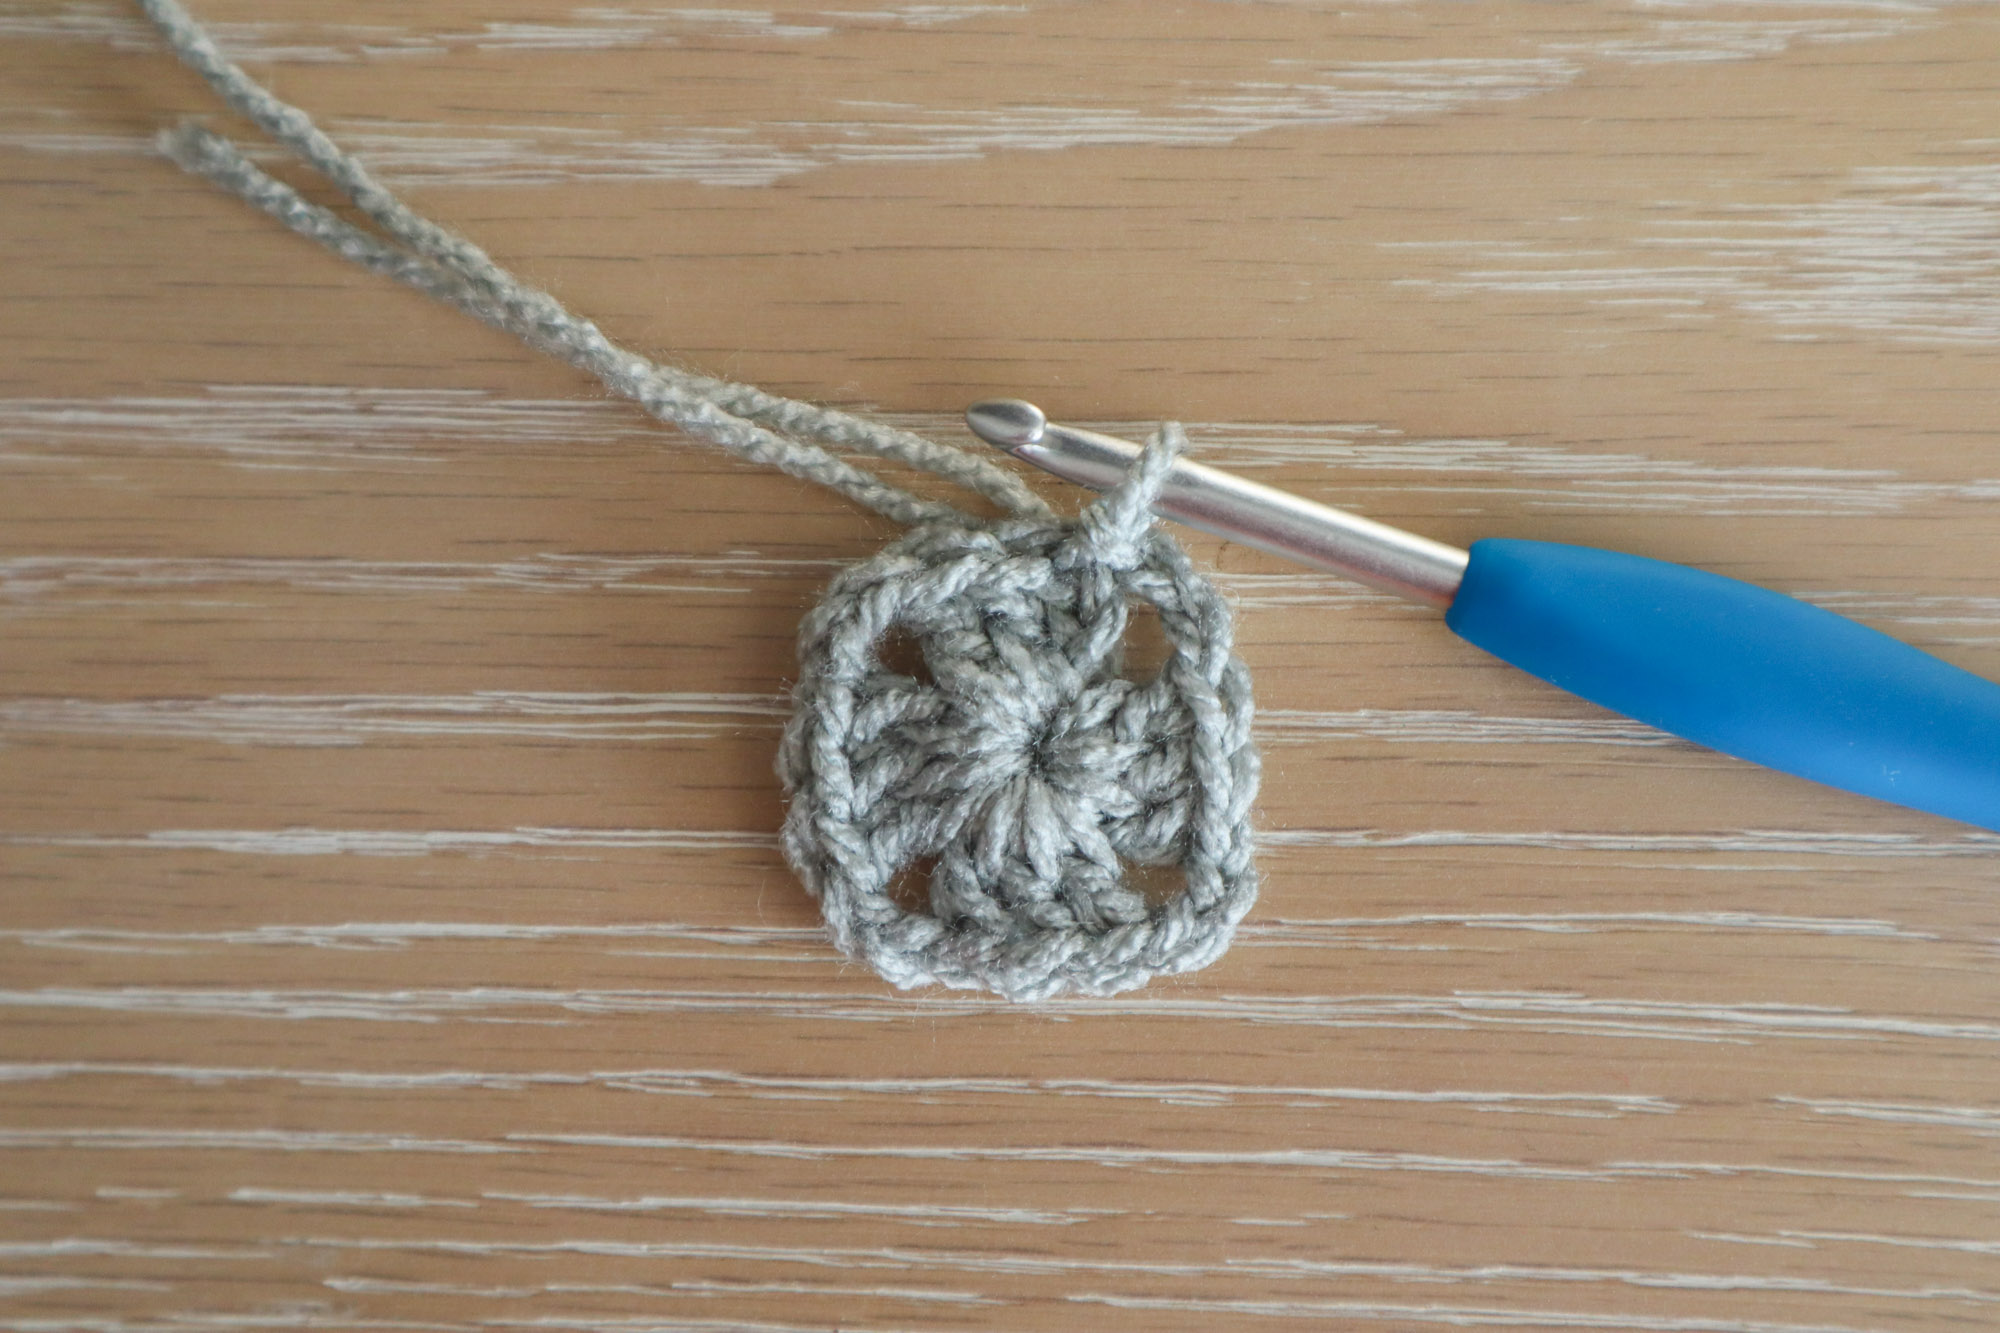
To begin, make a magic ring (or ch4 and sl st to the first ch to form a ring – whichever you prefer).
Round 1
Ch3 (counts as 1dc) and make 2dc into the ring, ch2.
(3dc, ch2) three more times into the ring.
Sl st to the top of the starting ch3 to complete the rnd.
(4 ch2 corners and 4 groups of 3dc)
Round 2
Ch1, turn and sl st into the closest ch2 space (to reposition the yarn).
Ch3 (counts as 1dc), and work 2 more dc into the ch2 space. Ch2 and work 3dc into the same ch2 space. *Ch1 and into the next ch2 space, work 3dc, ch2, 3dc all into the corner ch2 space.*
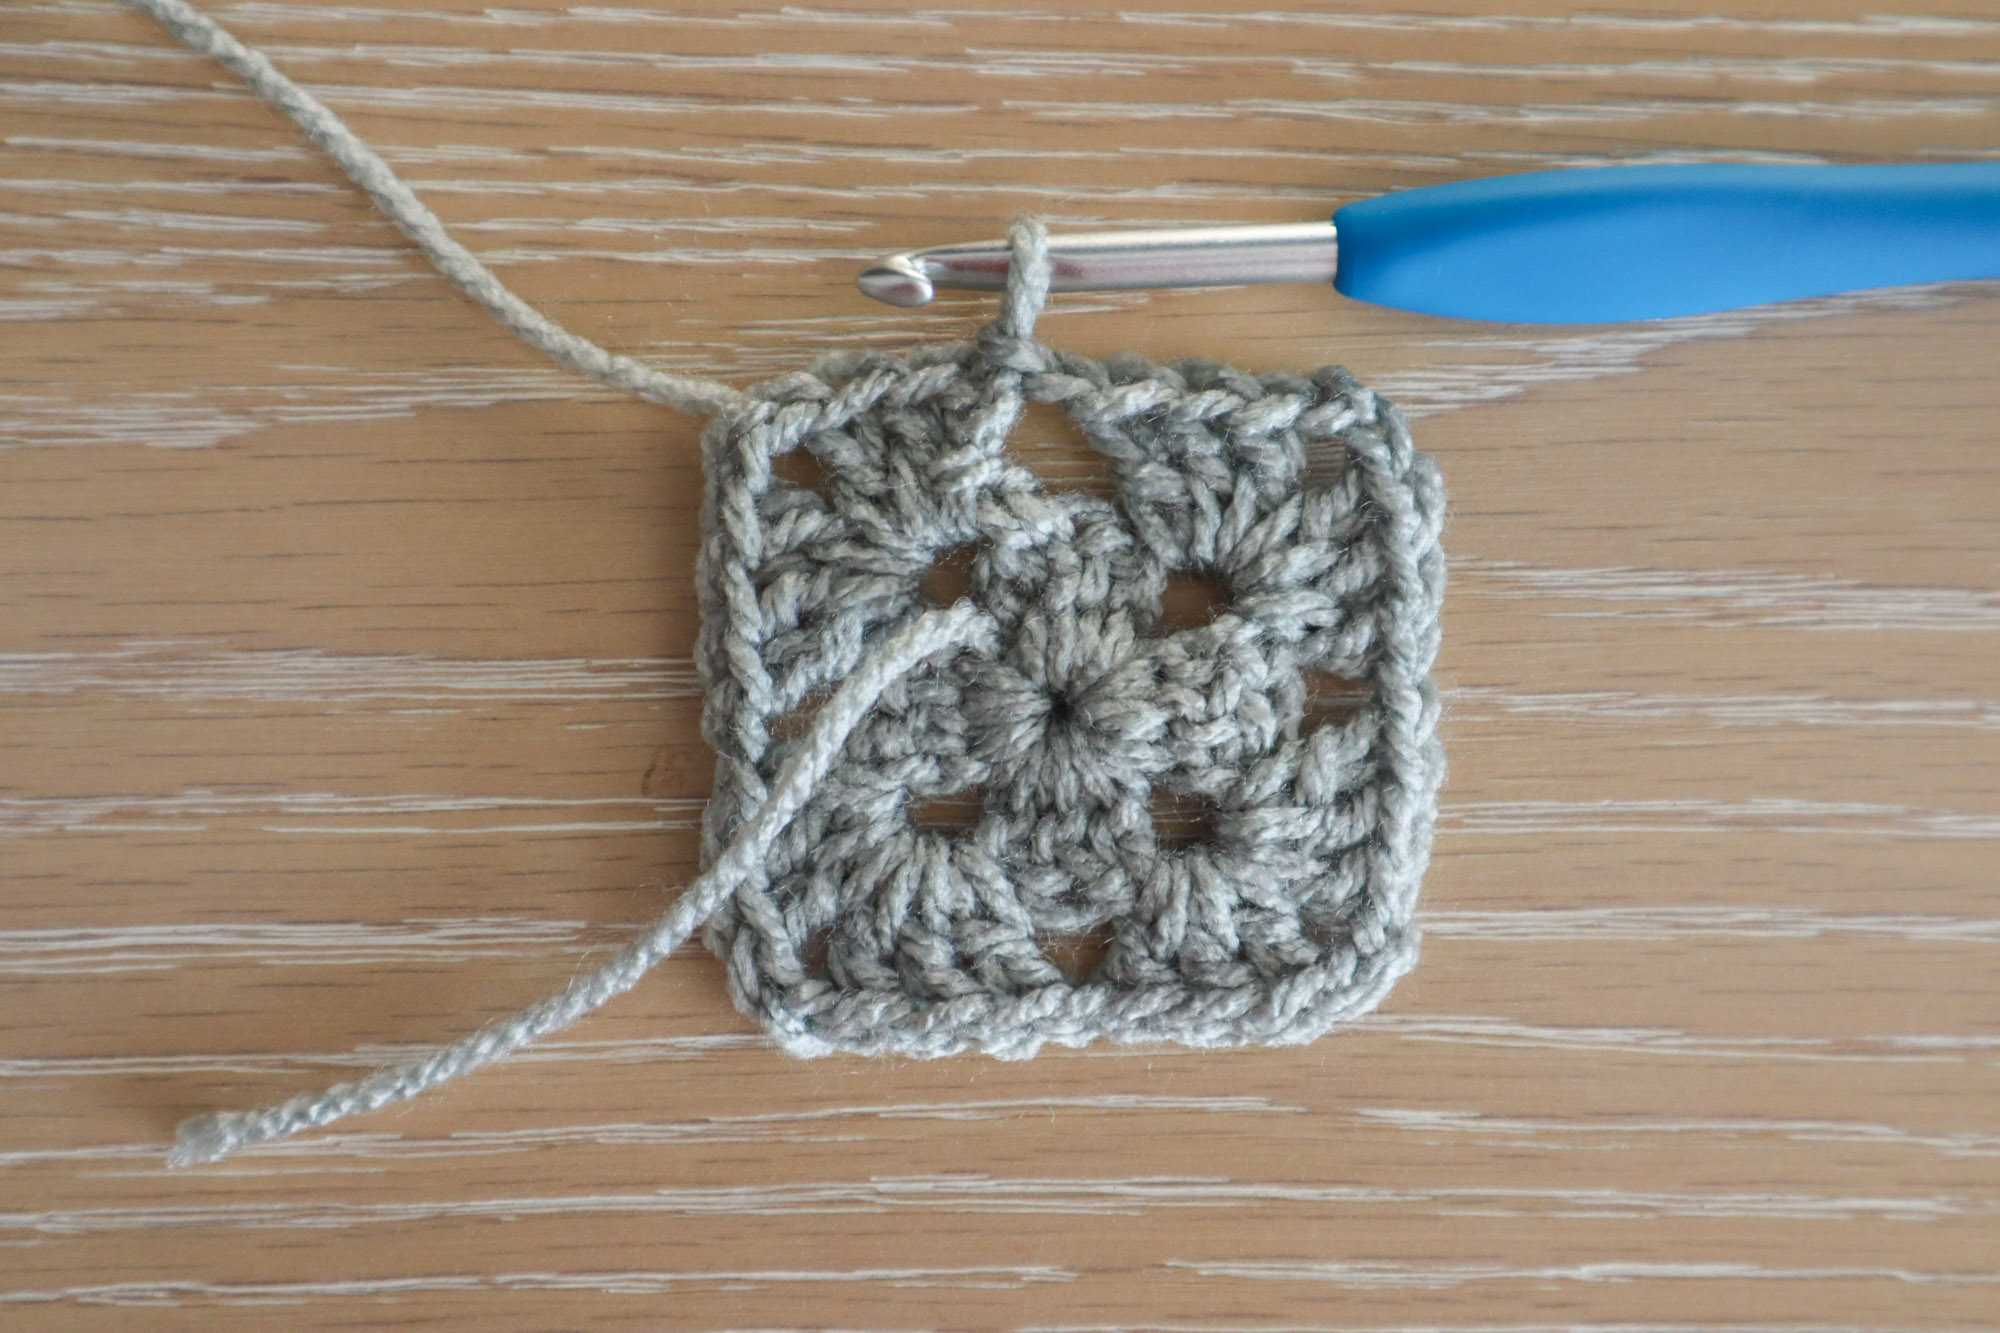
Repeat between ** for all ch2 spaces. Ch1 and sl st to the top of the starting ch3 to complete the rnd. (4 3dc, ch2, 3dc corners with ch1 spaces between them)
Fasten off
You’ve made a mini, basic granny square starting point to work the mitered rows onto.
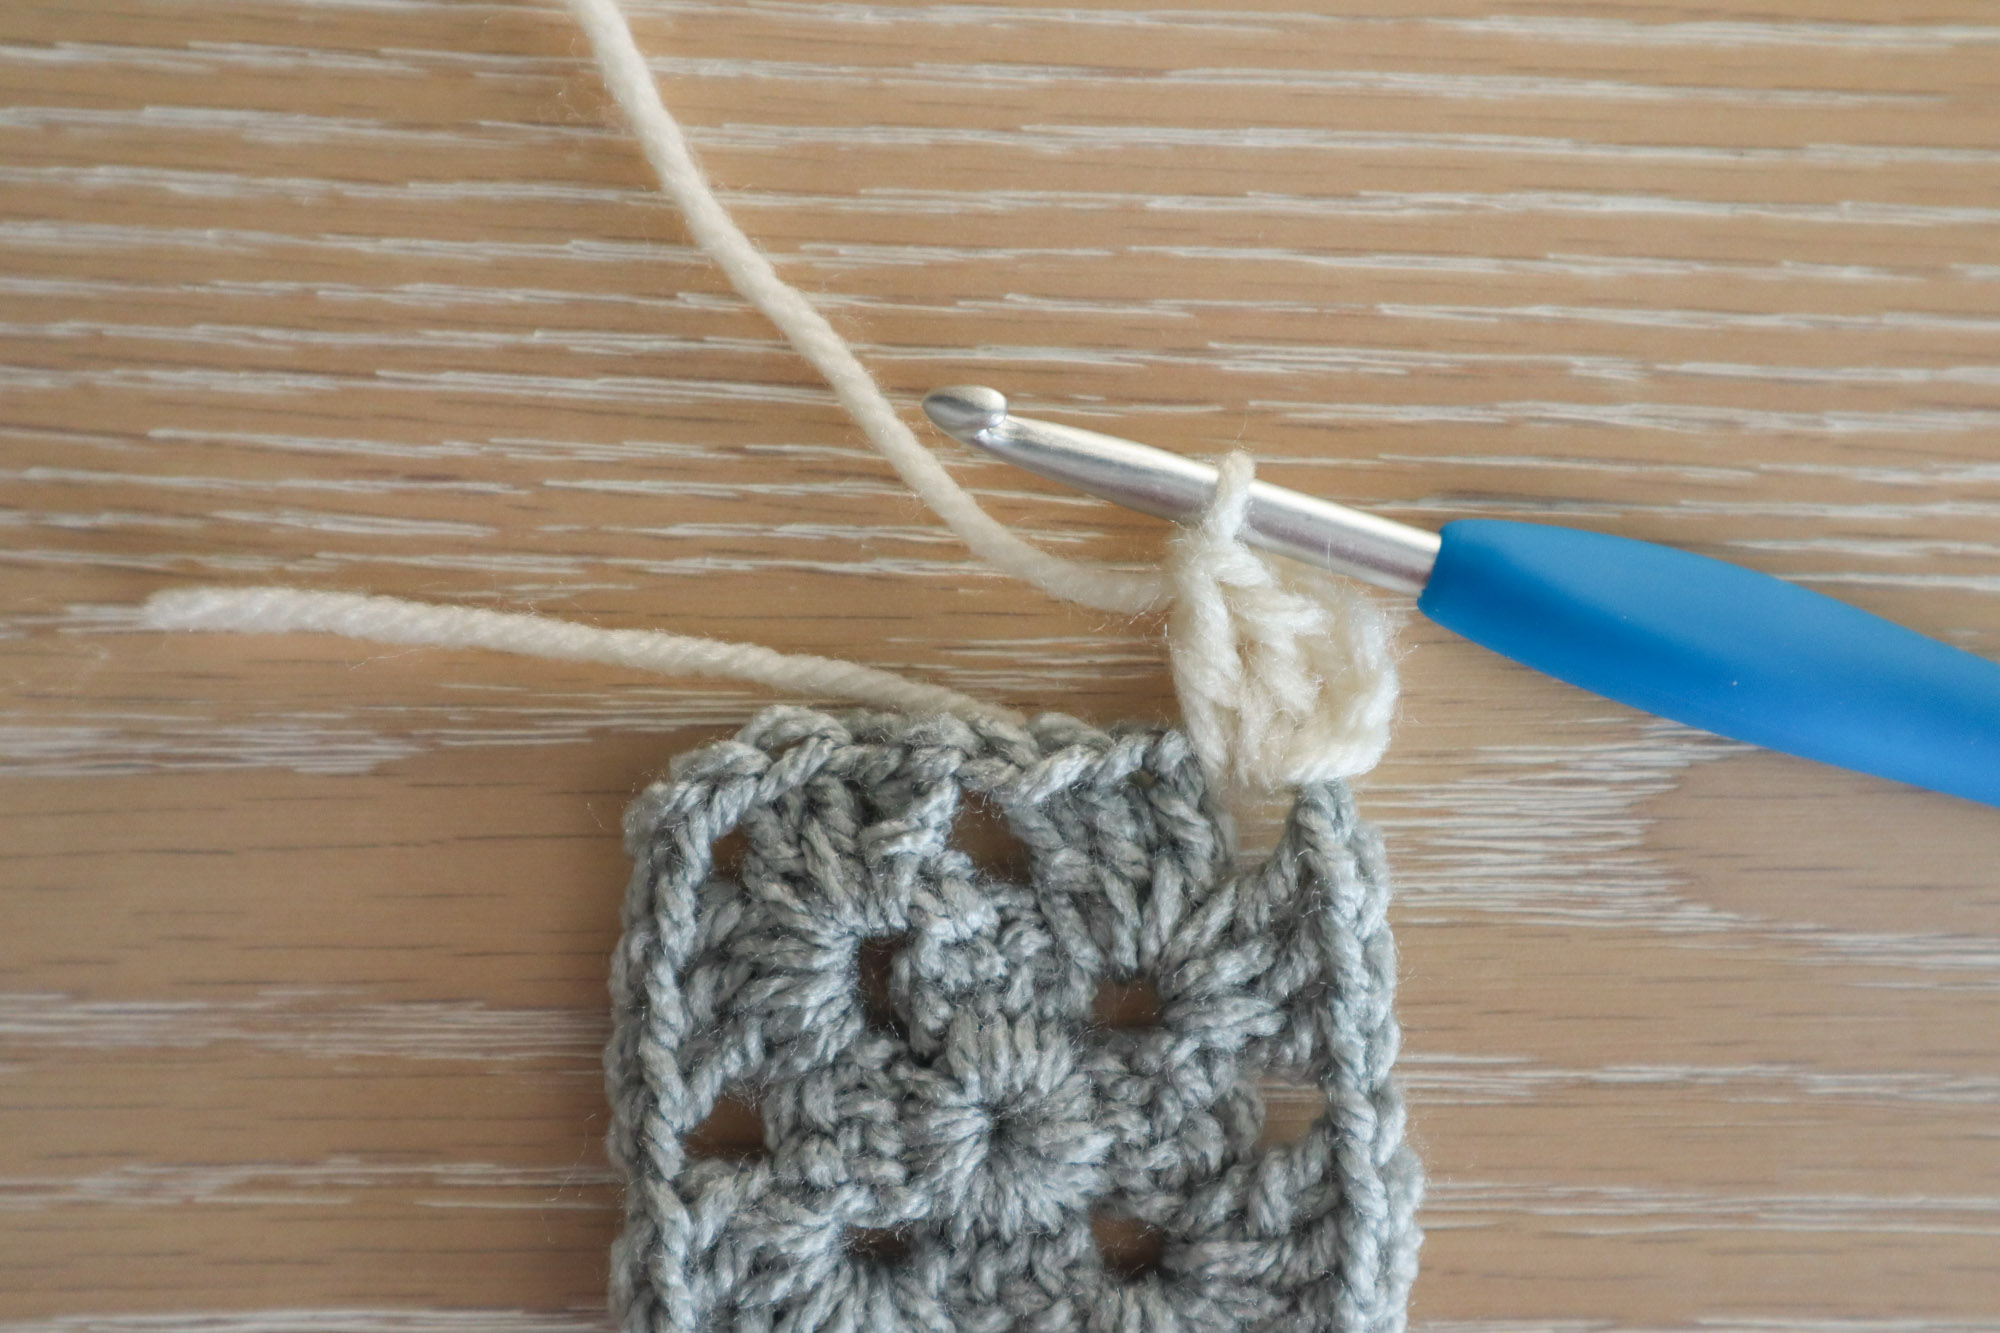
Mitered Extension
Row 1
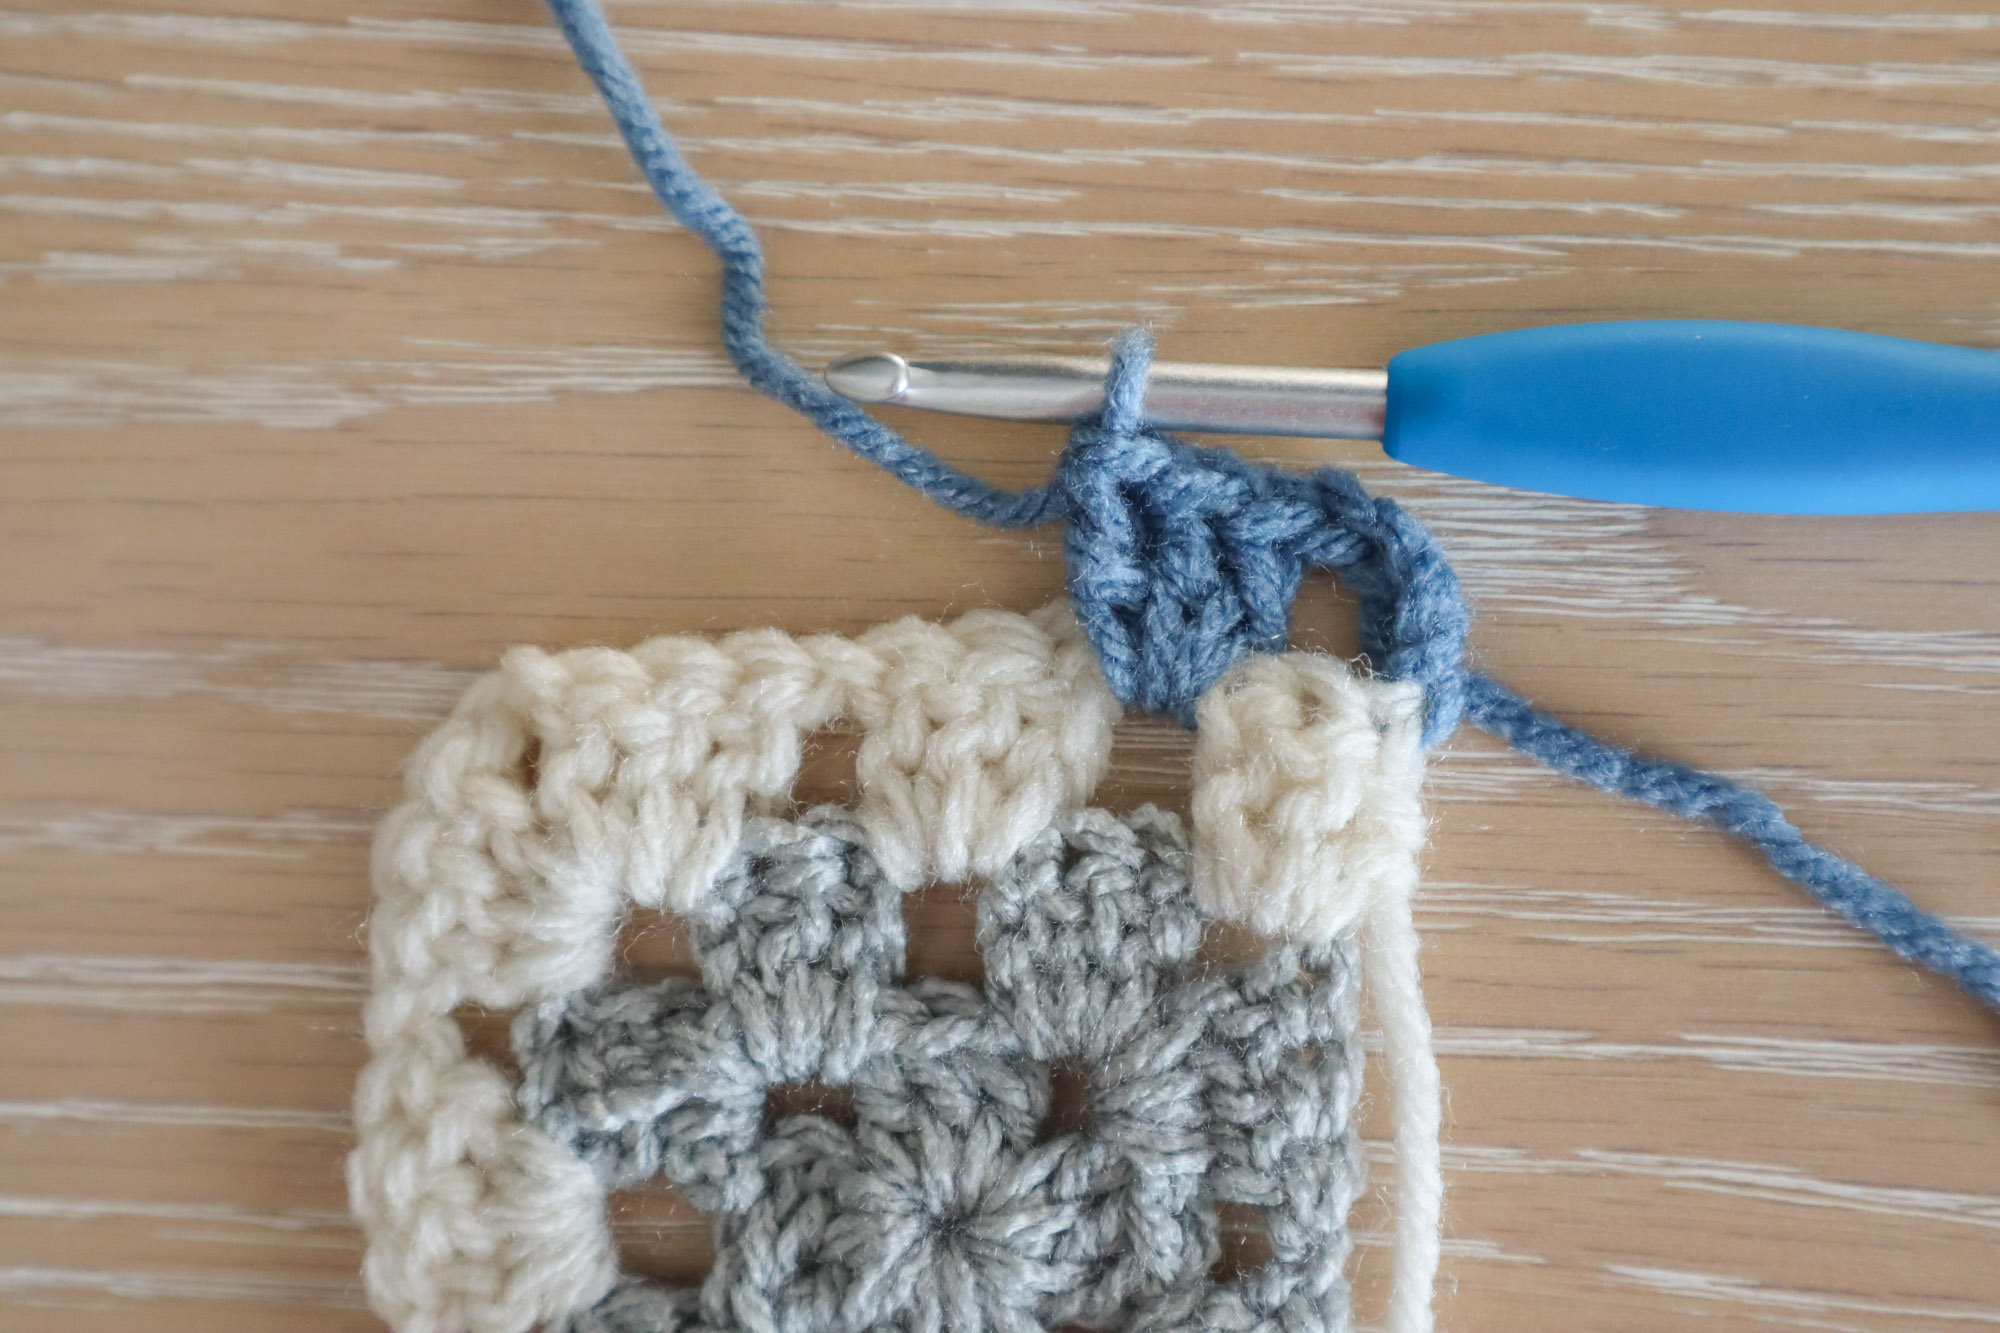
Fasten on a new color in any ch3 corner. Ch3 (counts as 1dc) and make 2 more dc into the corner. Ch1, 3dc in the next ch1 space. Ch1. 3dc, ch2, 3dc all into the next corner ch2 space. Ch1, 3dc in next ch1 space. ch1, 3dc in next ch2 space.
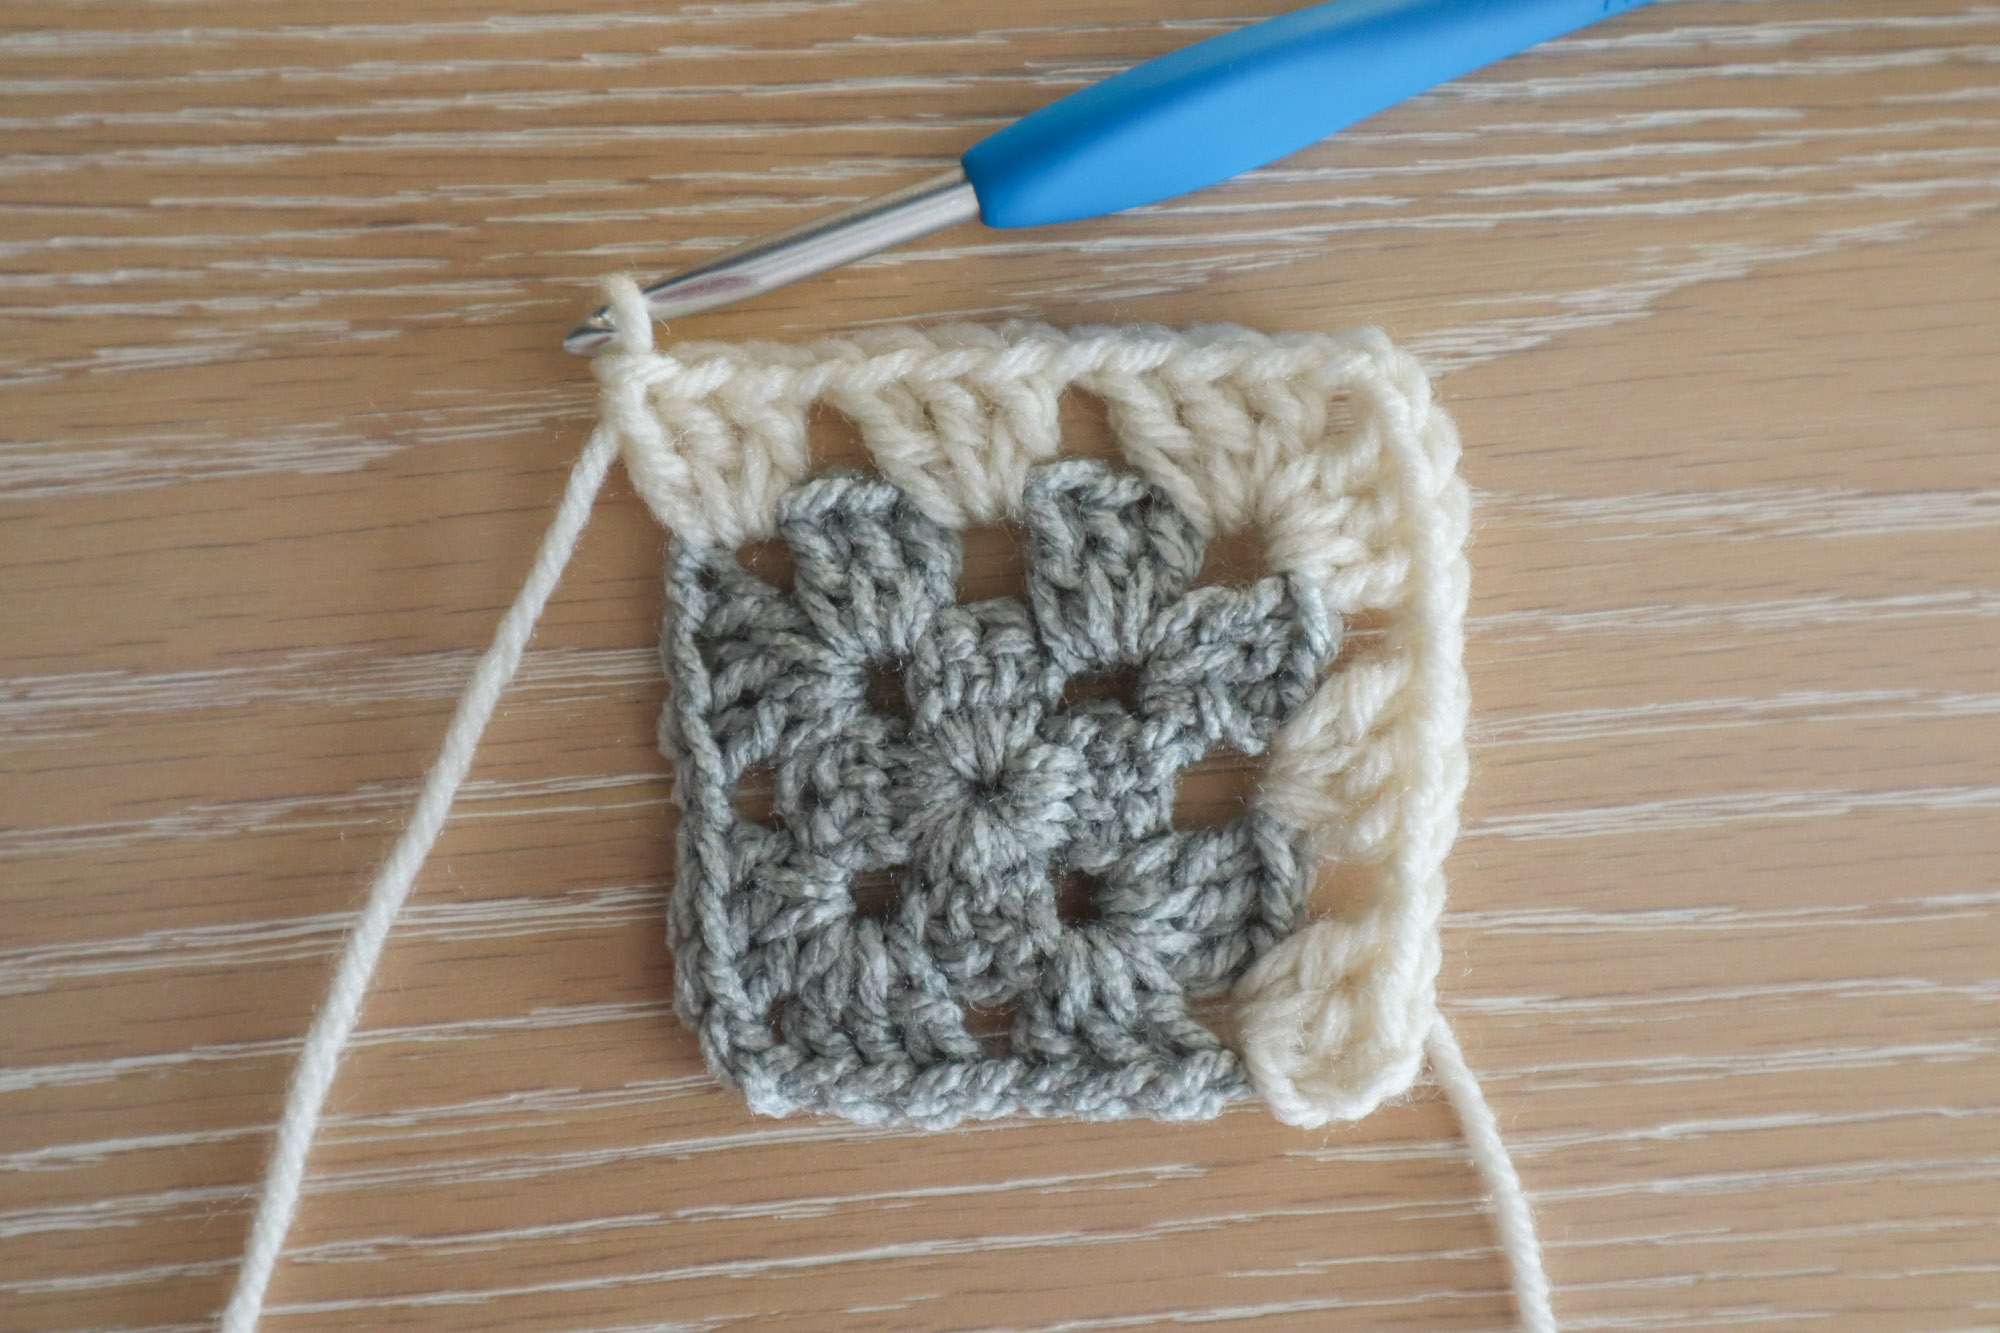
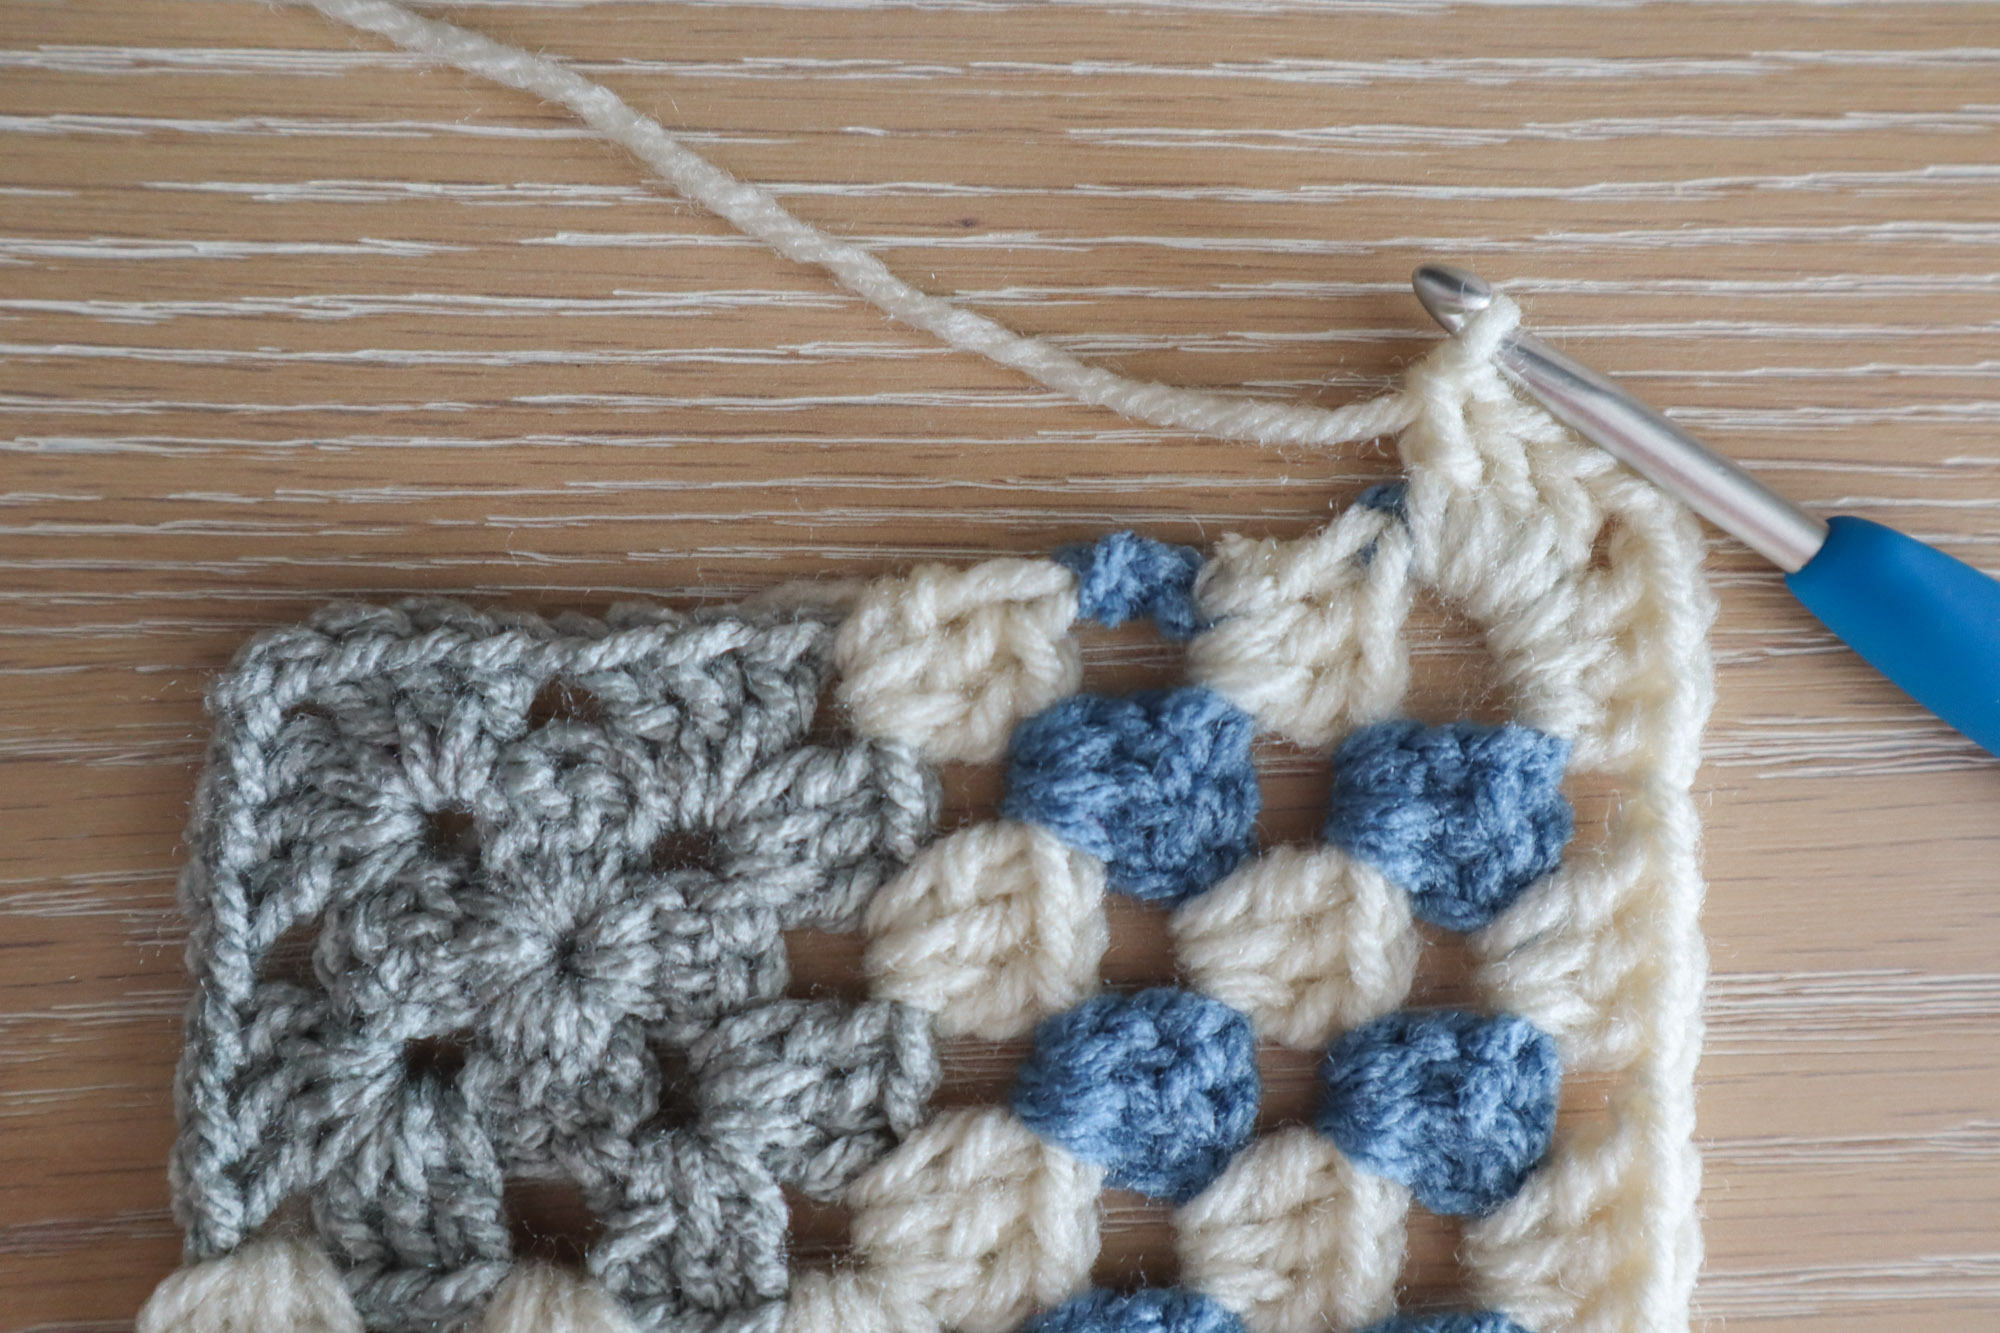
Row 2 (And all even rows)
You may fasten off and change color again if you’d like. Ch4 (counts as 1dc and a ch1) and make 3dc into the next ch1 space.
Ch1, 3dc in each ch 1 space. Ch1, 3dc, ch2, 3dc in the corner ch 2 space. Continue to last granny cluster. Ch 1 and make 1dc in the top of your starting ch3 from the prev row.

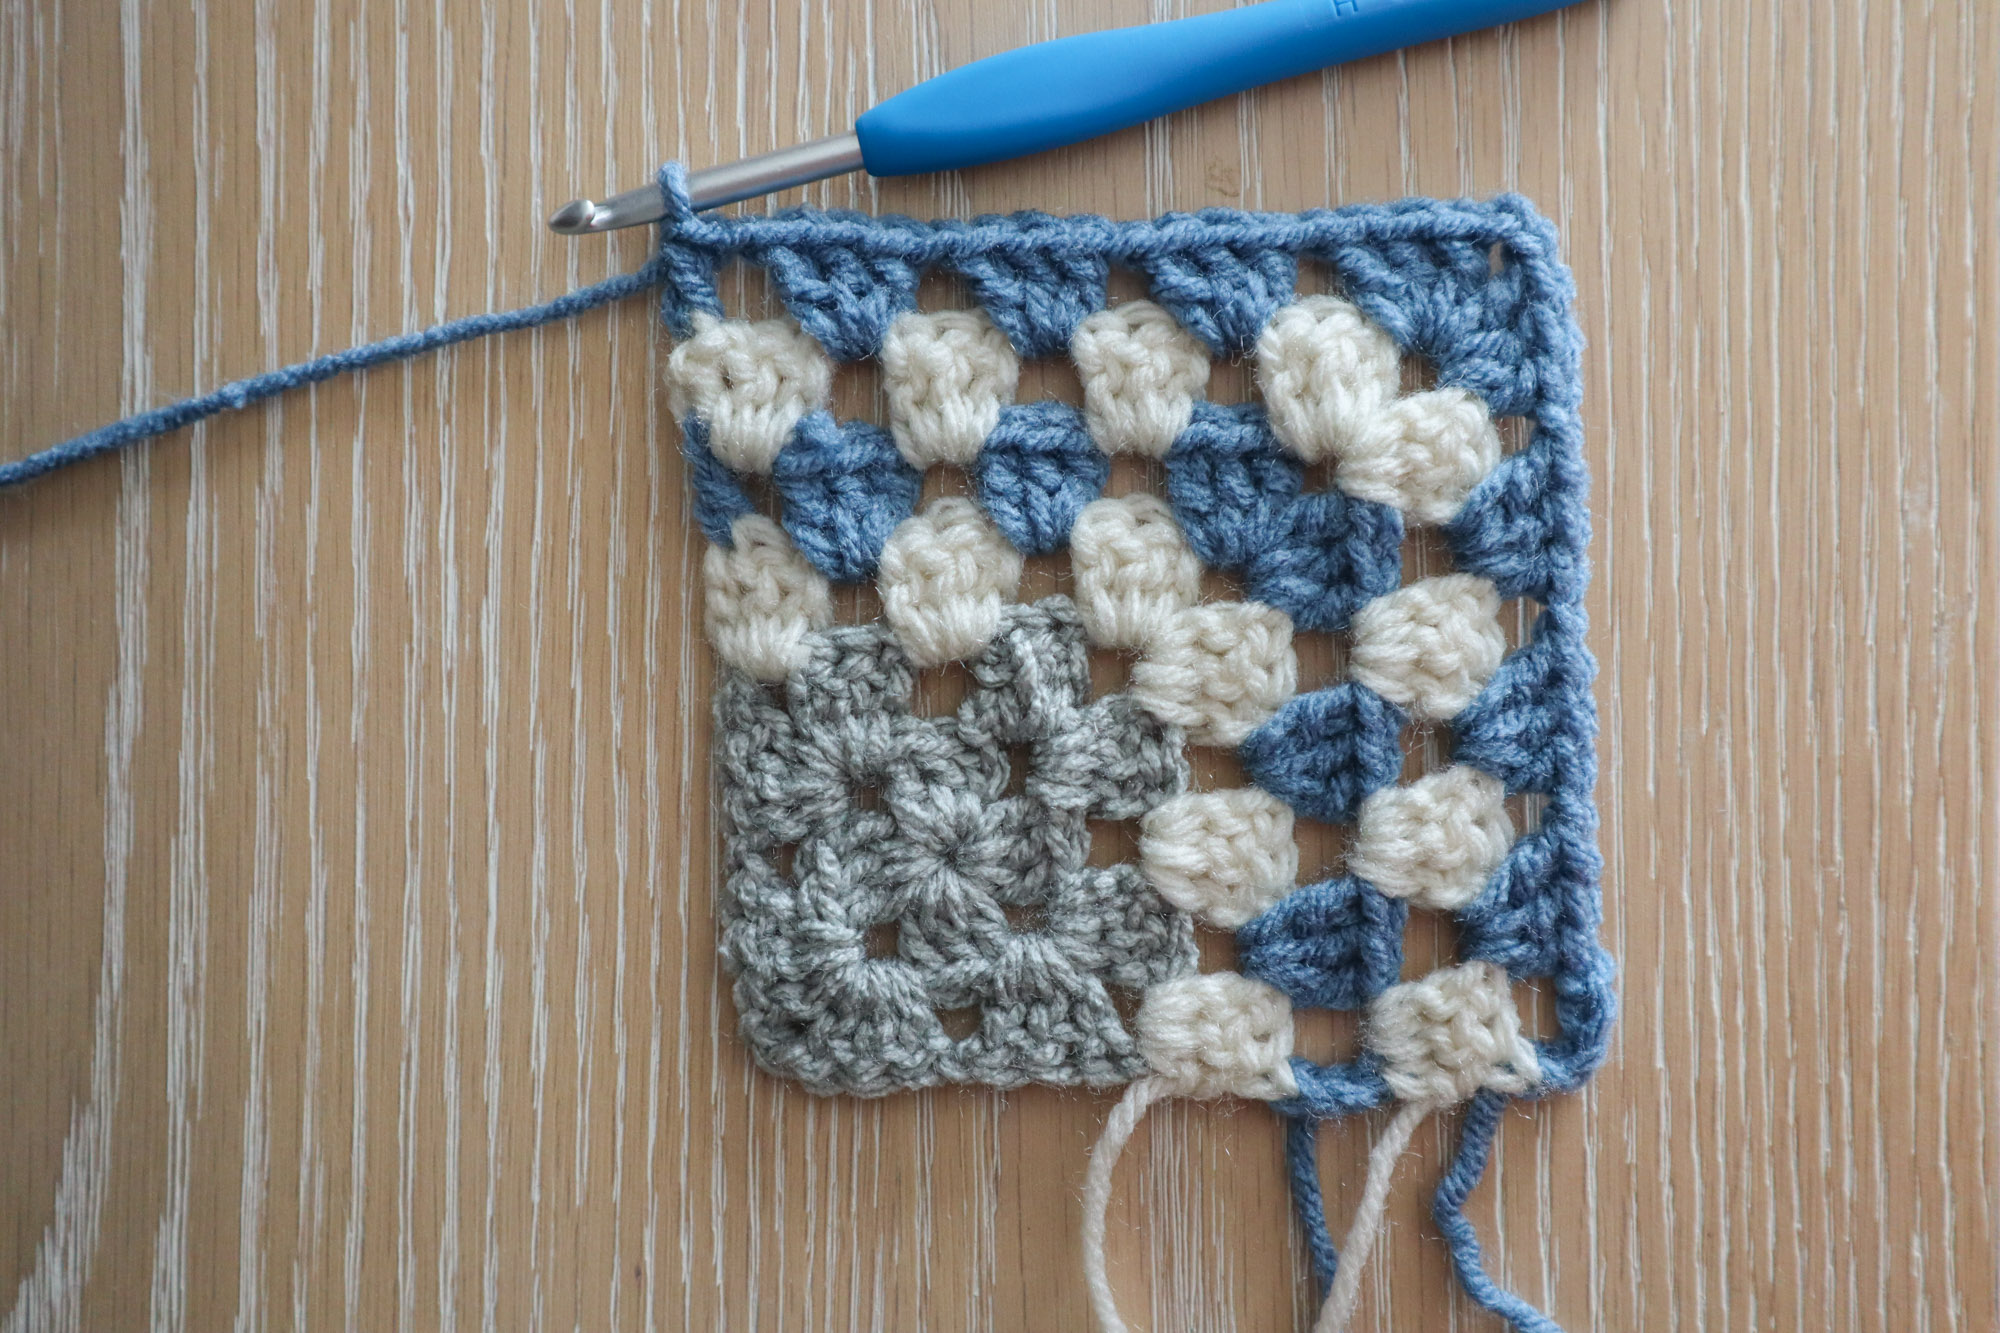
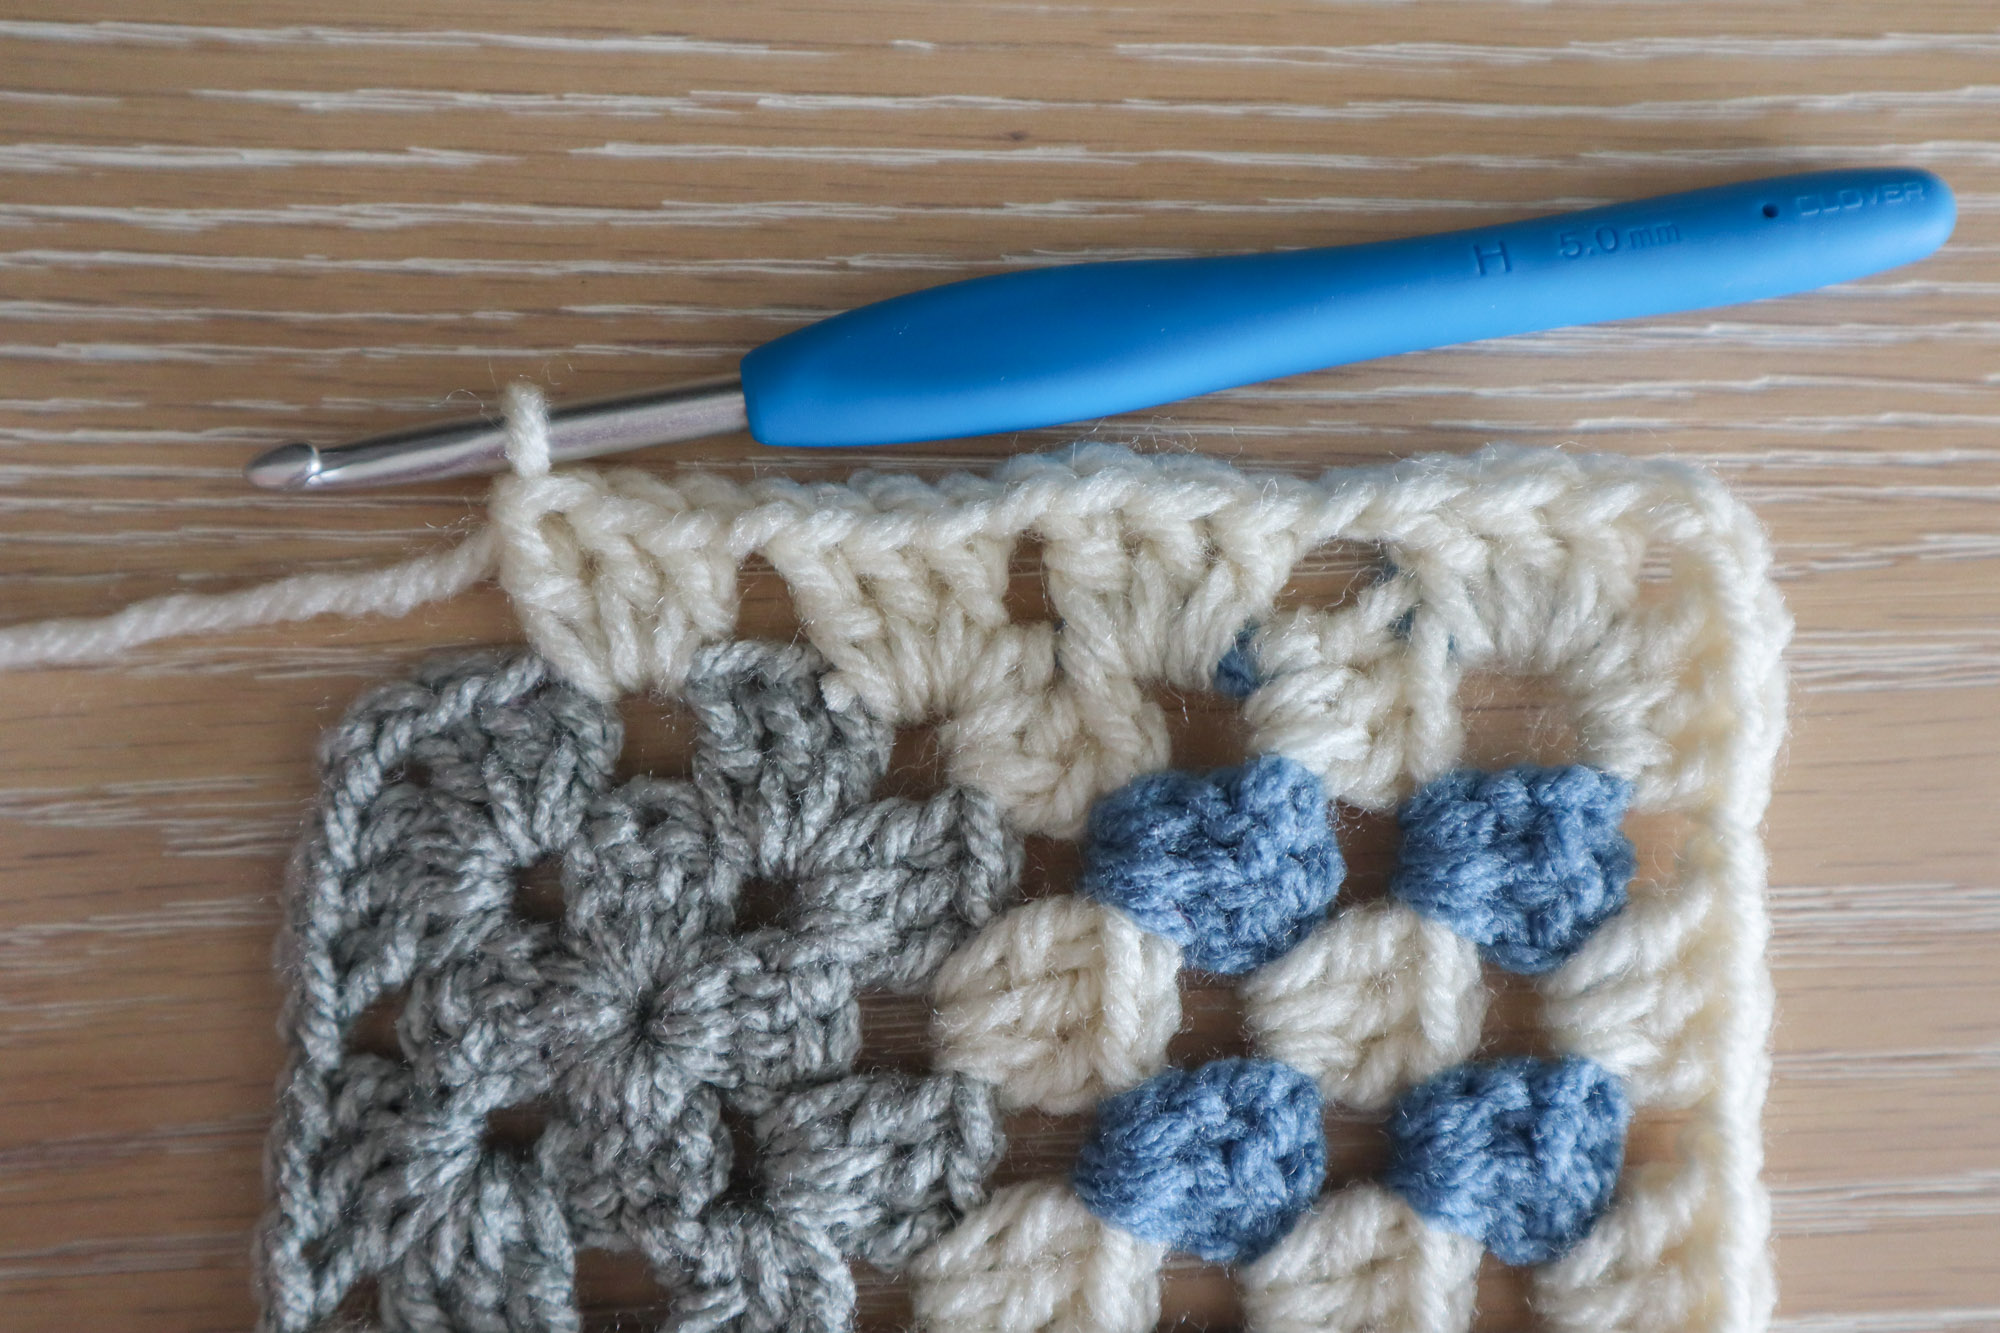
Row 3 (And all odd rows)
Fasten on a new color if you’d like. Ch3 (counts as 1dc) and make 2 more dc into the ch1 space between your last dc and your next granny cluster from the prev row. Ch1, 3dc in each ch 1 space. Ch1, 3dc, ch2, 3dc in the corner ch 2 space. Continue to your starting ch4 from prev row. Ch 1 and make 3dc in the space created by the ch4.
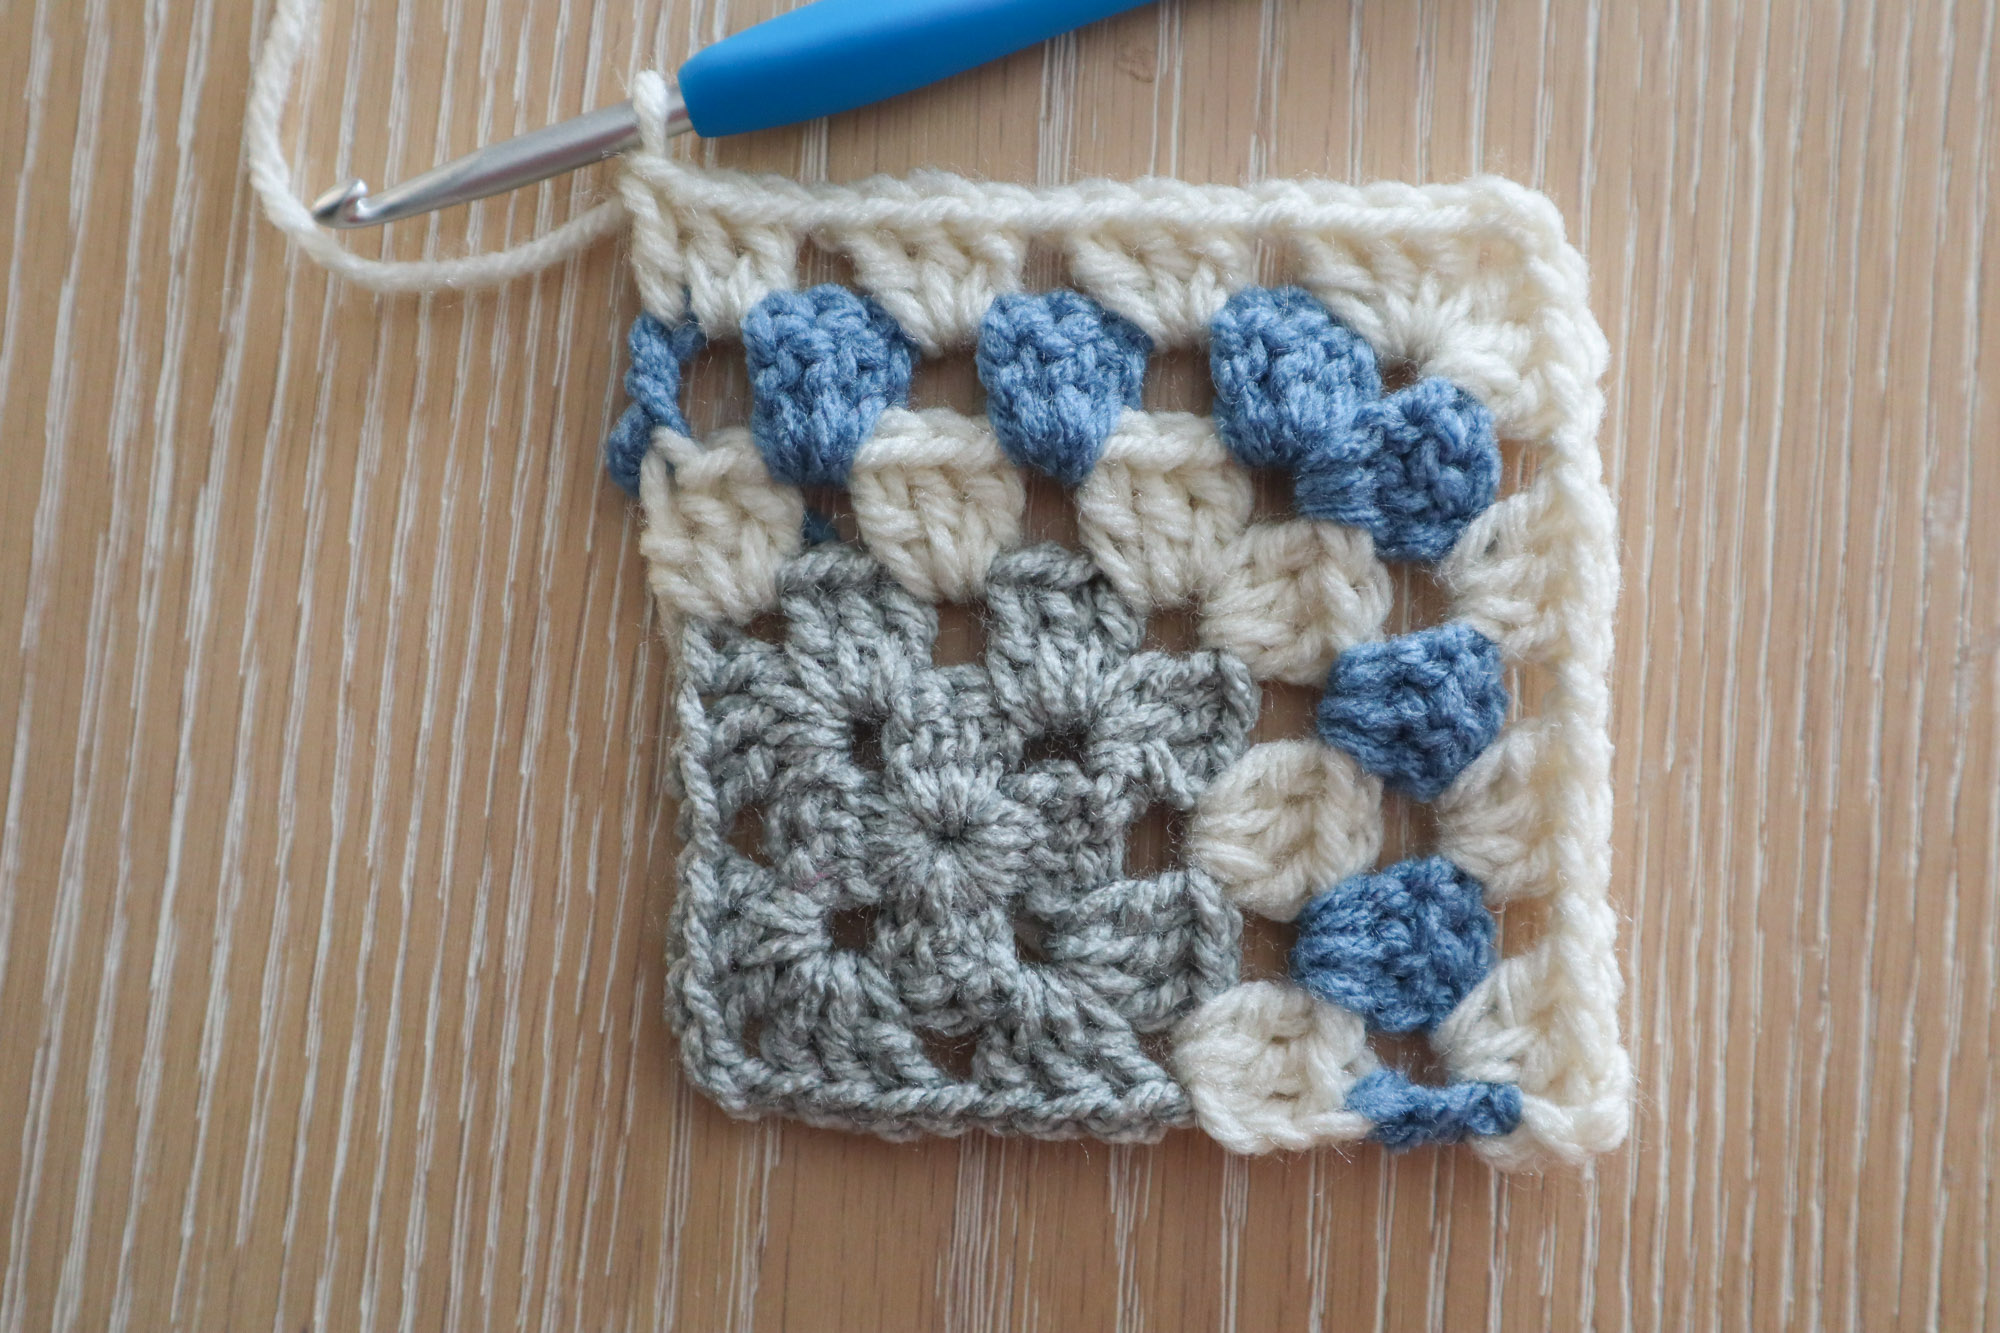
Optional Tip: to maintain straighter edges, work final dc into the 3rd chain of your starting ch 4.
Growing your square
Continue repeating row 2 and row 3 until your square is as large as you’d like.
Optional Border
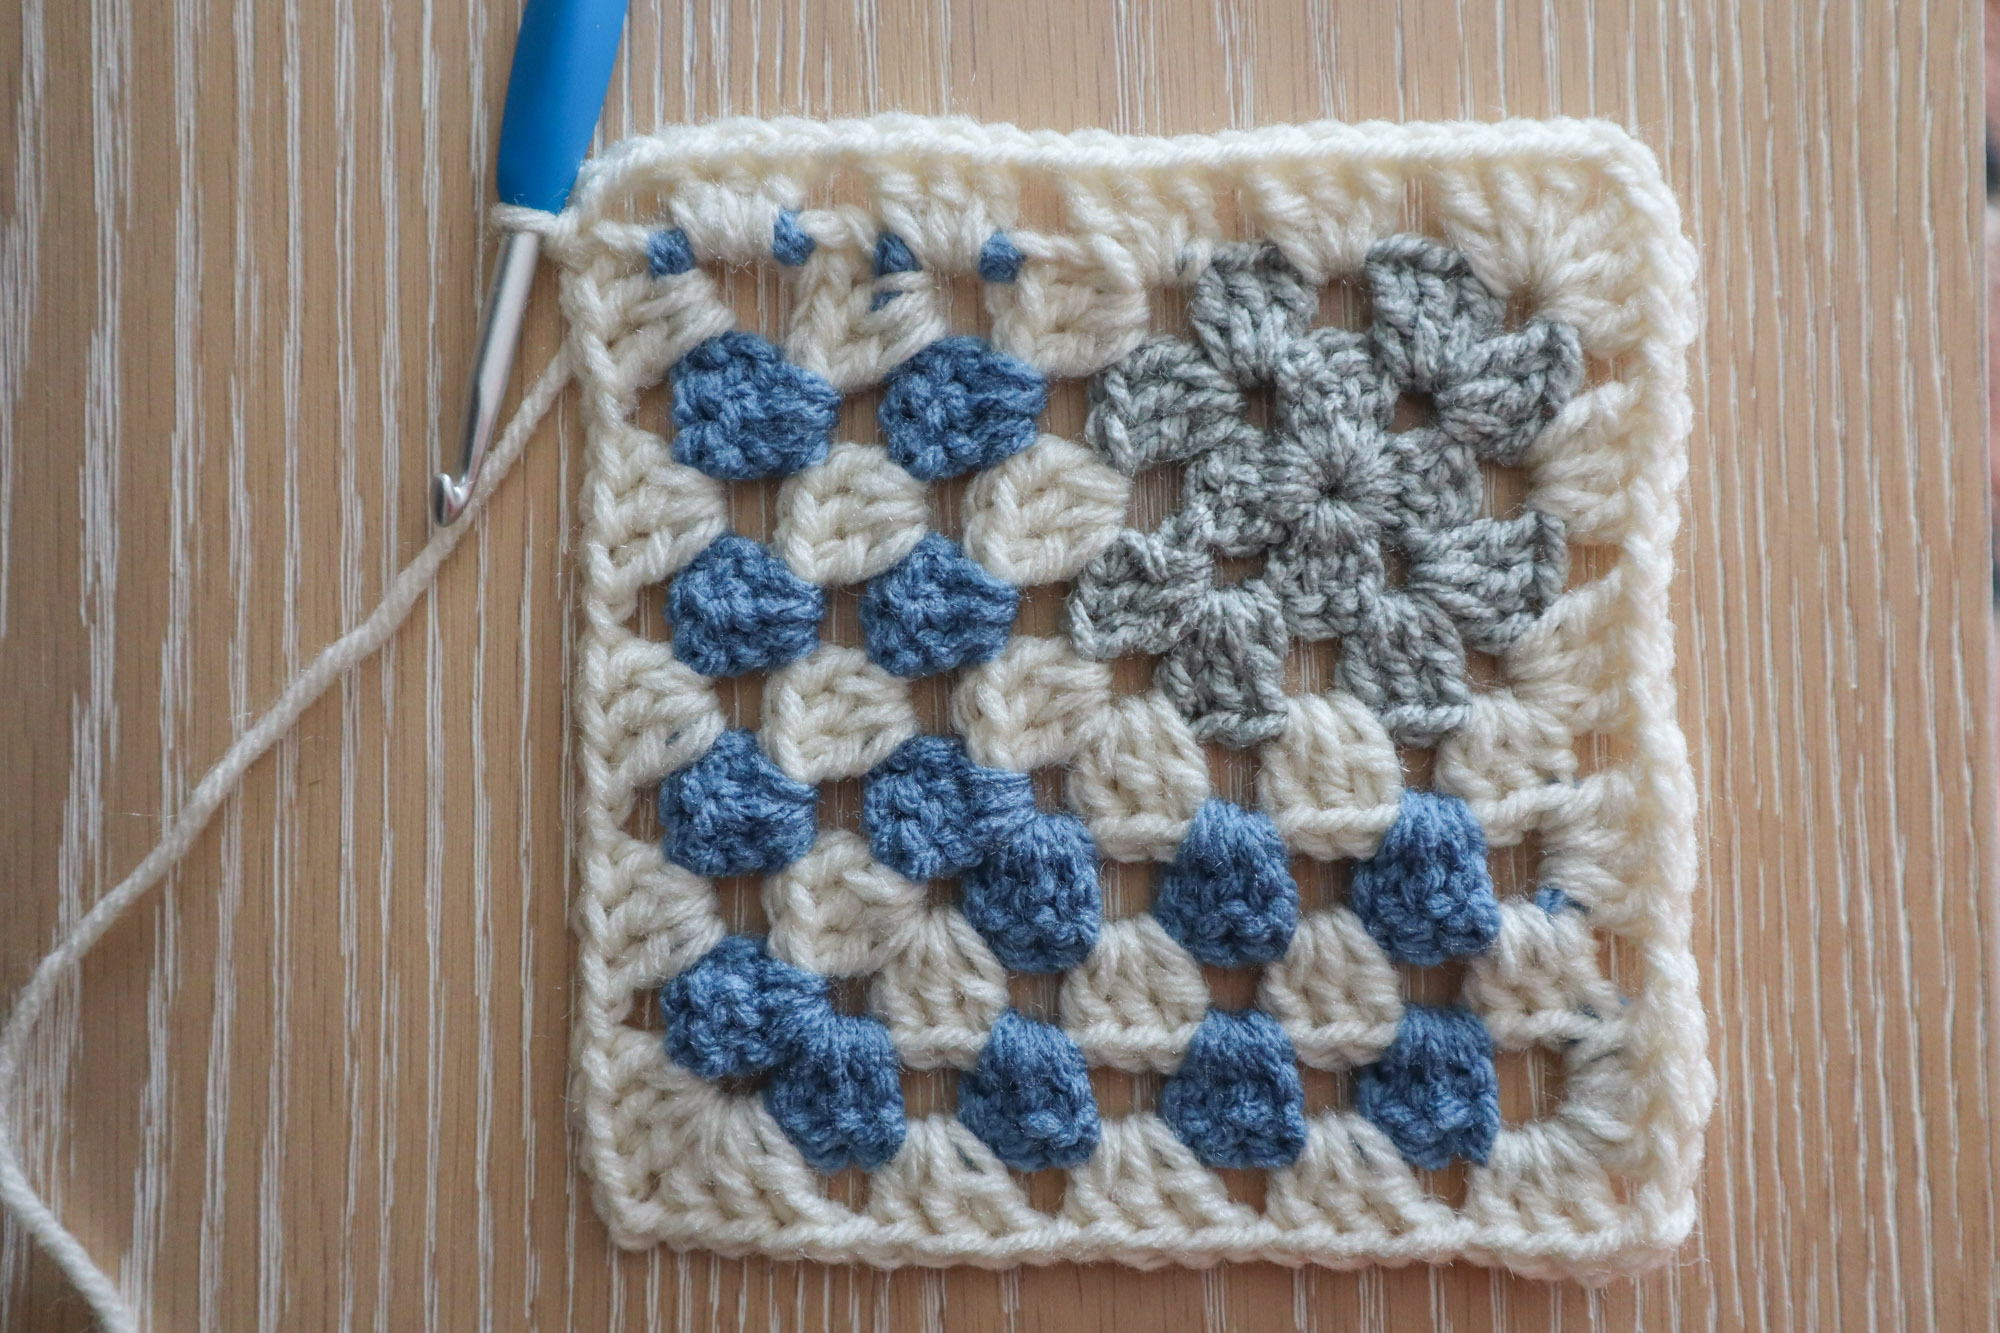
You may work a granny stitch border around your mitered square by beginning a “row 3” row as normal, but when you reach the end, ch2 and complete a “corner” by working another 3dc into that space.
Continue around, working 3dc clusters into available spaces, and 3dc, ch2, 3dc into the ch2 corner.
End with 3dc, ch2 in the last ch sp. Sl st to the top of your starting ch3 to finish the border.
Finishing Touches
Fasten off and weave in your ends. This style of square really benefits from some gentle blocking to define the corners and keep those edges straight.
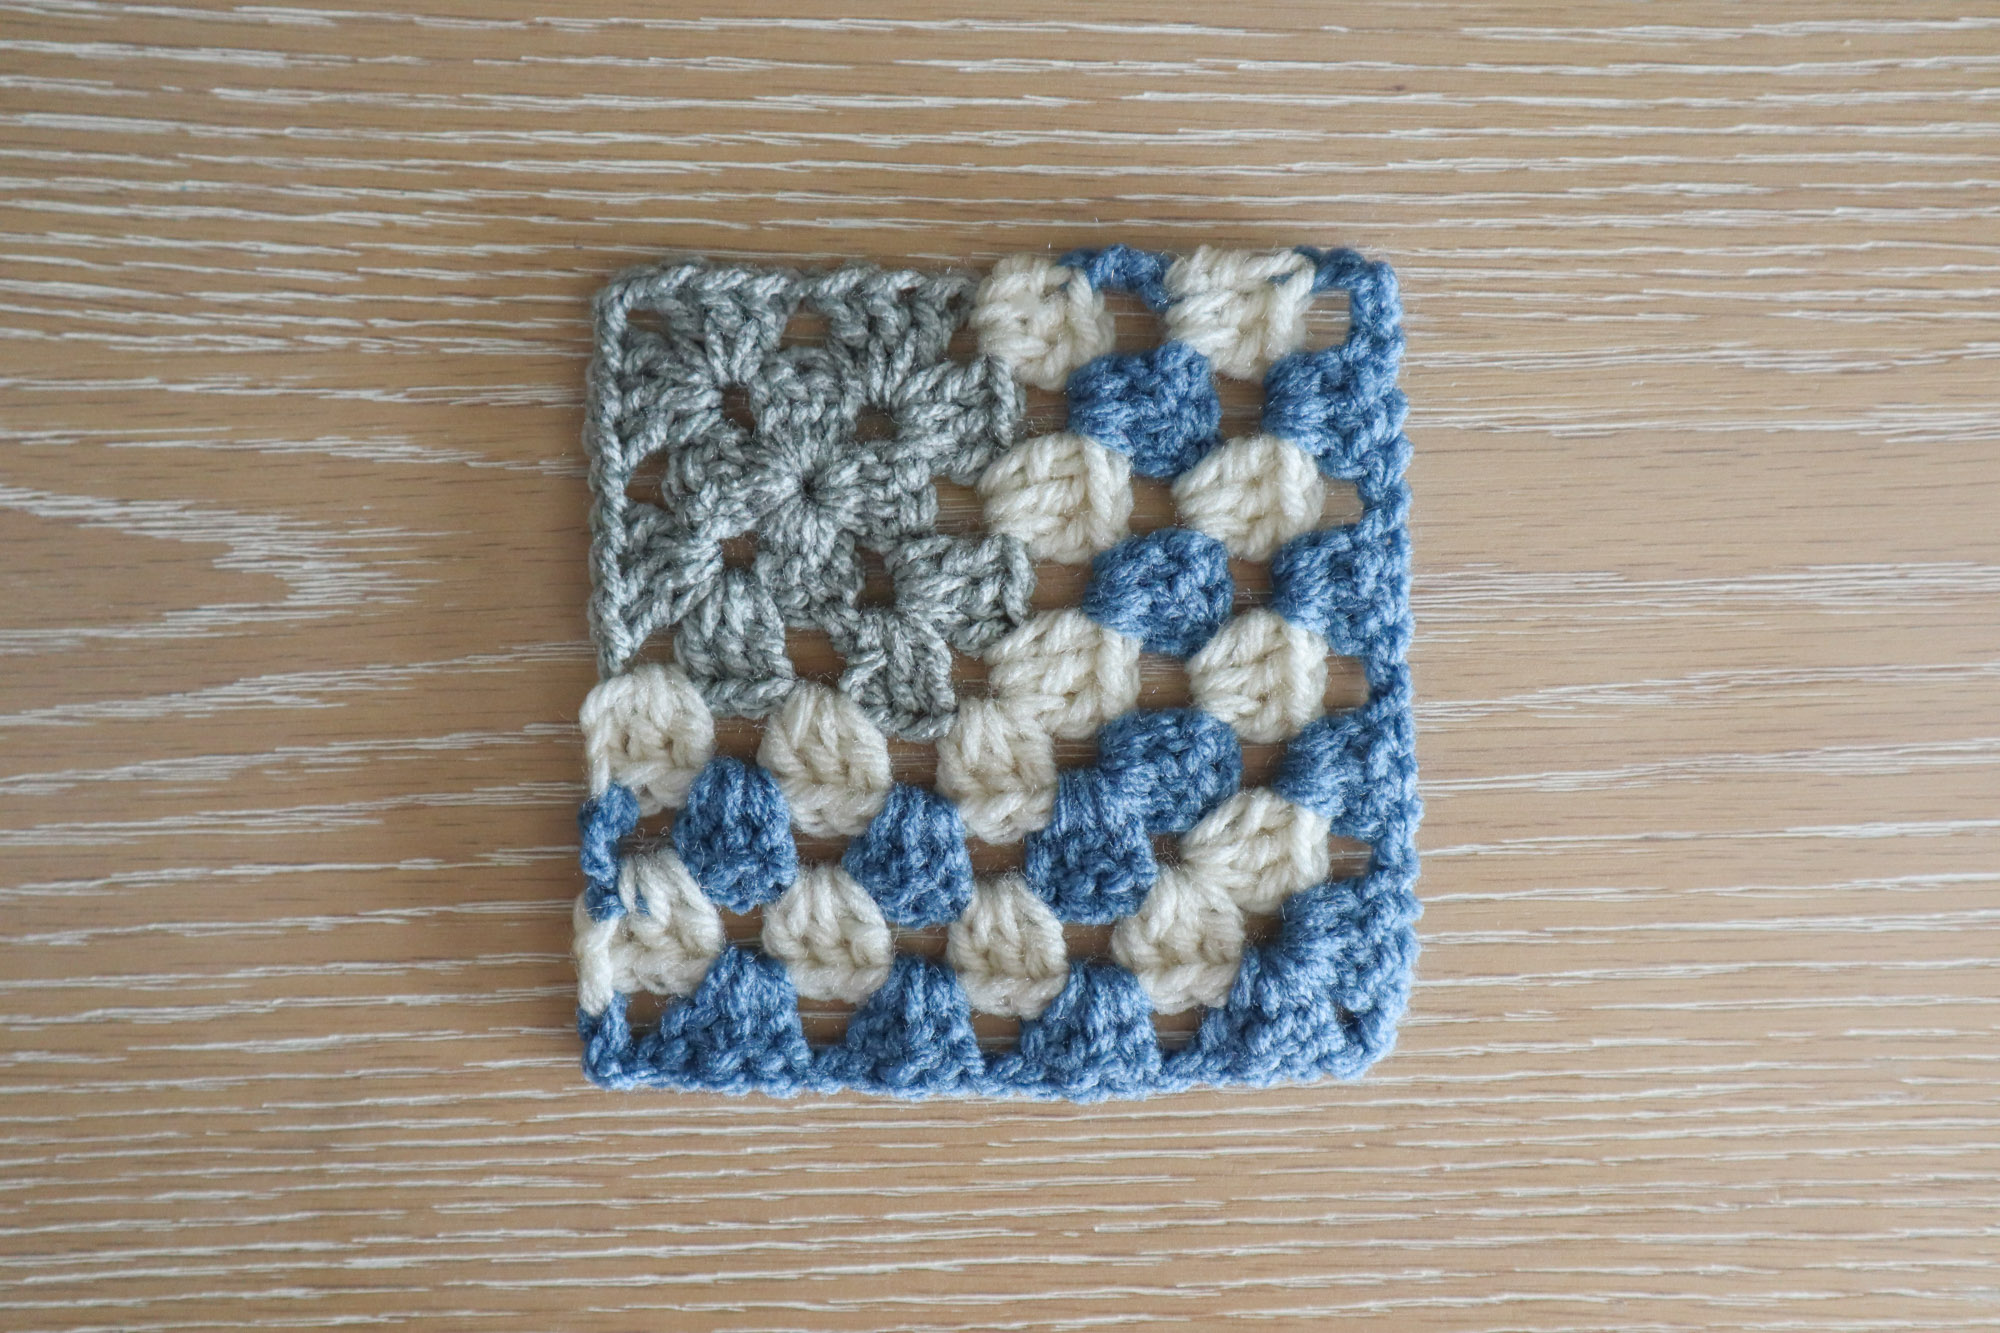
This mitered granny variation is endlessly versatile – alternate colors or even try with variegated yarn for a color-changing effect you just can’t get by working back and forth the old fashioned way. A mitered corner really steps up your crochet design game!
When joining squares, you can use your favorite join-as-you-go method or sew them together later. Either way, the result is striking and seamless.
P.S.
Pin these graphics for later so you can pull up this granny square when you’re ready to use it in a project!