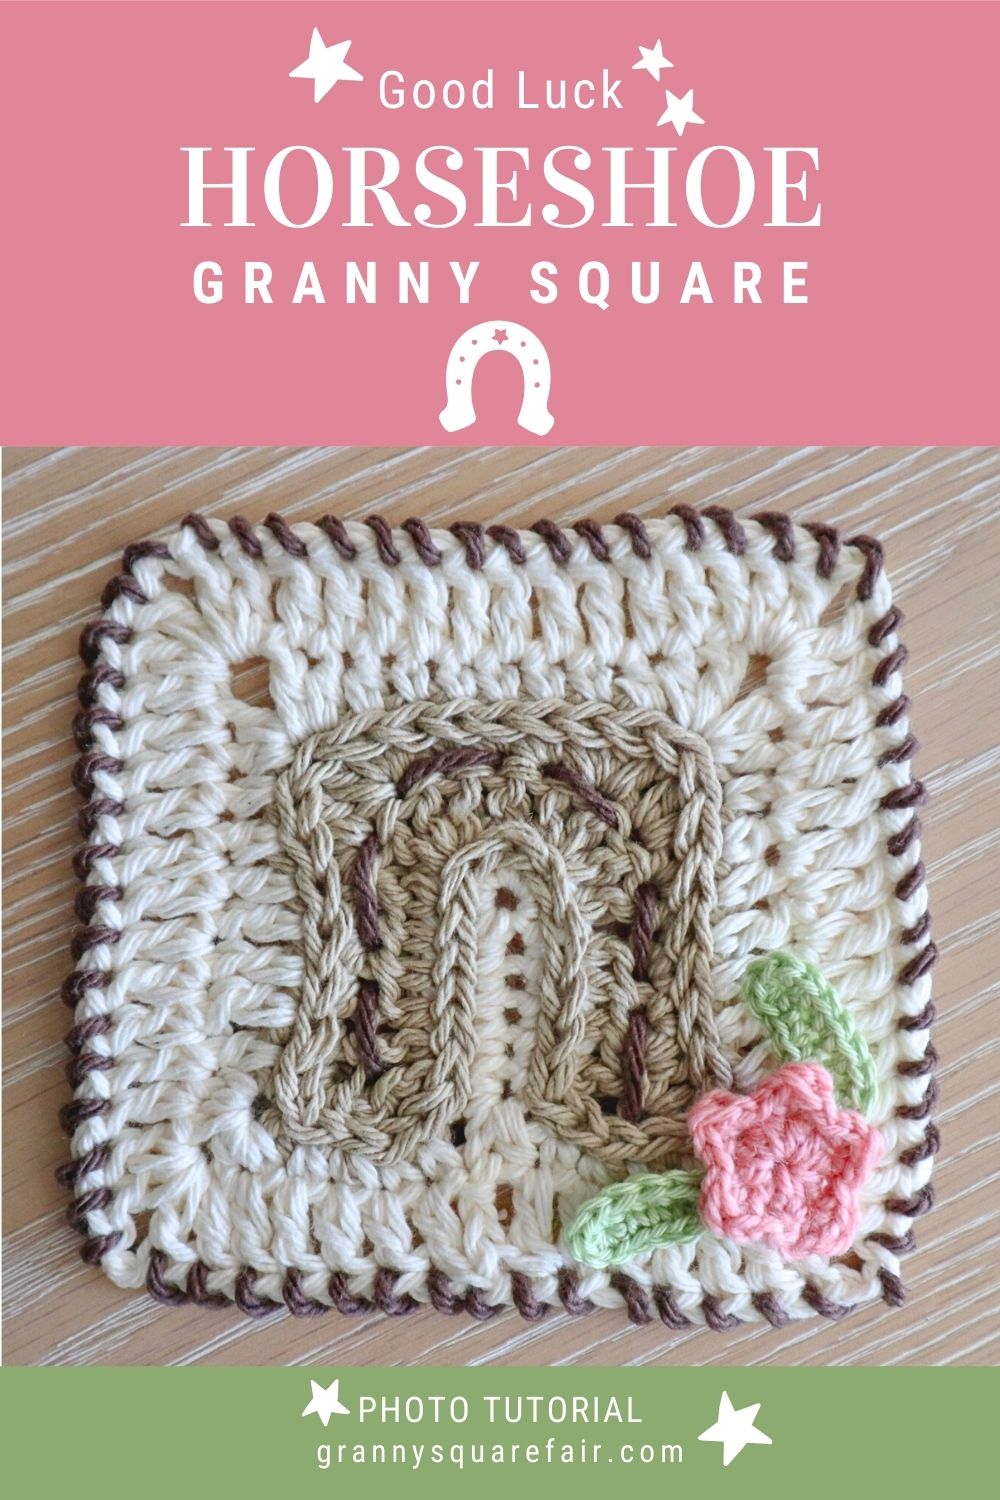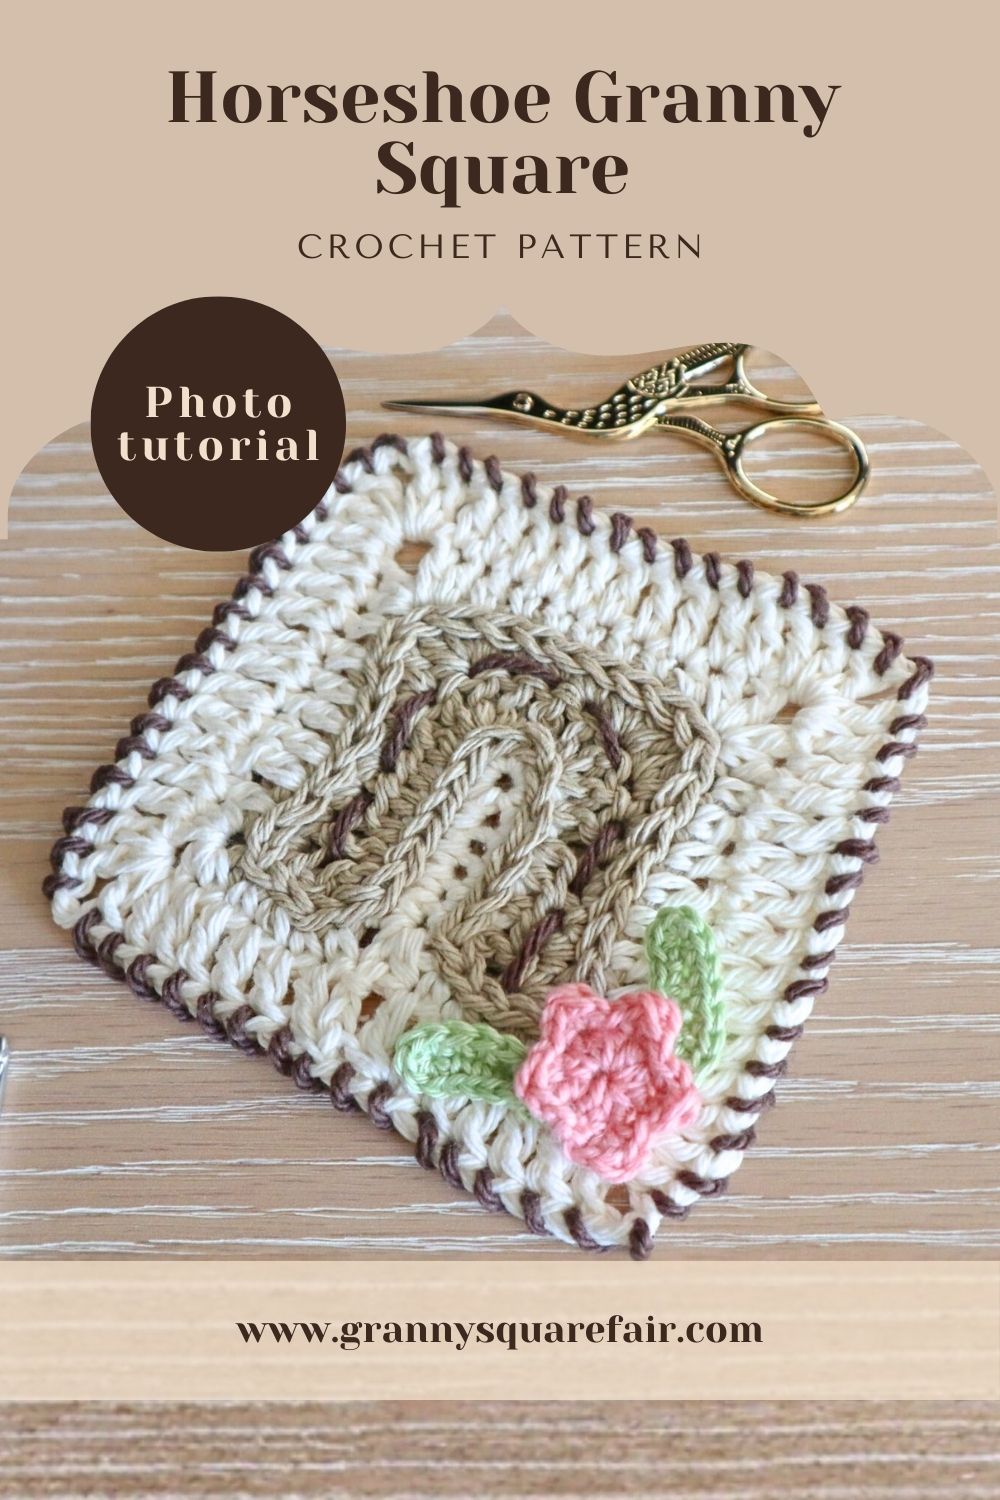
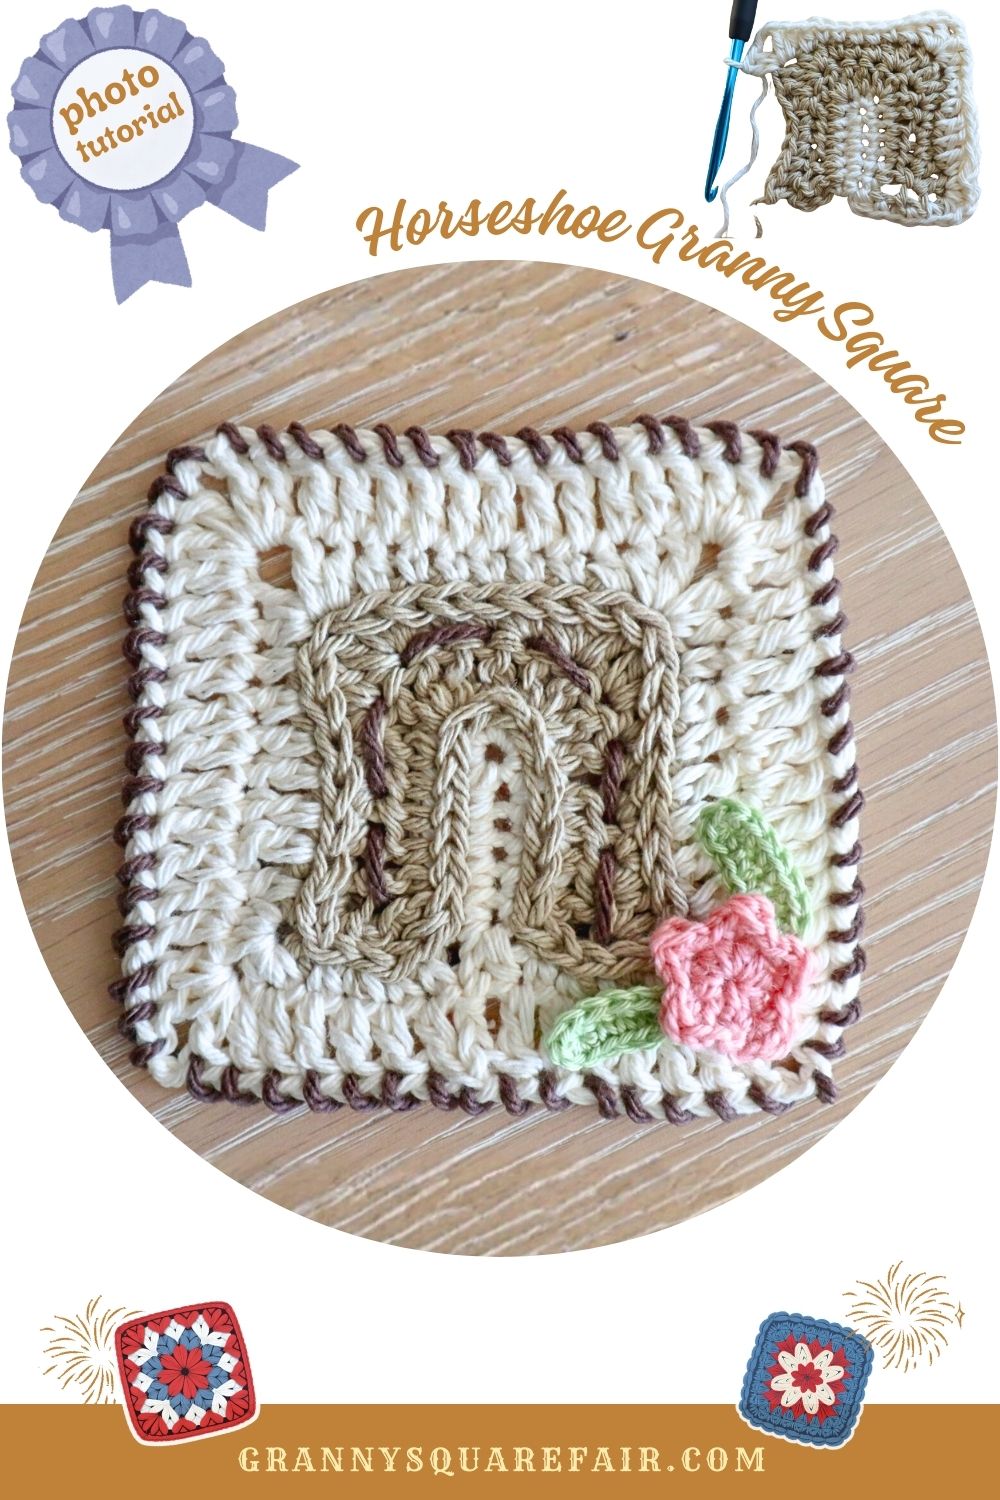
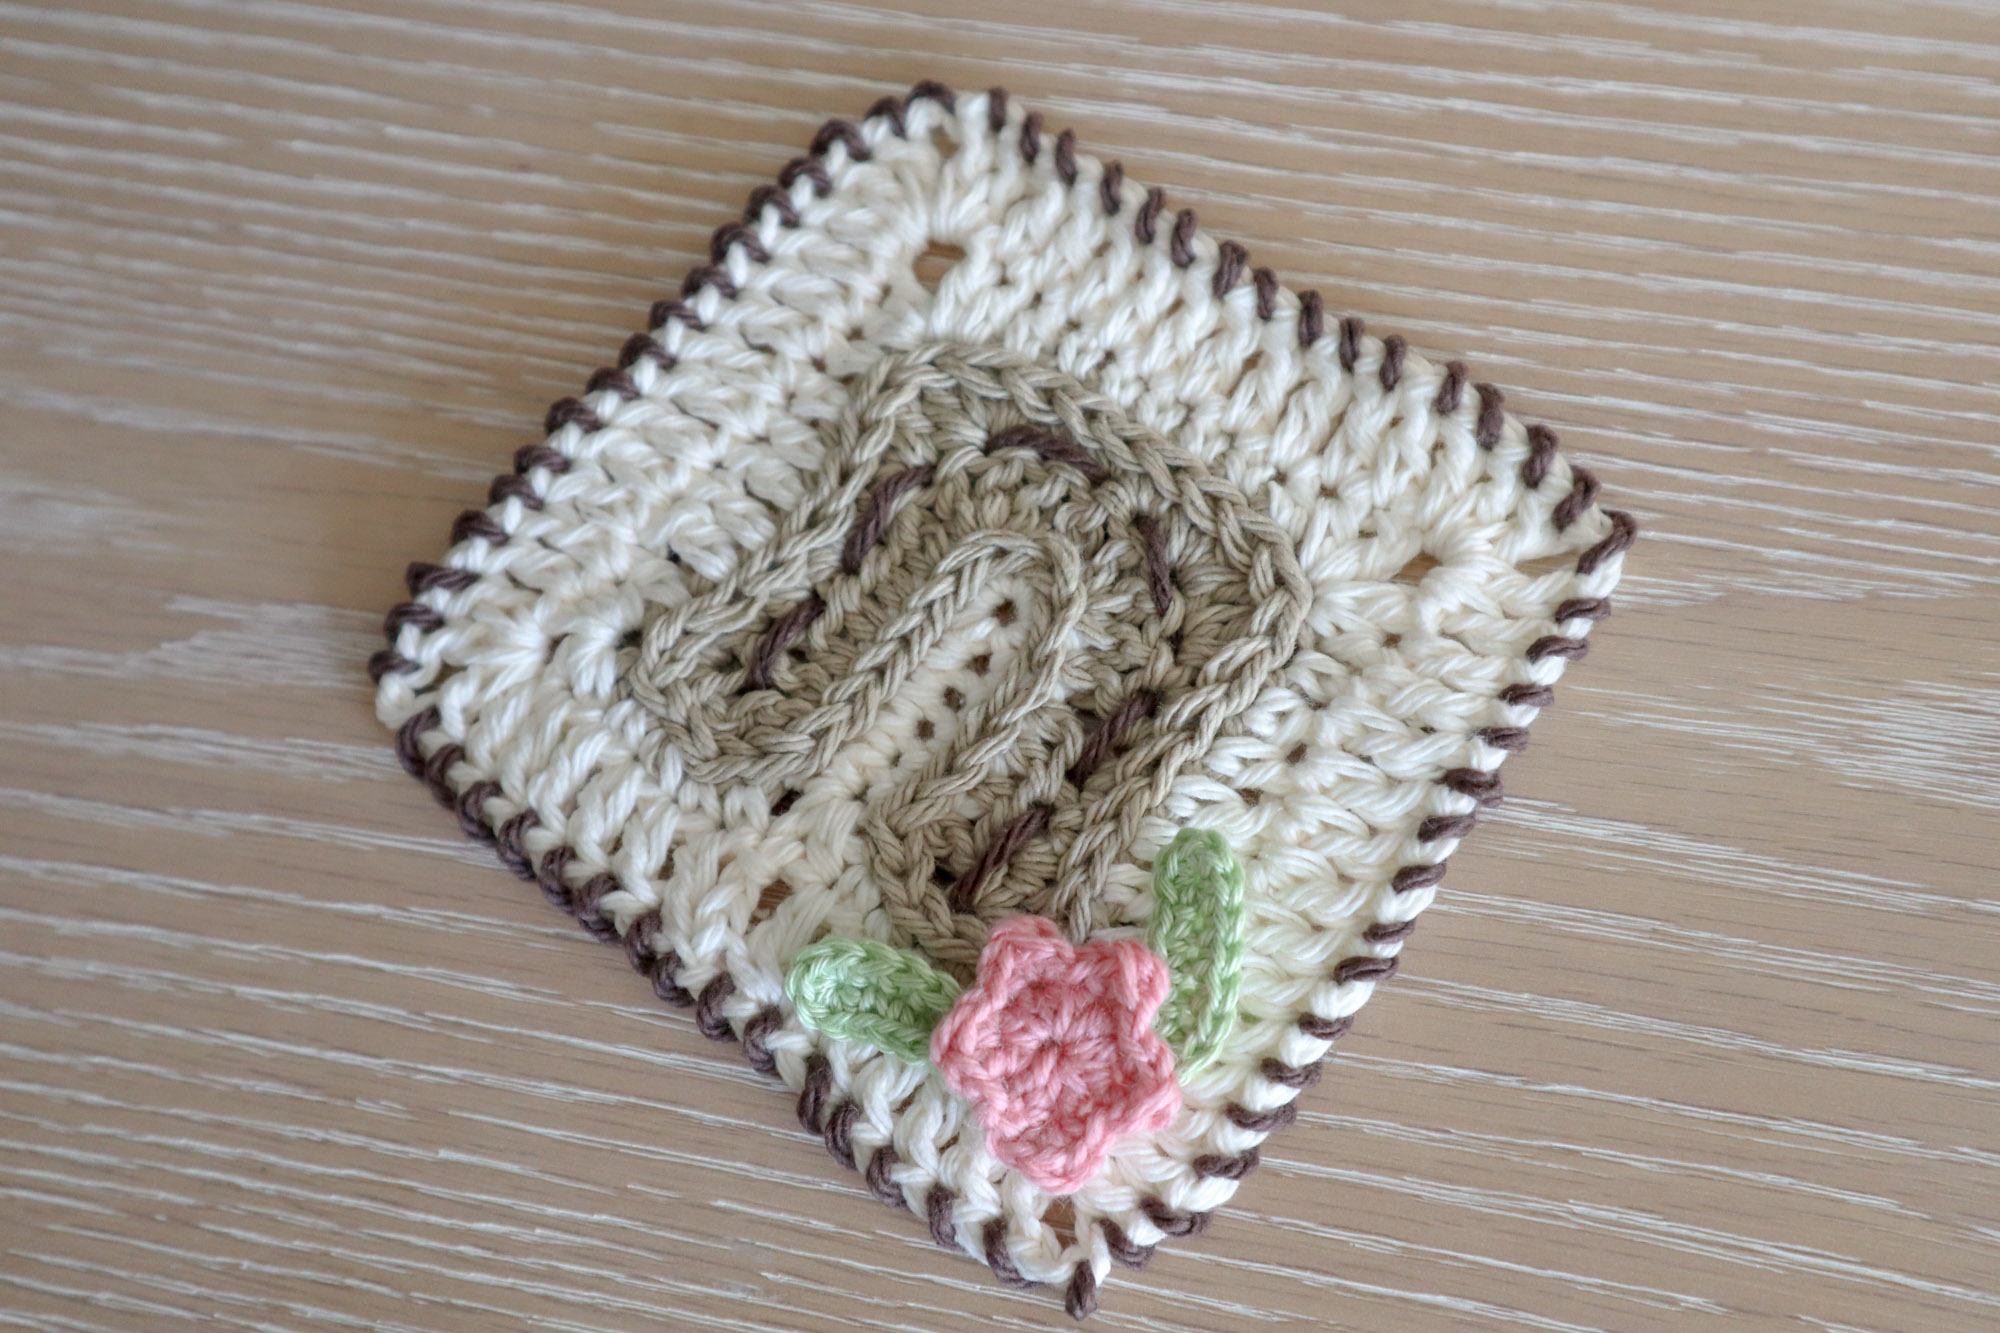
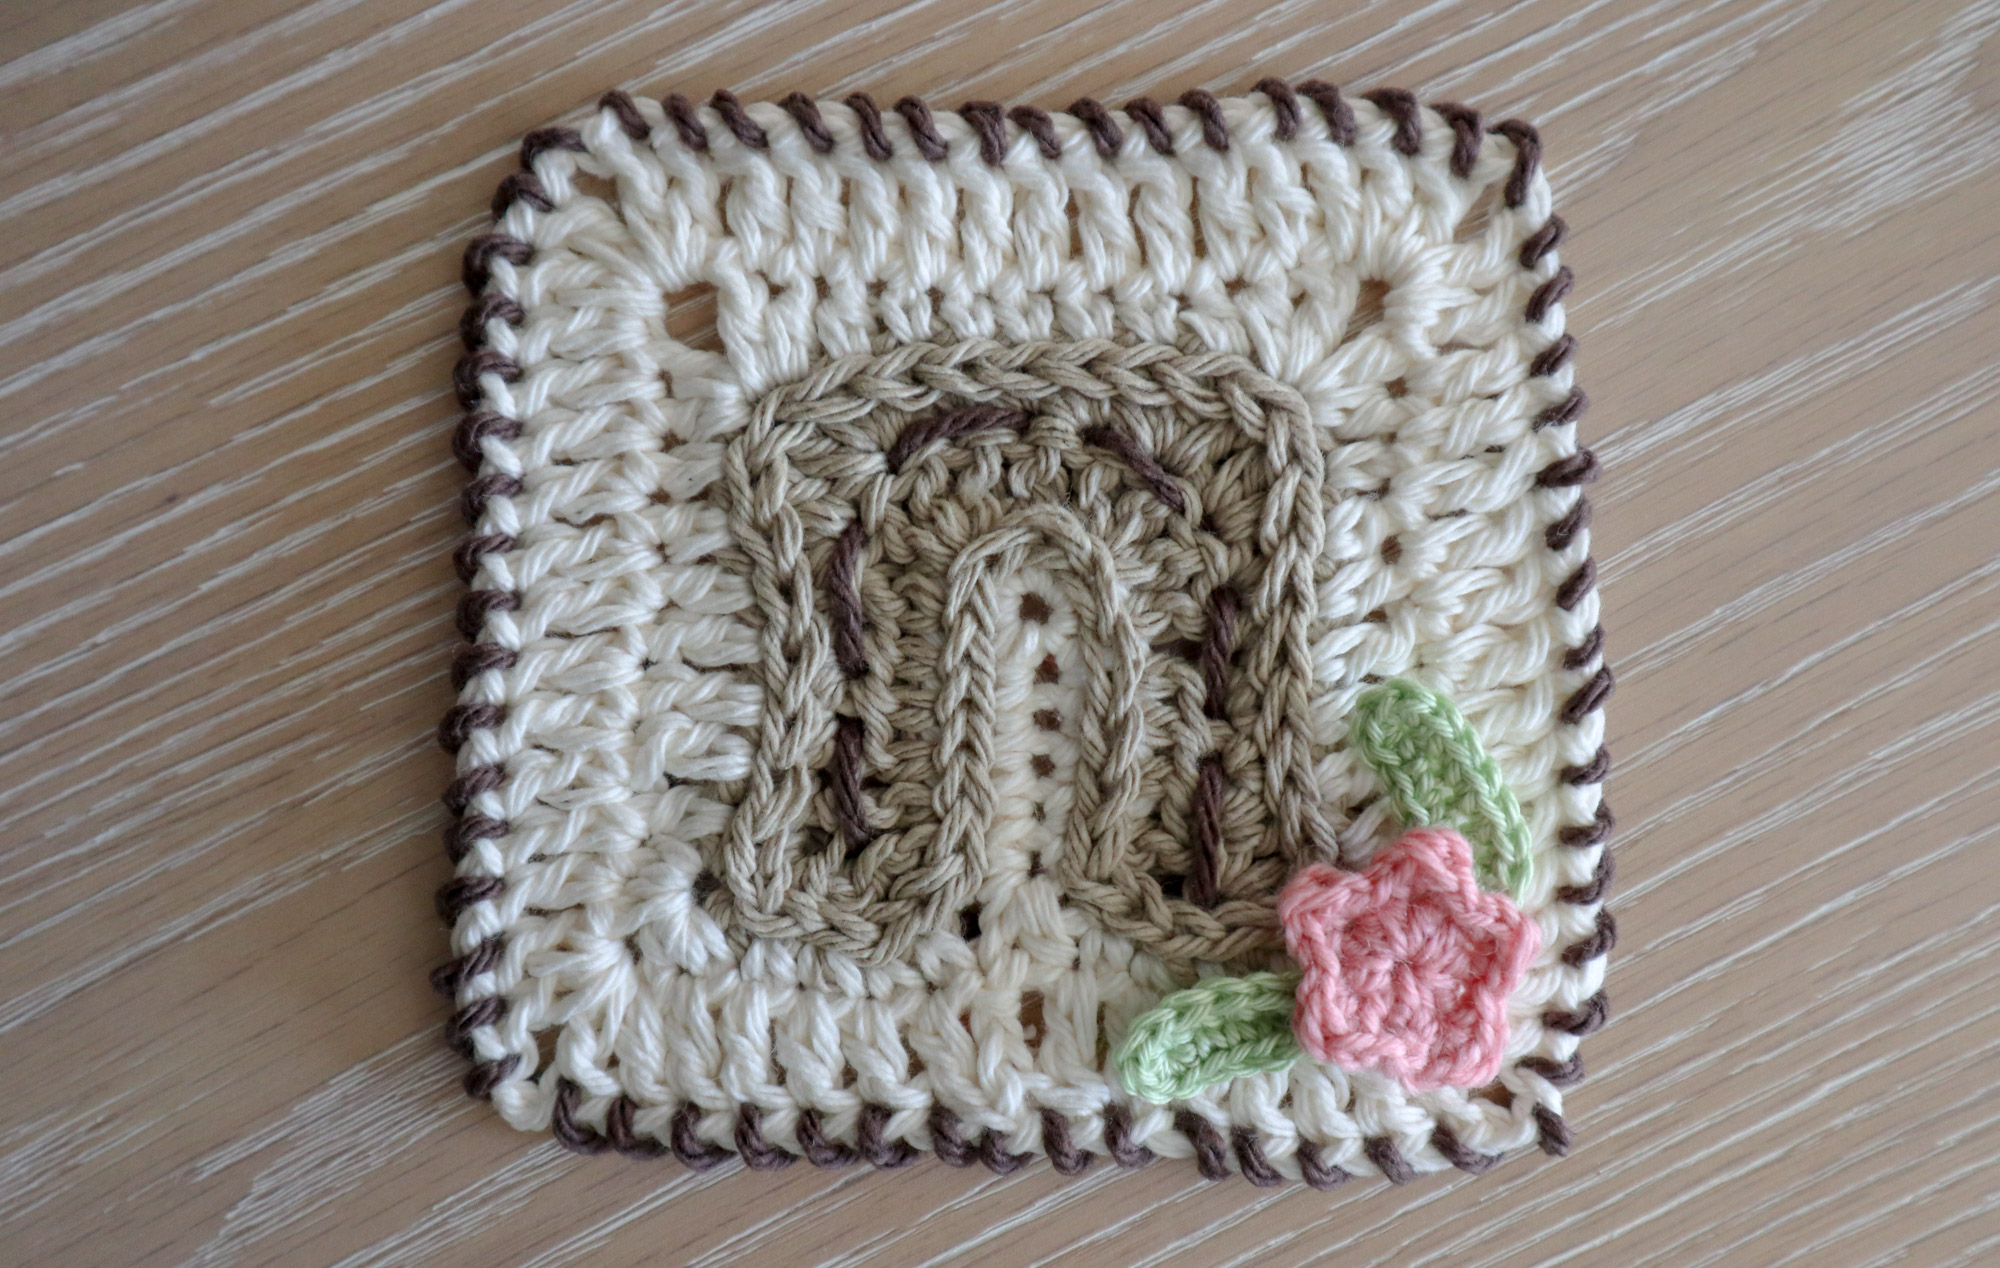
Horseshoe Granny Square
Yeehaw! This granny square is taking us to the southwest with an iconic horseshoe shape. The cowgirls and cowboys in your life are sure to appreciate it!
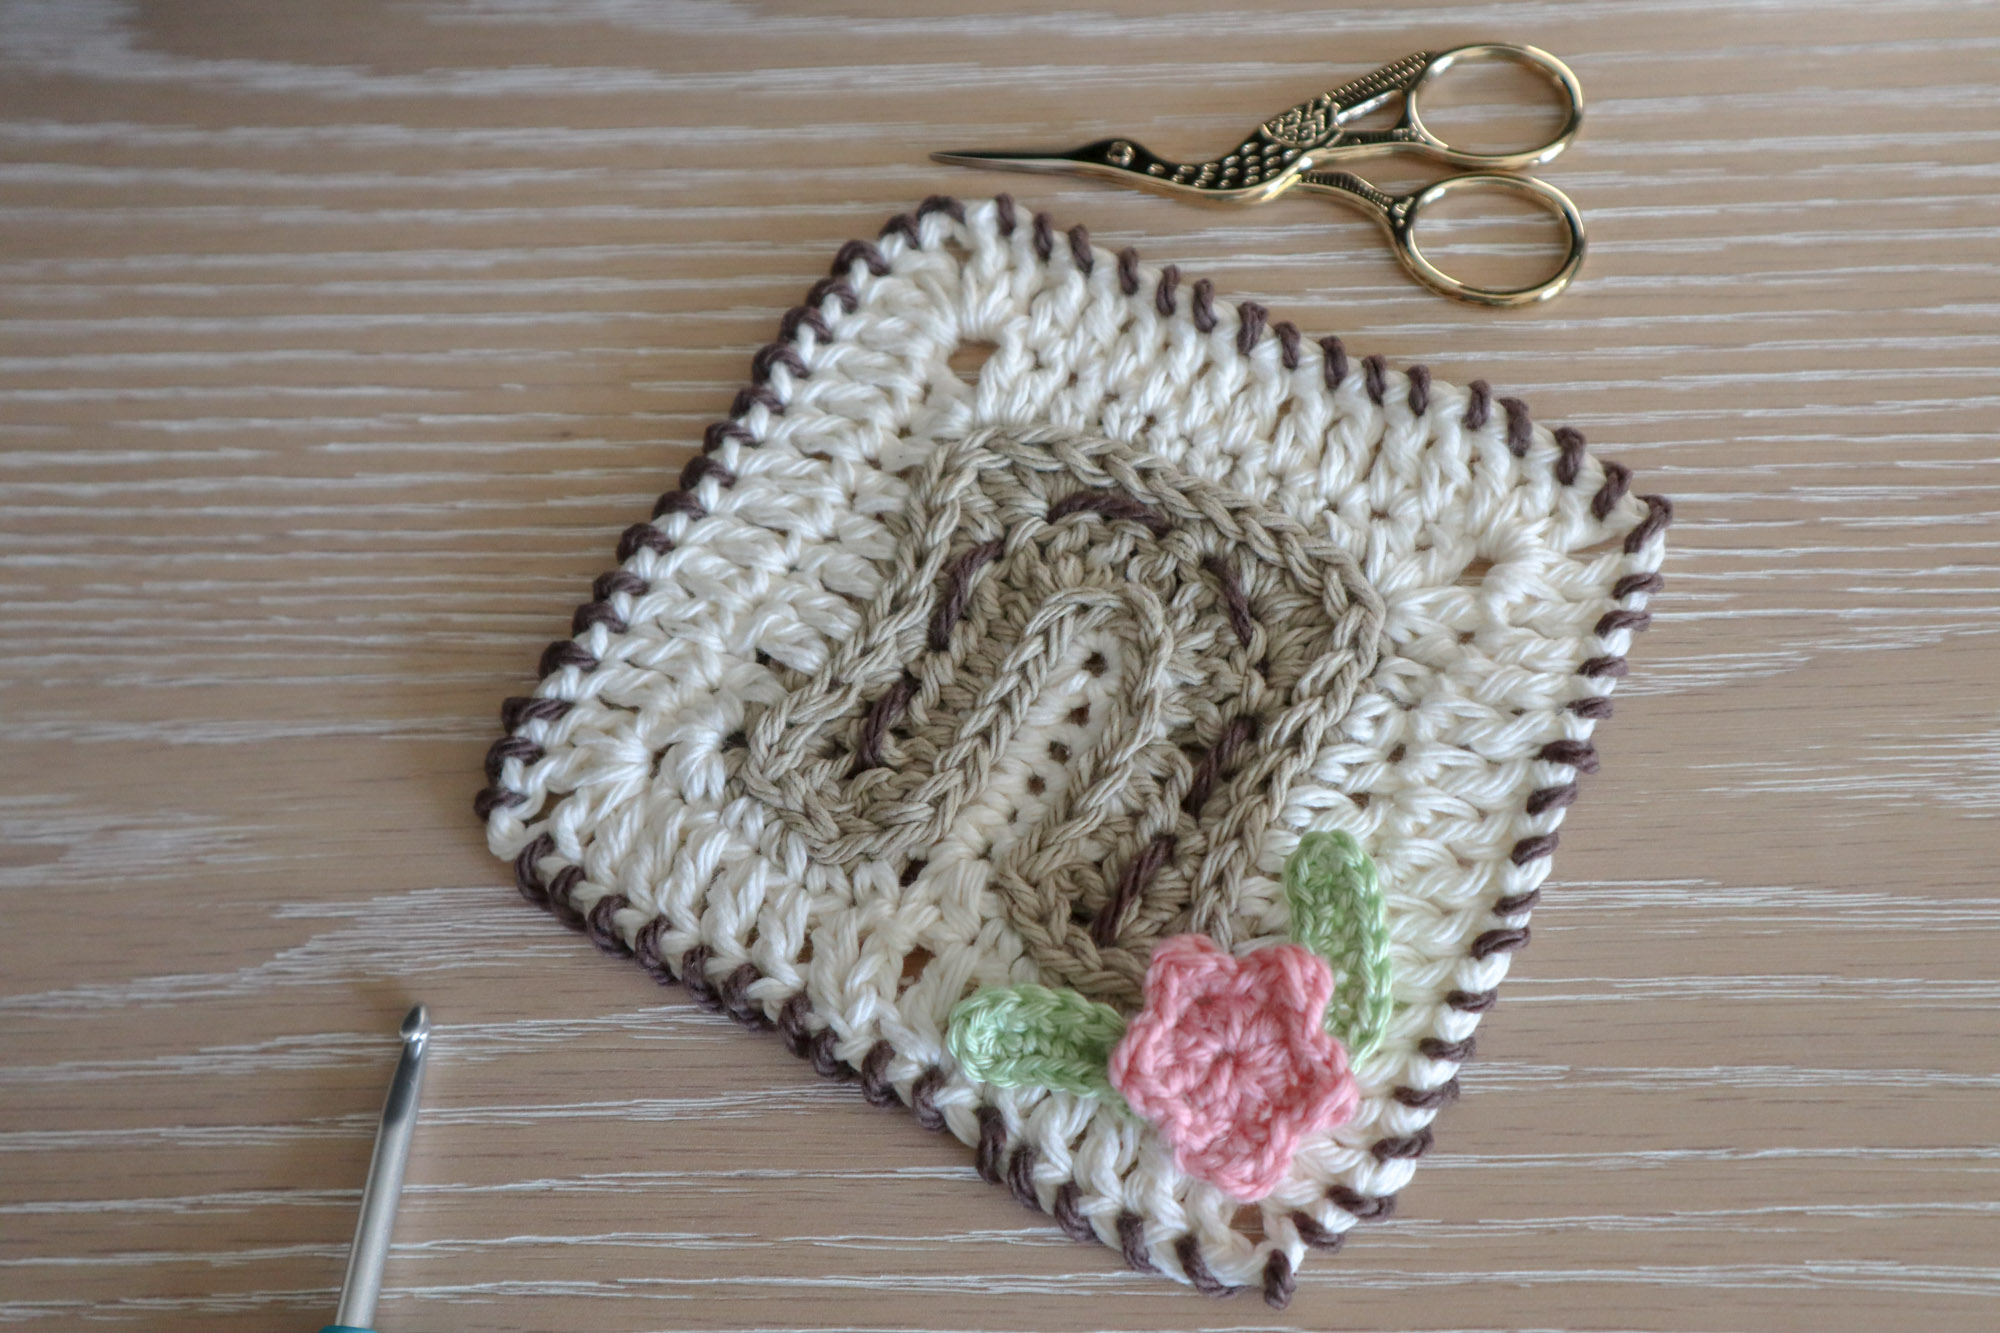
Whether you’re crafting a western-themed baby blanket, adding some ranch-style charm to your throw pillows, or creating a whole rodeo of motifs for that special someone who loves all things equestrian, this horseshoe granny square brings that authentic country spirit right into your hook!
Jump to:
Skill Level
Intermediate — While this granny square only uses basic stitches (single crochet, half double, double, treble, chains and slip stitches), it does require you to have a good handle on counting your stitches and keeping track of where to put them.
Stitch Abbreviations Used in the Pattern (U.S. Terms)
| Abbreviation | Stitch Name |
|---|---|
| ch | chain |
| sl st | slip stitch |
| sc | single crochet |
| dc | double crochet |
| tr | treble (triple) crochet |
| st(s) | stitch(es) |
| sp | space |
| rep | repeat |
What You’ll Need
- Yarn: Any weight yarn you love – I used two colors of worsted (4) weight cotton yarn and a little extra of a 3rd color for the horseshoe nail hole details.
- Hook: Use a hook that matches your yarn label’s recommendation. I used a 5 mm hook.
- Notions: Scissors, tapestry needle, a lil’ buckaroo to crochet this square for!
Gauge & Size
Gauge is up to you and your yarn and hook size! After 5 rounds, in my 4 weight yarn and 5mm hook, my square was a little over 4″ across.
Pattern Notes
- We first work a little piece in the border color to build our horseshoe on top of. Then change color to make the horseshoe motif, then resume using the border color.
- Turning chains may or may not count as stitches depending on the row/round.
- We may or may not turn our work depending on the row/round so the pattern requires paying close attention to this.
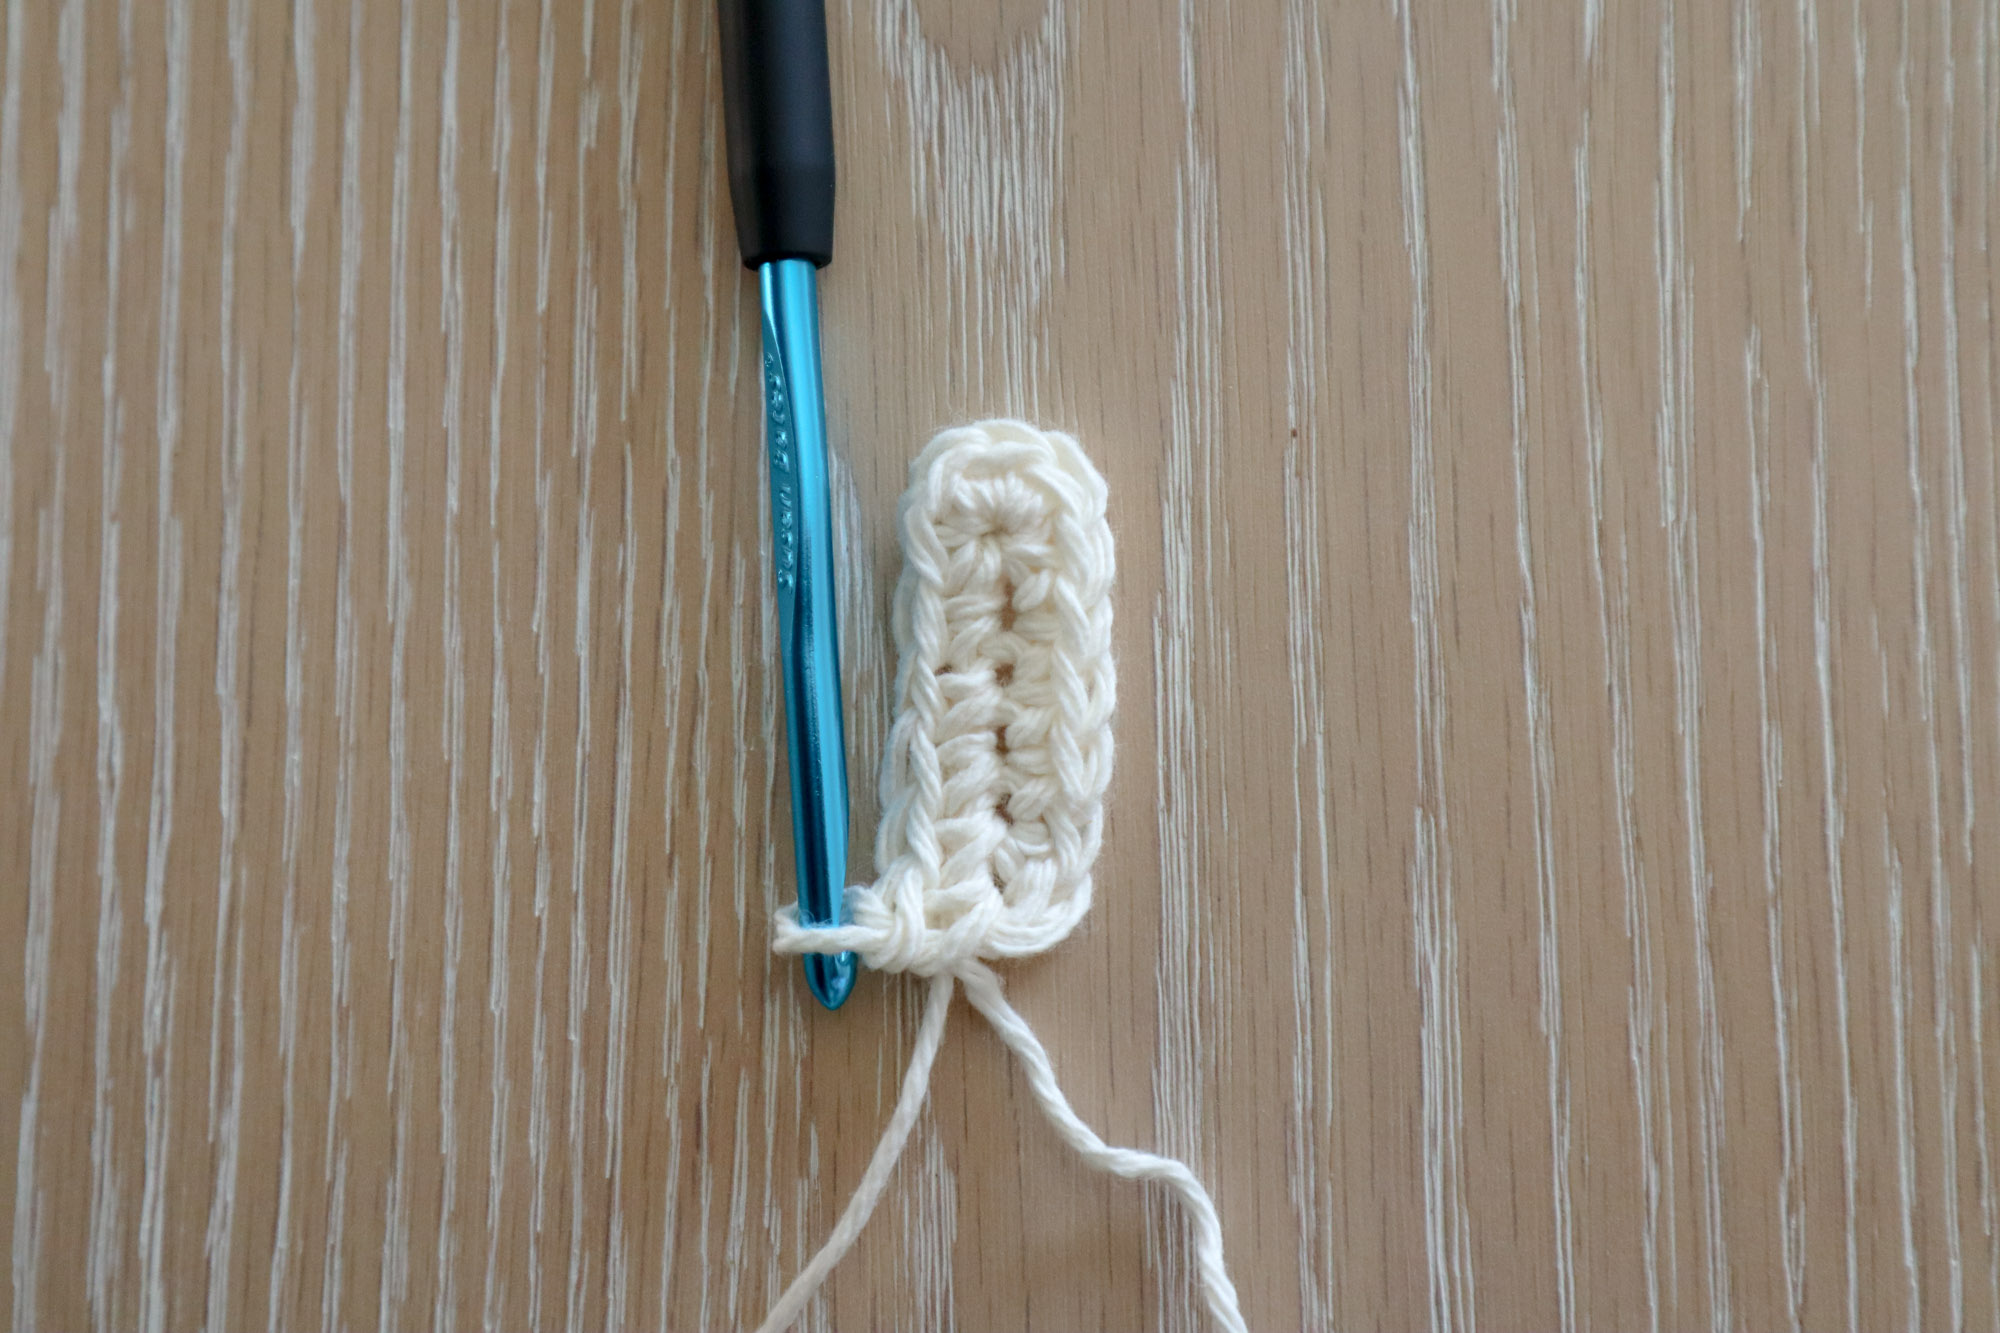
Row 1 – Inner Space of the Horseshoe
In border color, ch7. Skip the first ch (doesn’t count as a stitch) and make 1sc in each of the next 5chs. In the first chain, make 5sc, tilting your work to work on the underside of the foundation chain. Make 1sc in each of the next 5 chains along the underside of your foundation chain.
Row 2 – Horseshoe motif
Change to horseshoe color but leave border yarn attached to pick up later. Ch3 and turn (doesn’t count as a stitch) 1tr in the first st. 1dc in the next st. 1hdc in each of the next 3 sts. *1dc in the next st. 3dc in the next st* rep between ** once more, 1dc in next st. 1hdc in each of the next 3 sts, 1dc in the next stitch, 1tr in the last st.
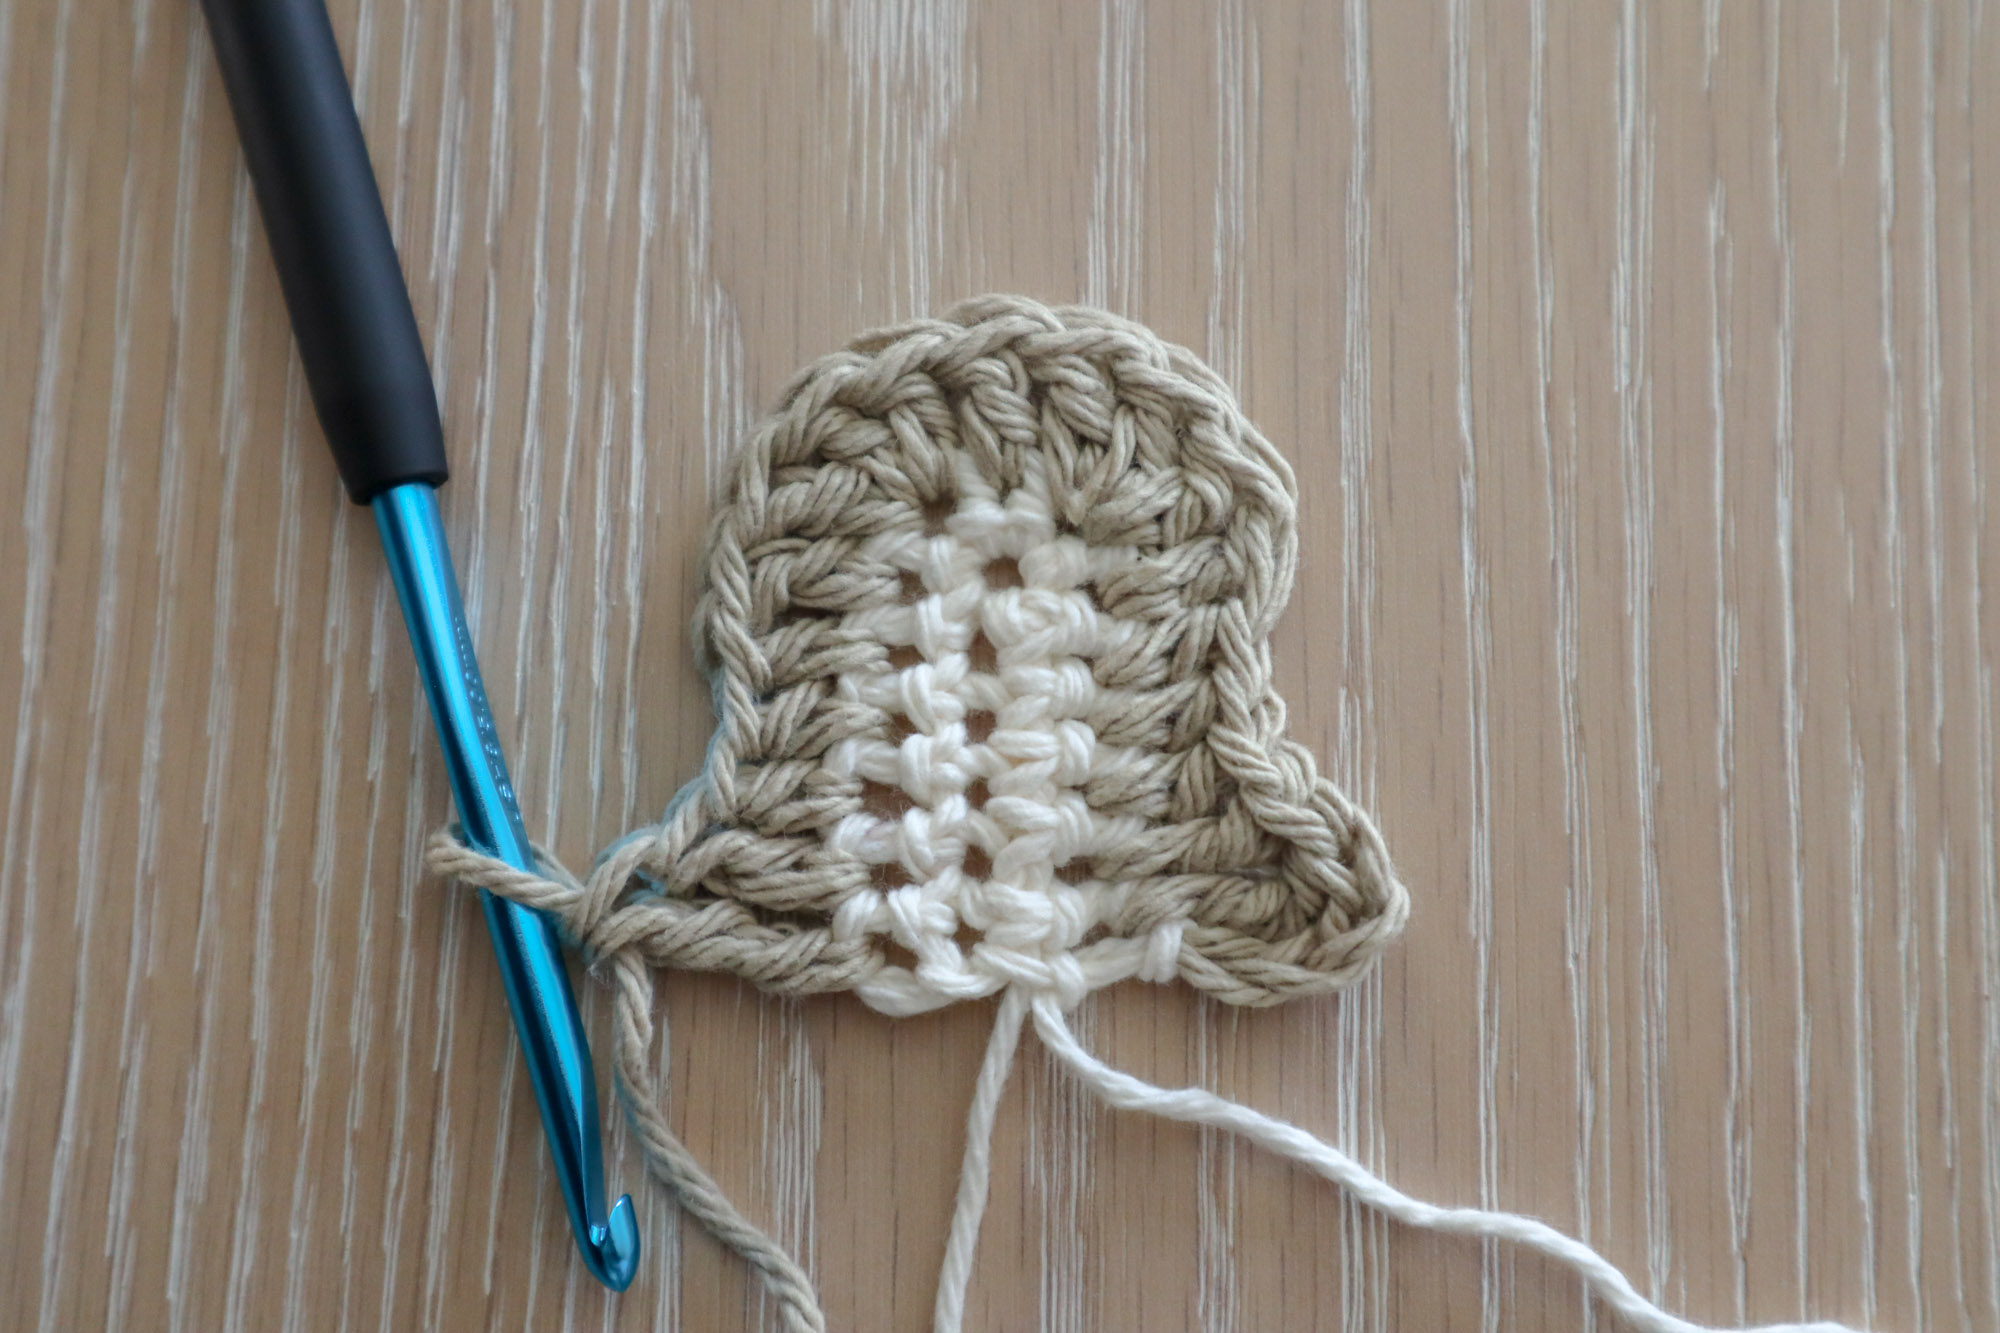
Row 3
Ch2 and turn (doesn’t count as a st). 1dc in the first st, 1hdc in the next. 1sc in each of the next 4 sts. 1hdc and 1dc in the next st, 1dc and 2hdc in the next st. 1sc in each of the next 3 sts. Working in reverse order of what we just did: 2hdc and 1dc in the next st, 1dc and 1hdc in the next, 1sc in the next 4 sts, 1hdc in the next, 1dc in the last st.
Fasten off horseshoe color but leave a long tail for the surface crochet edge detail at the end.
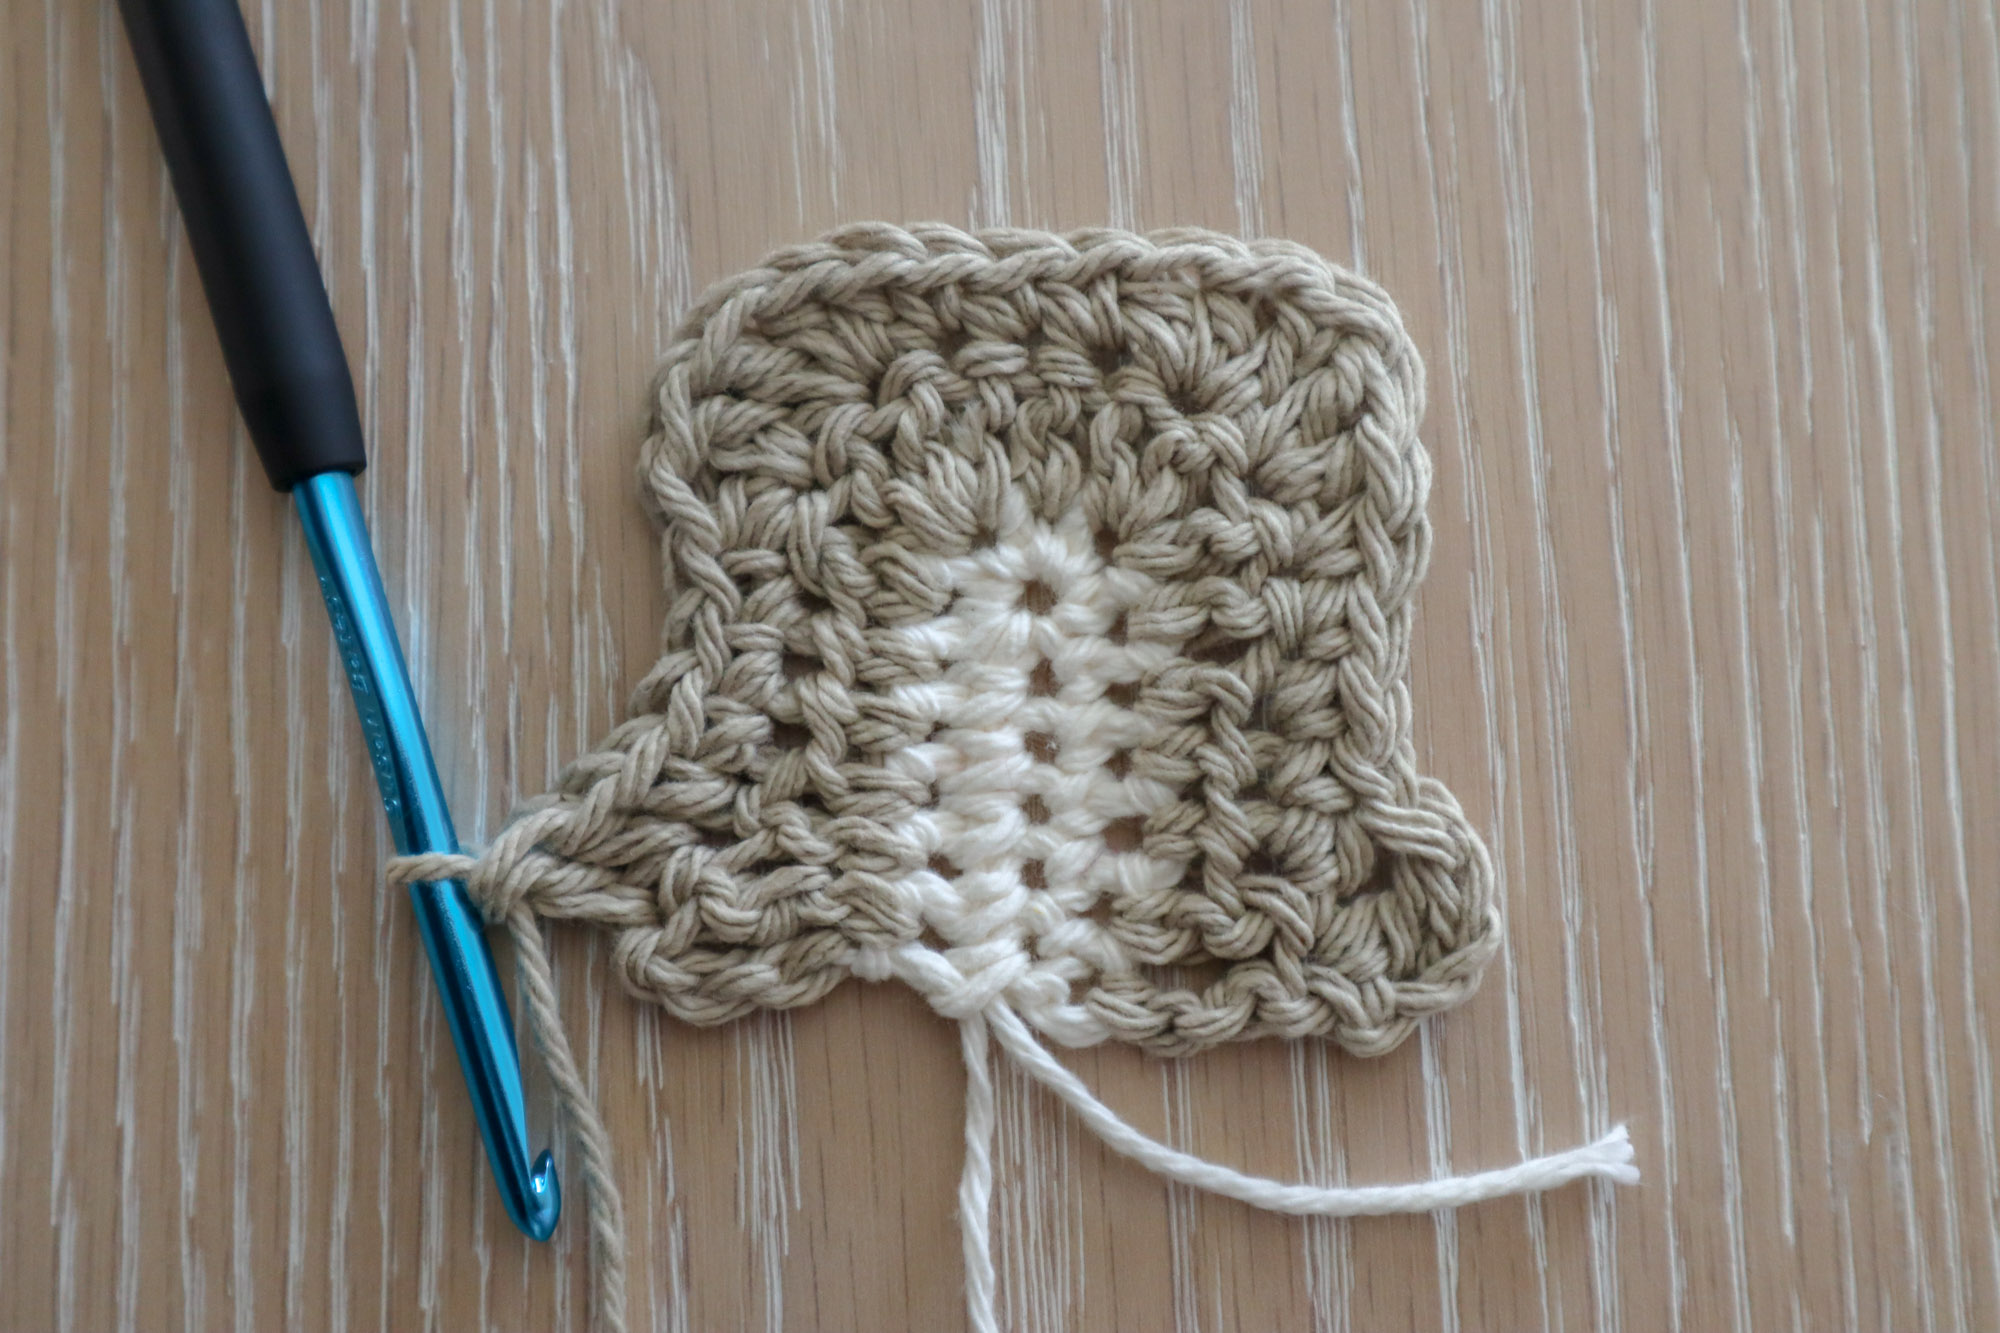
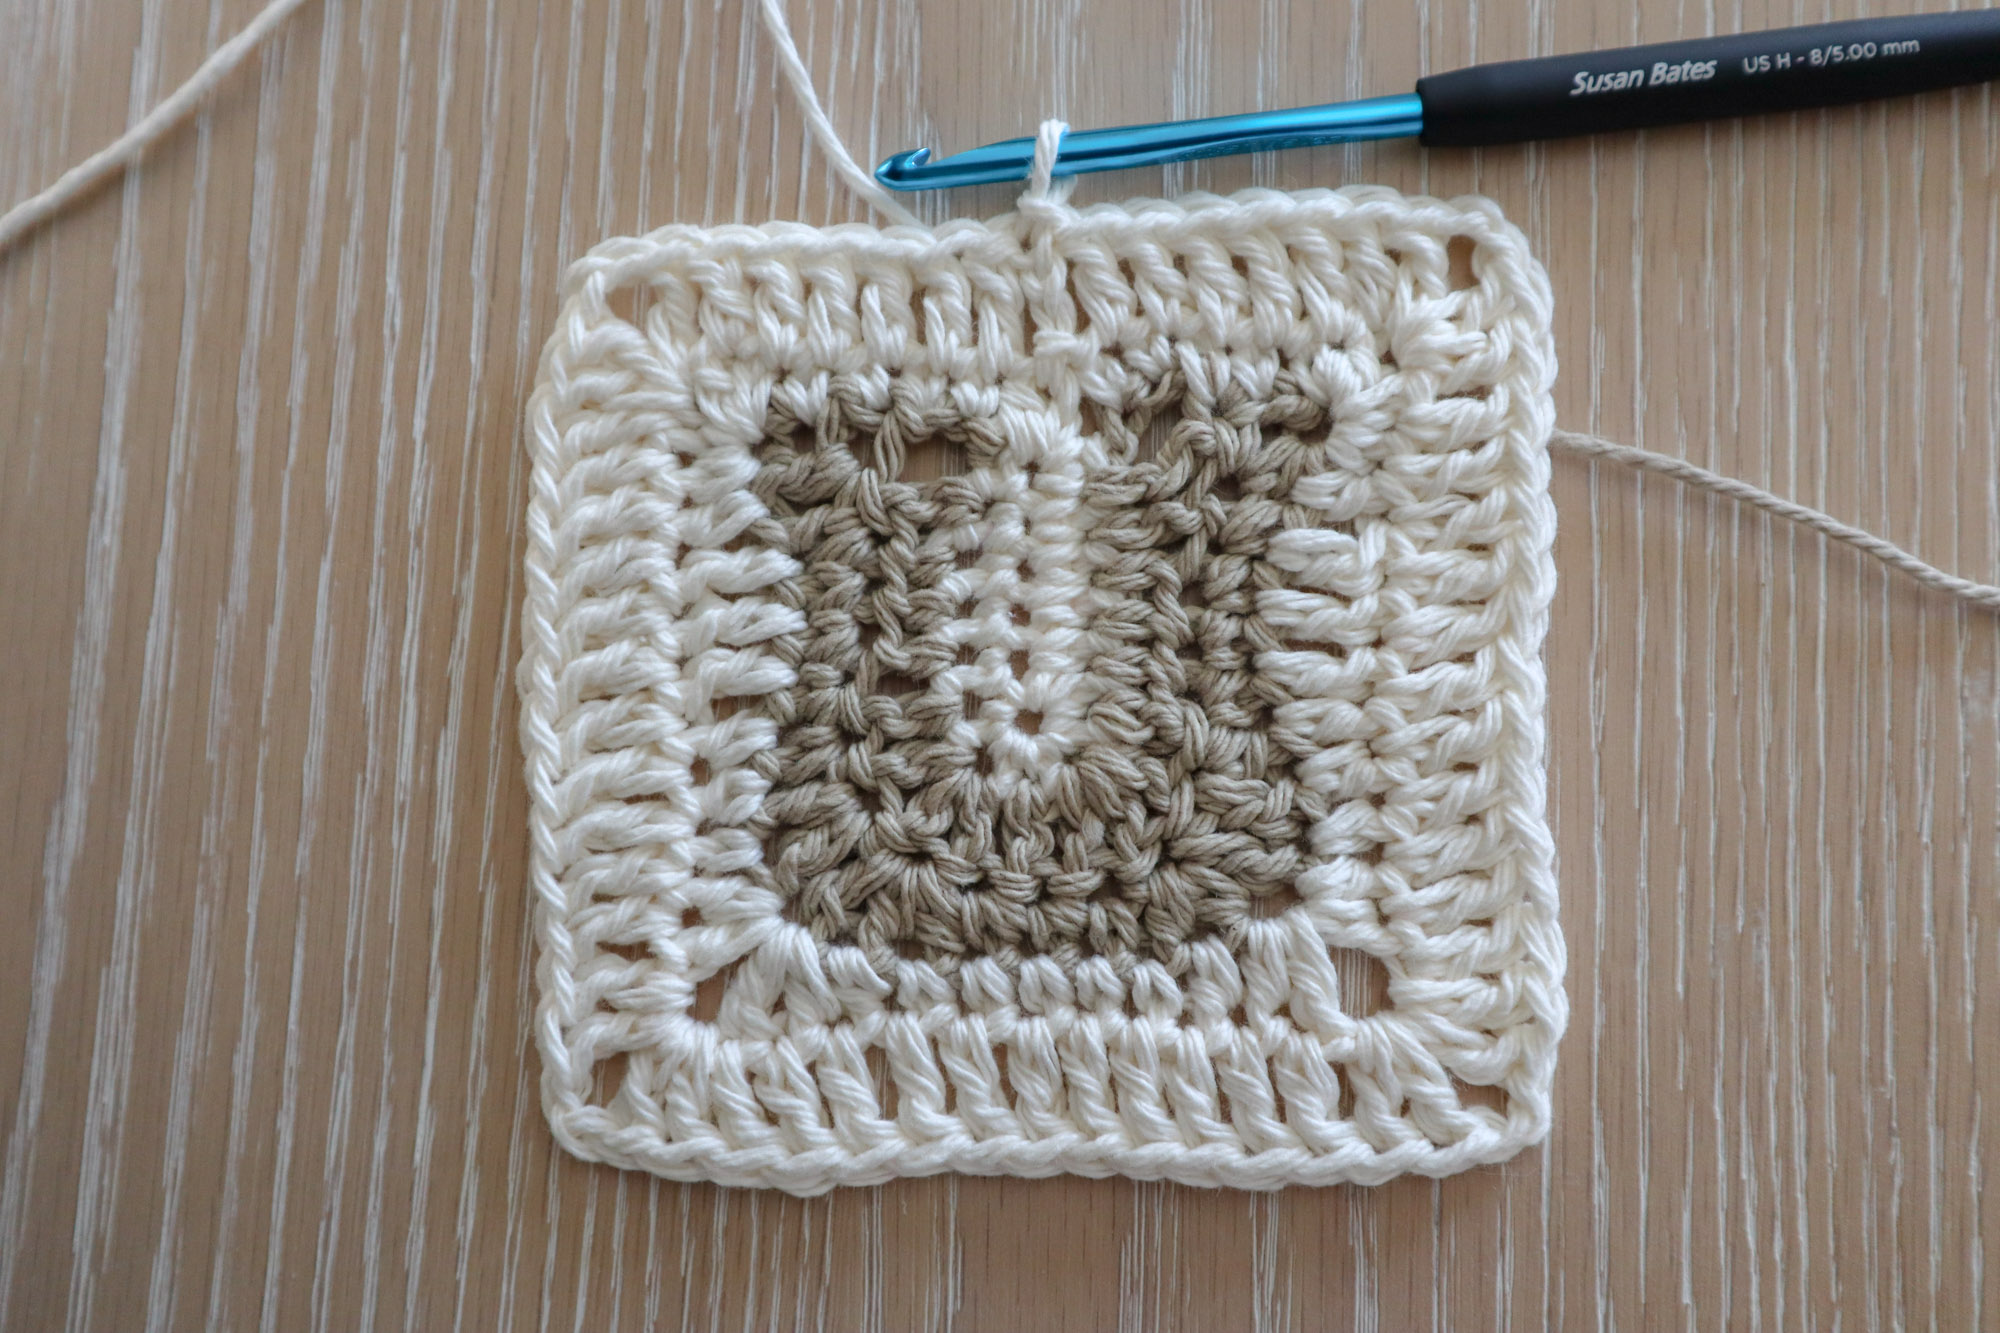
Squaring The Horseshoe
Pick up the border color in the bottom center of the motif and chain 1 (doesn’t count as a stitch). Working along the bottom edge of the motif, work 1hdc in the center of the border color piece we made at the beginning.
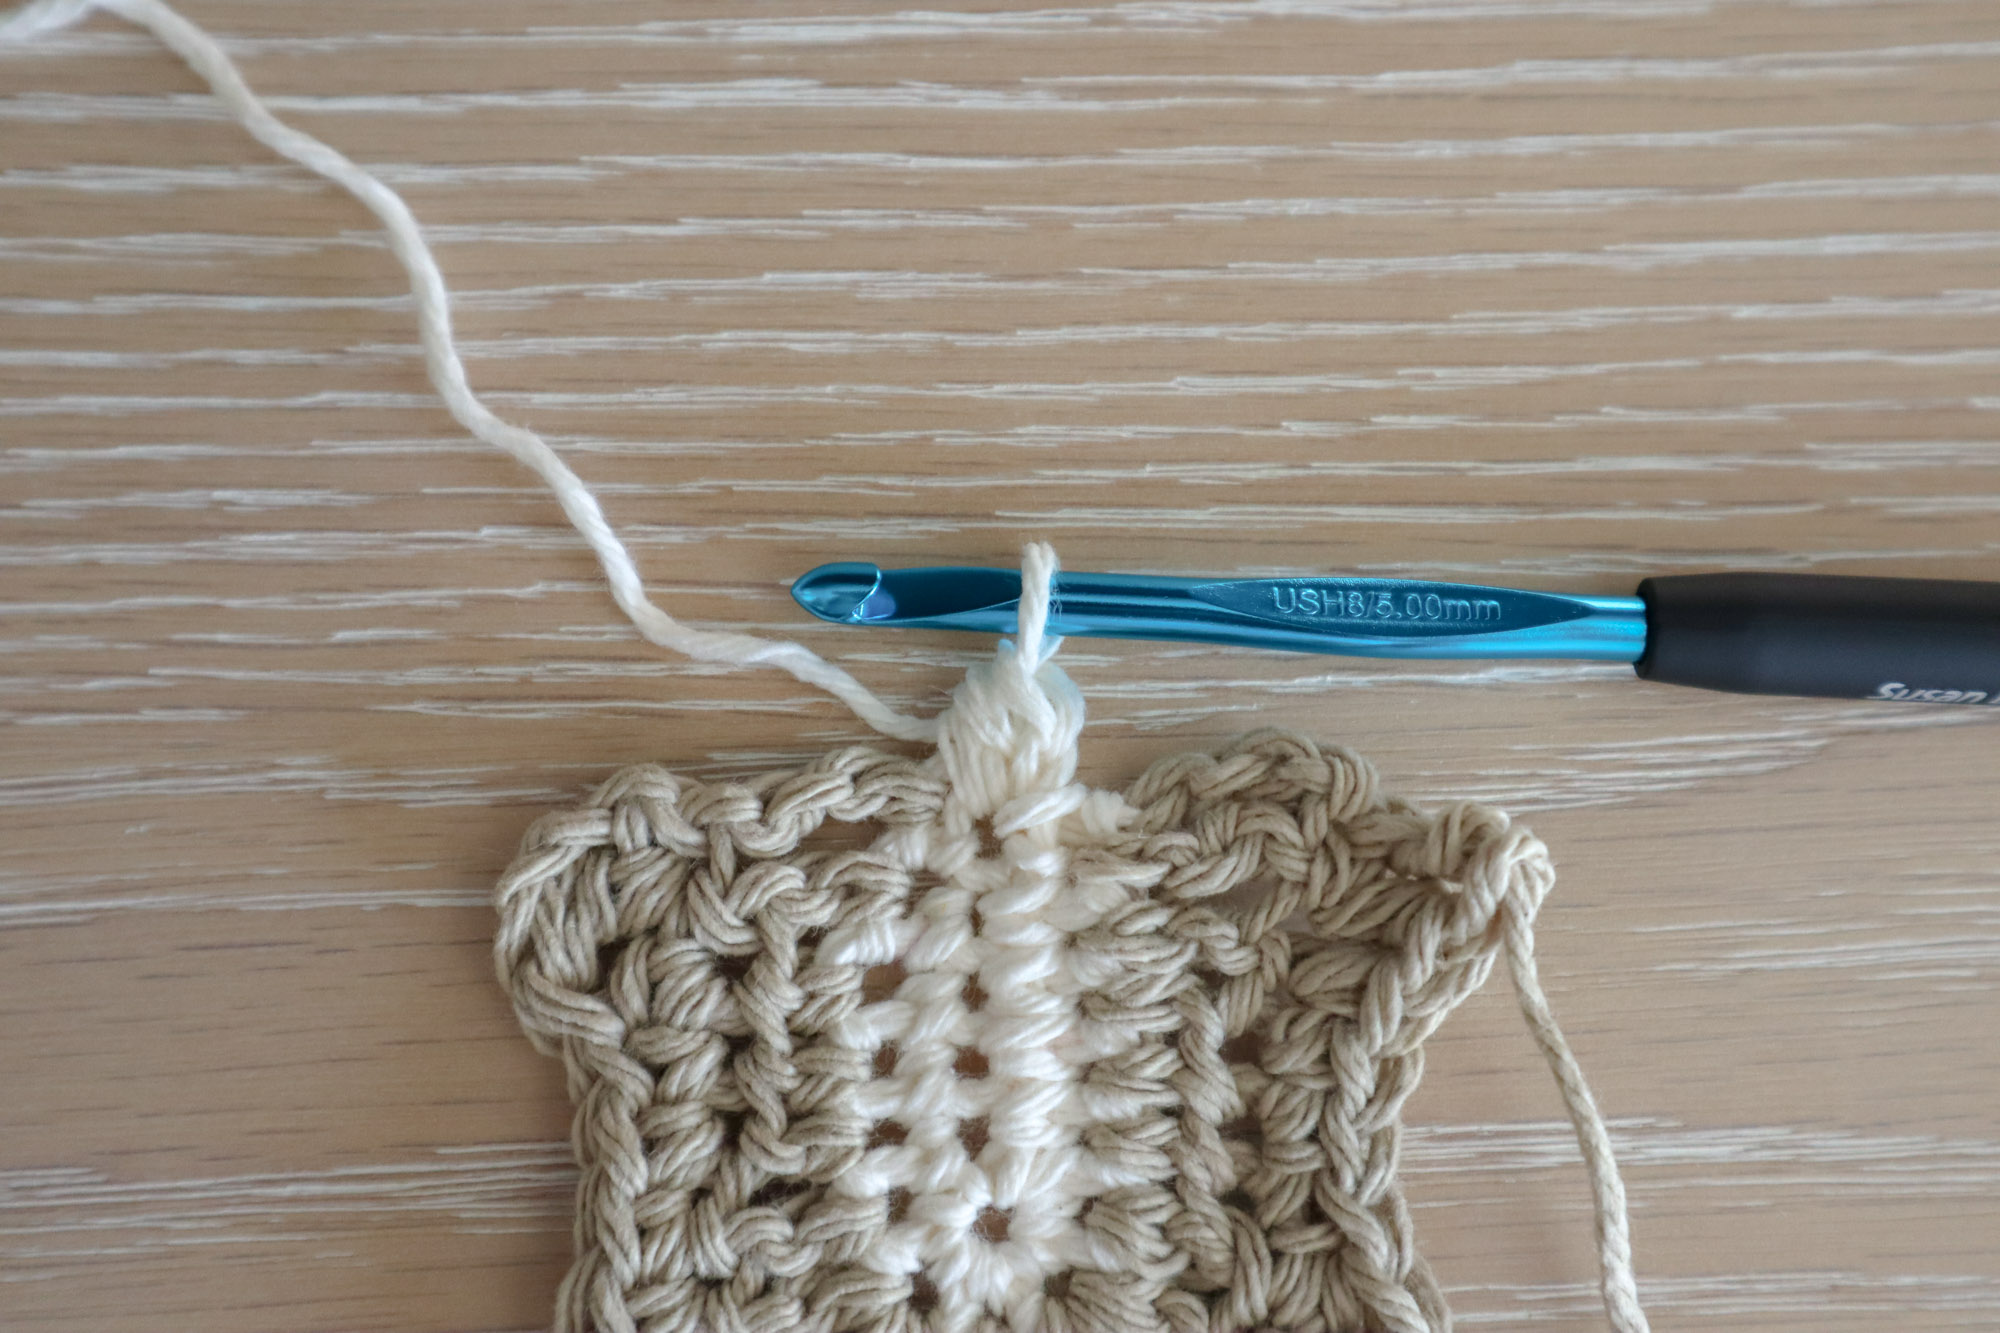
Work 4 sc evenly along the bottom edge. In the dc from the start of the prev row, work 1sc, 1hdc, ch2, 2sc all in that same st.
You just worked halfway along the bottom of the motif and completed the first corner
1hdc in the next st, 1dc in each of the next 3 sts. 1hdc in each of the next two sts. 1sc in the next st. Into the next st, work 2hdc, ch2, 1dc, 1 hdc all in the same st.
You just worked along the right side of the motif and completed the second corner
Work 1hdc in the next st, work 1sc in each of the next 5sts. 1hdc in the next st. Into the next st, work 1hdc, 1dc, ch2, 2hdc all in the same st.
You just worked along the top of the motif and completed the third corner
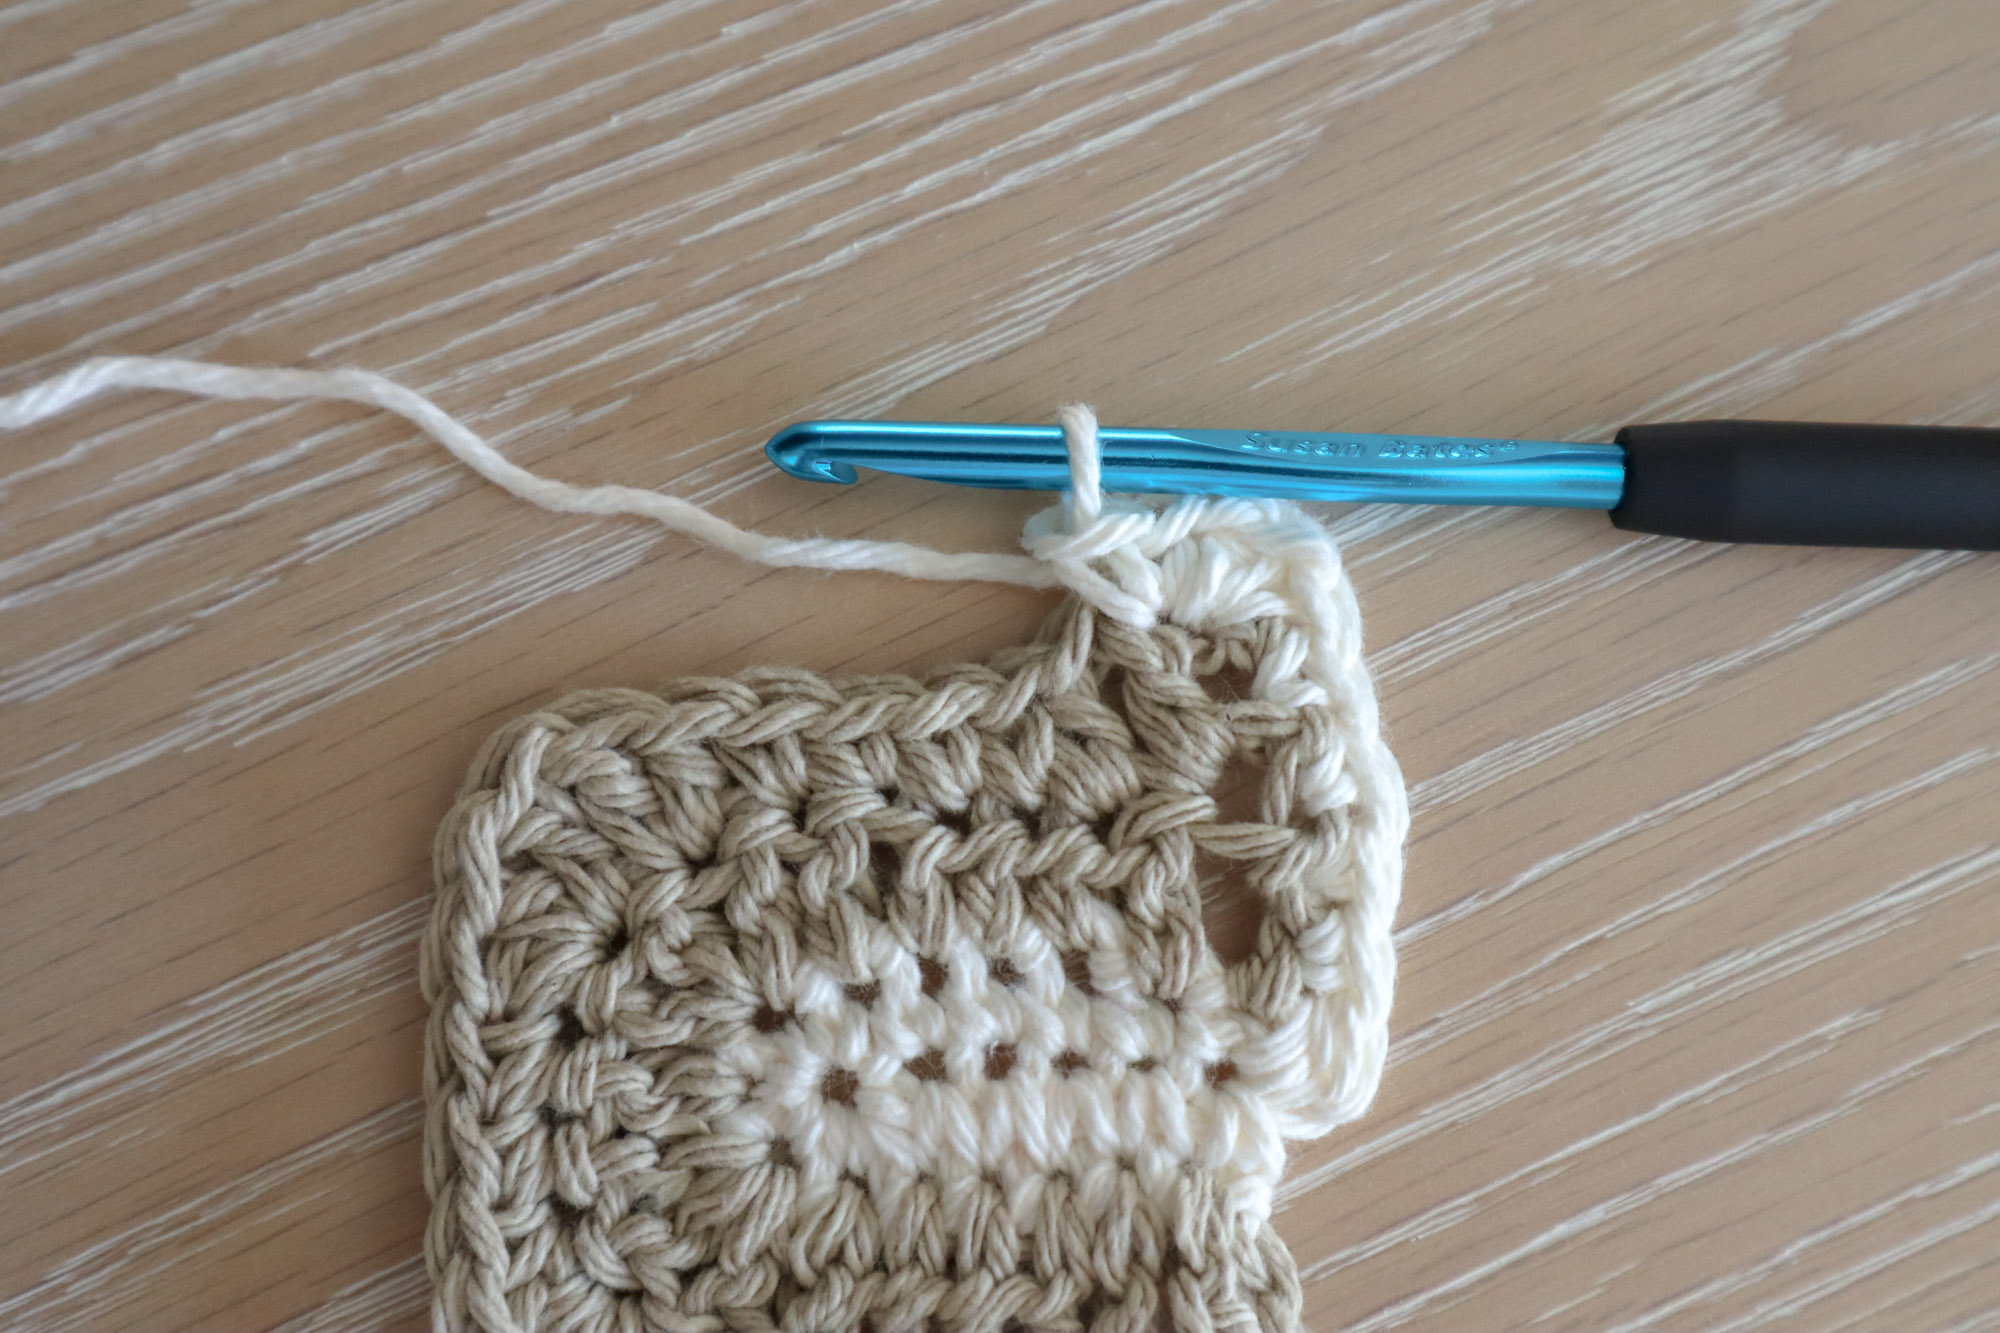
Work 1sc in the next st, work 1hdc in each of the next two sts. Work 1dc in each of the next 3 sts. 1hdc in the next st. Into the last st of he prev row, work 2sc, ch2, 1hdc, 1sc all in that same st. Evenly work 4 sc along the bottom edge. Sl st to the starting hdc to complete the rnd.
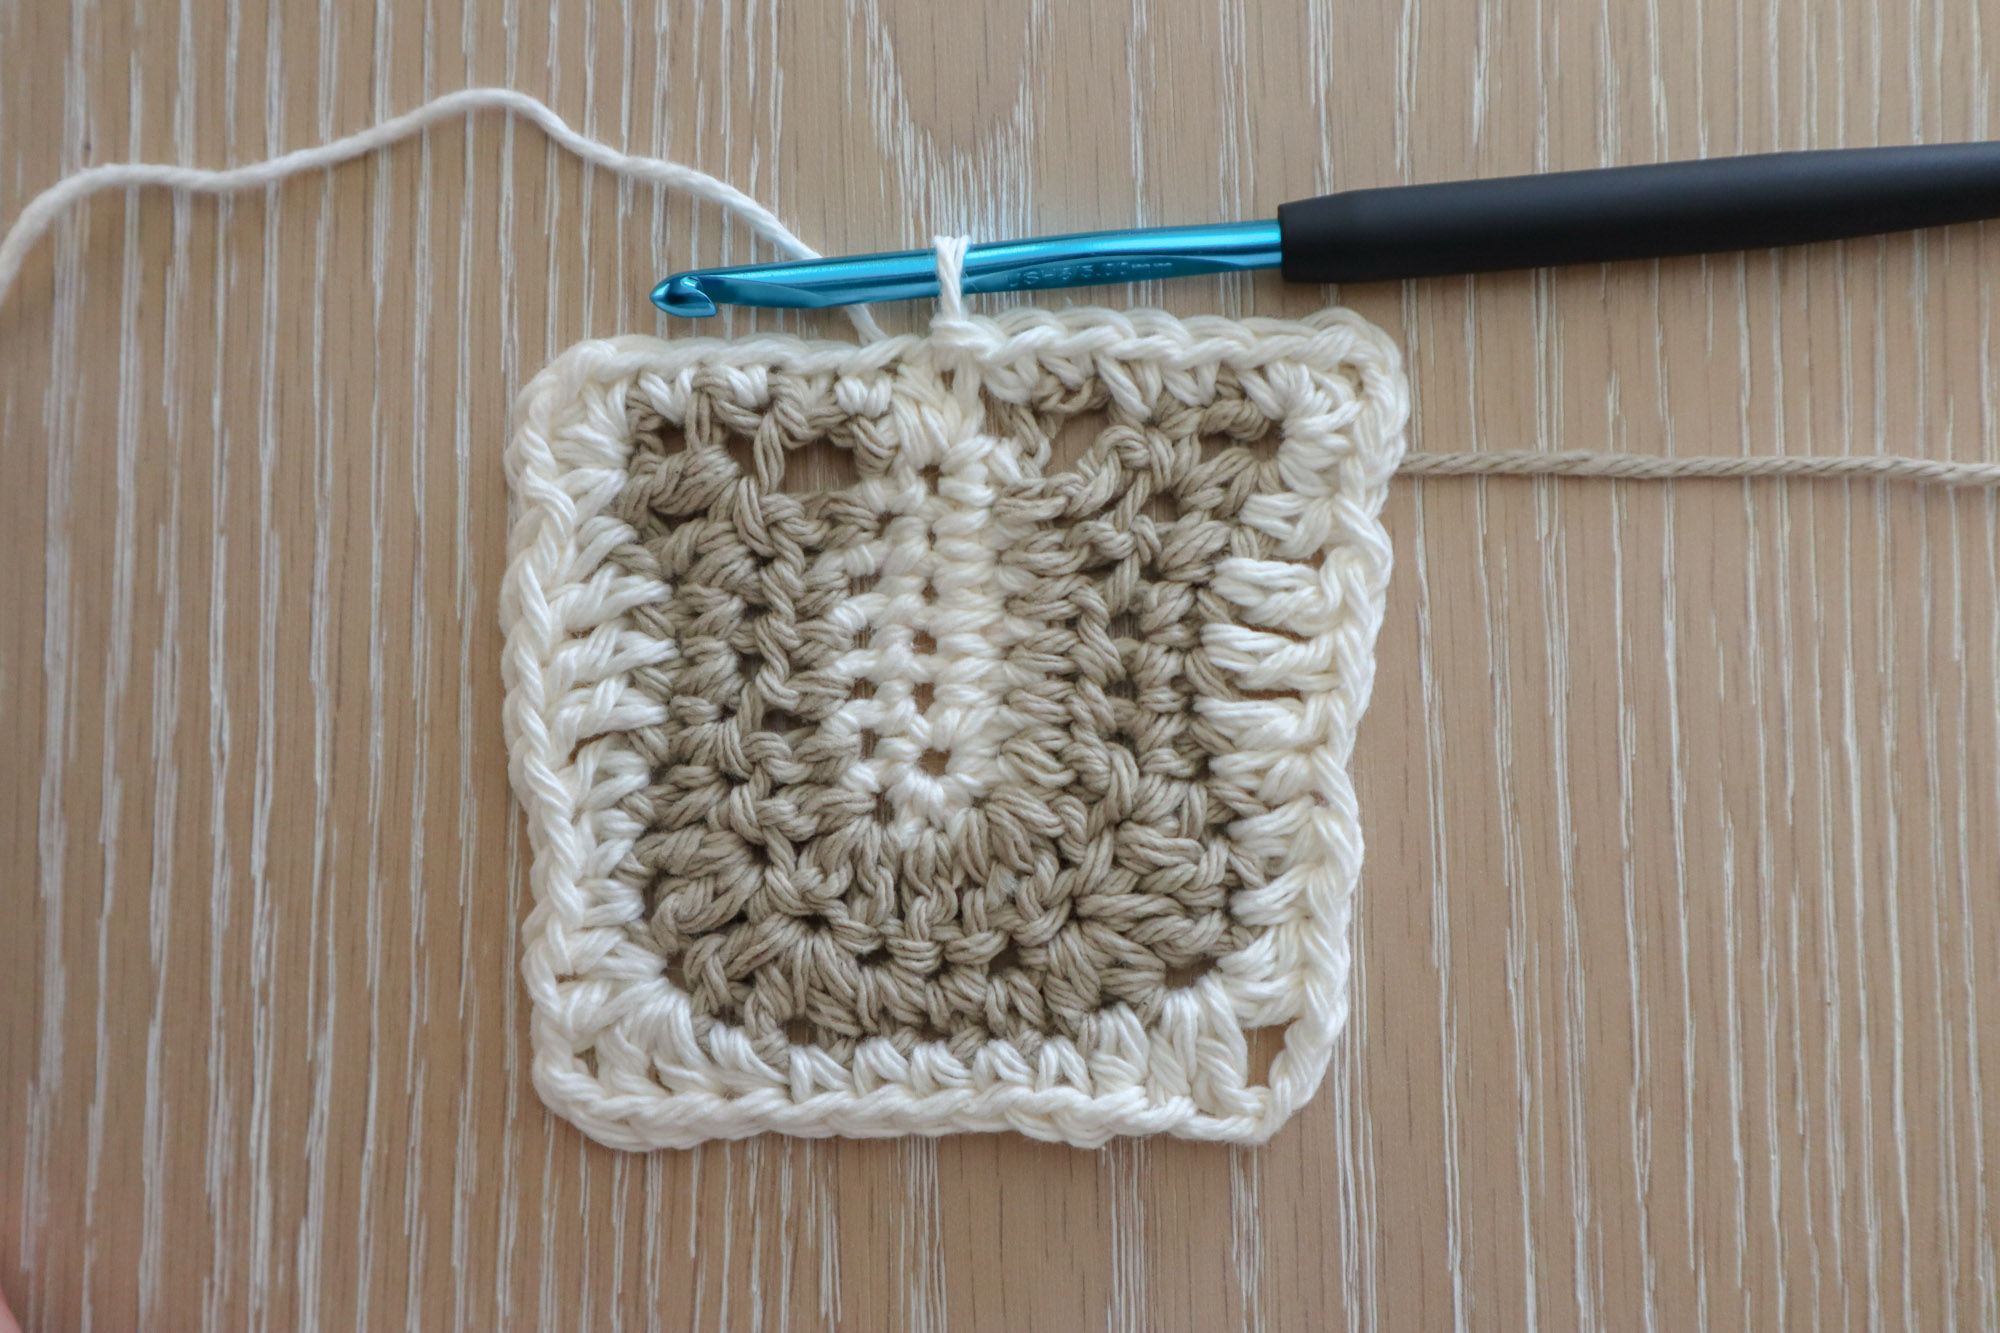
Round 6
Ch3 (counts as 1dc). Do not turn your work. Work 1dc in each stitch from the prev rnd. Into the first ch2 corner space, work 1dc, ch2, 2dc. Continue working 1dc in each st from prev rnd and work 2dc, ch2, 2dc into the next two corner ch2 spaces. Into the last corner ch2 space, work 2dc, ch2, 1dc. And then after working each corner and 1dc in each stitch, sl st to starting ch3 to complete the rnd. (15dcs between each corner)
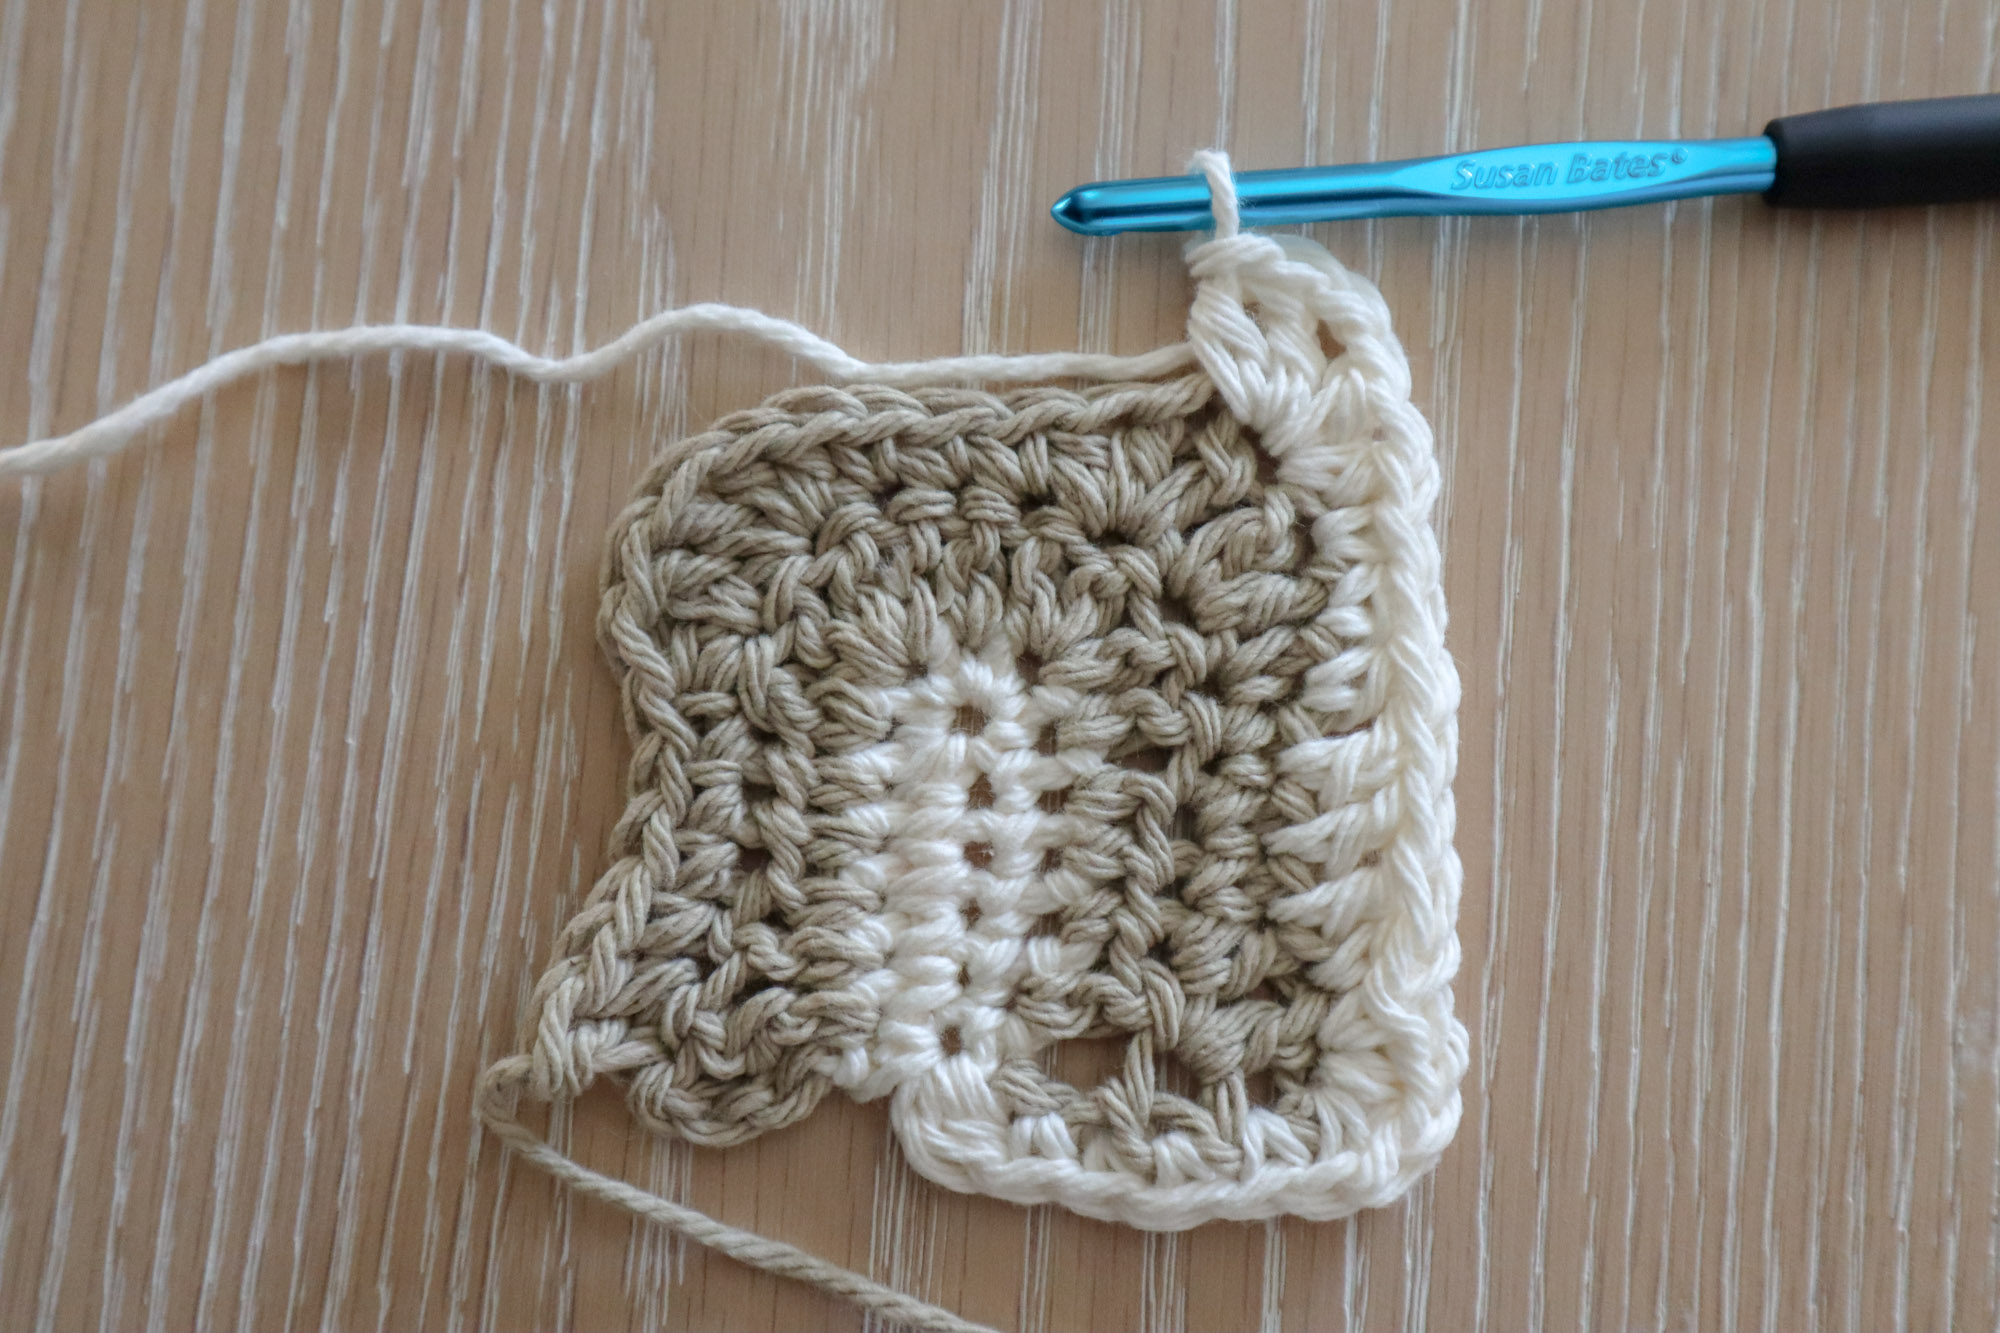
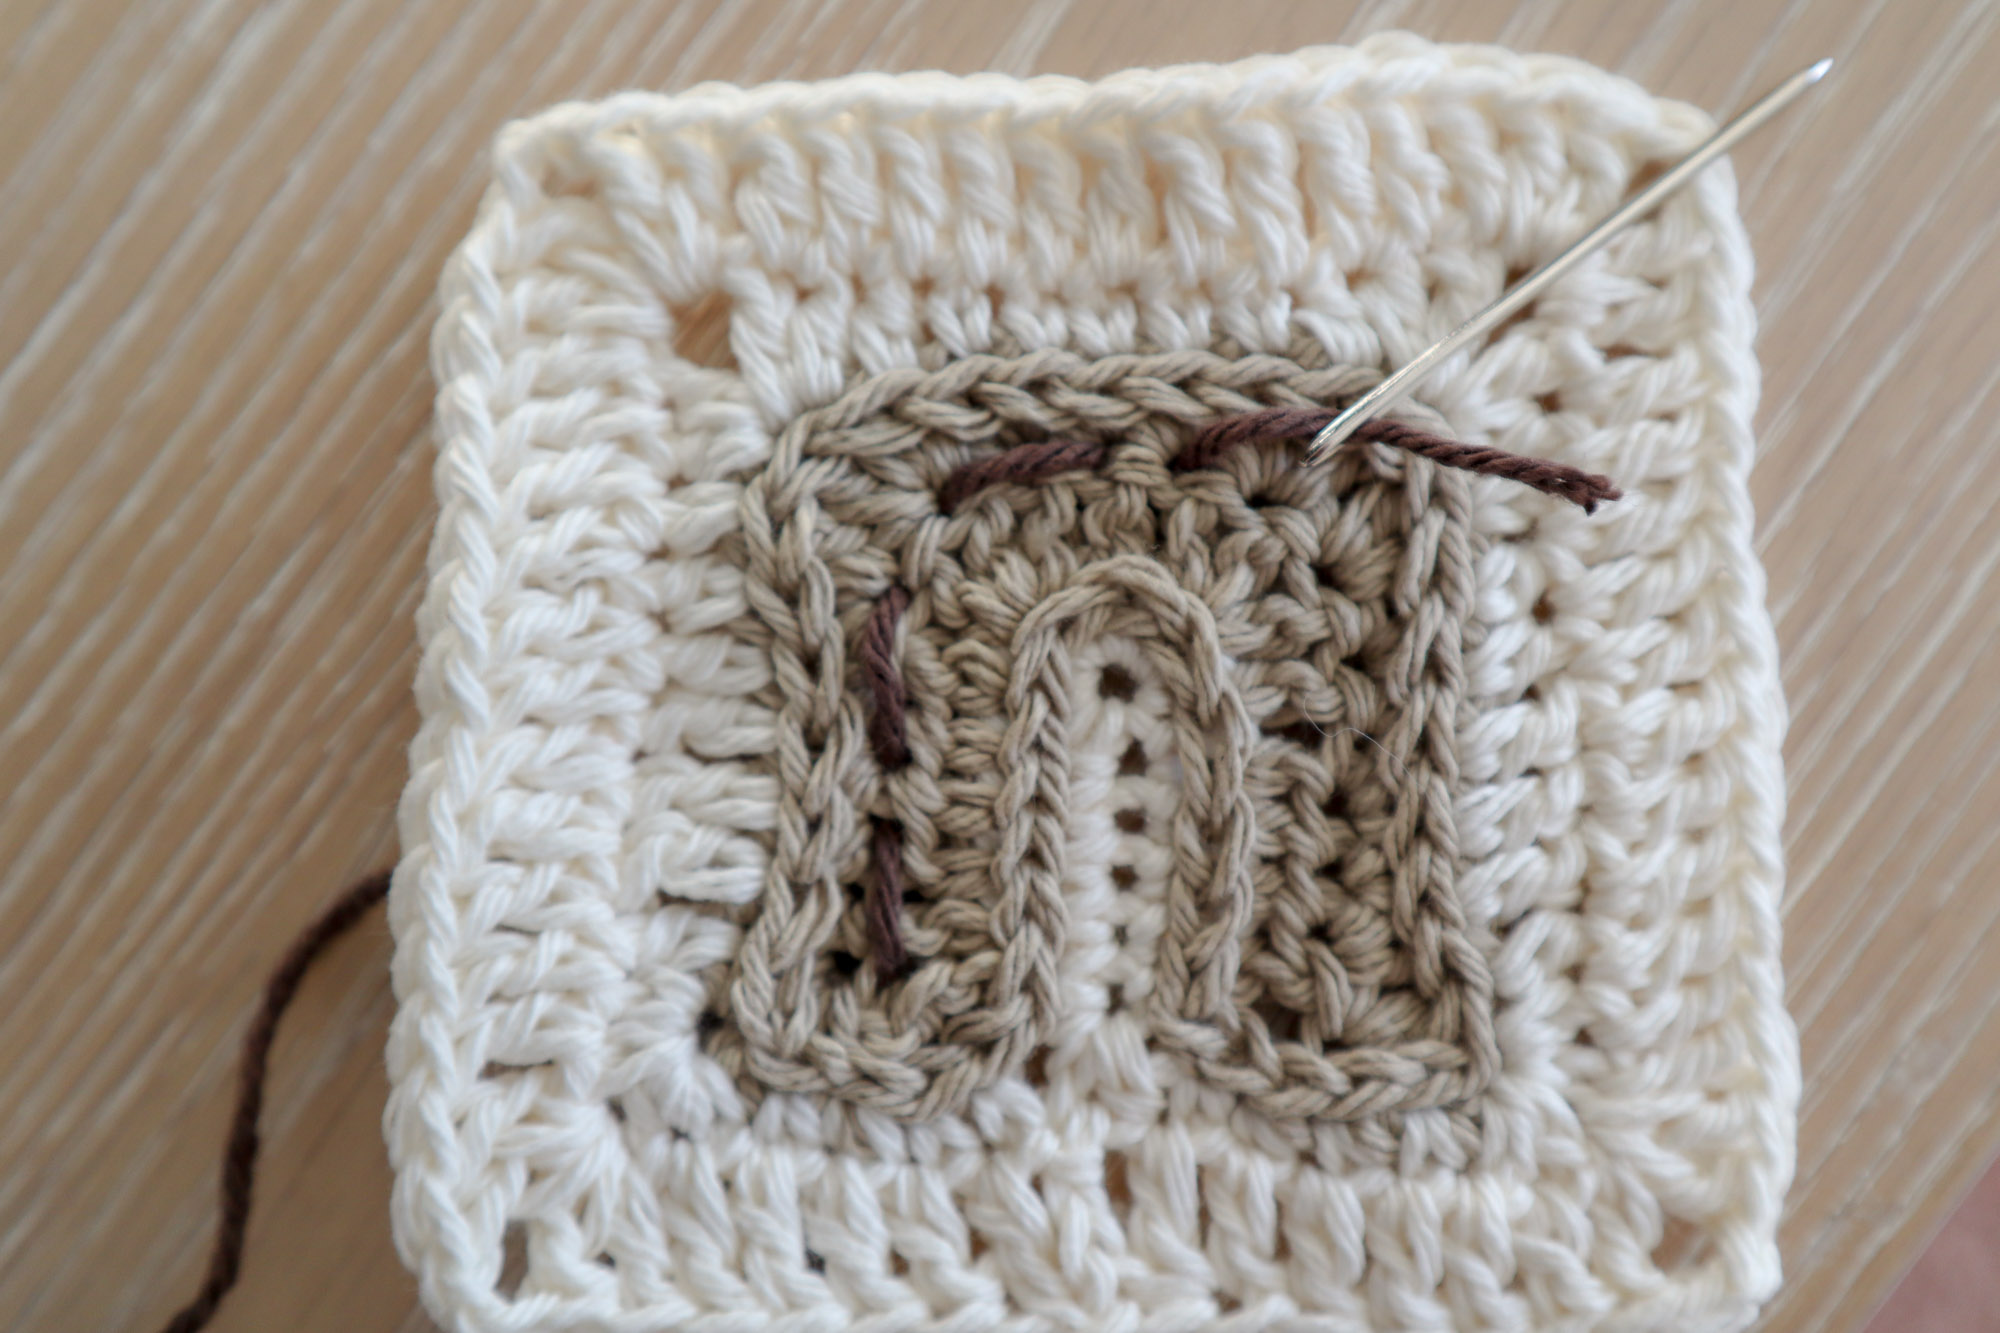
Surface Crochet Outline
With right side facing you, insert hook into a stitch on the outter edge of your horseshoe and find that long yarn tail we left earlier.
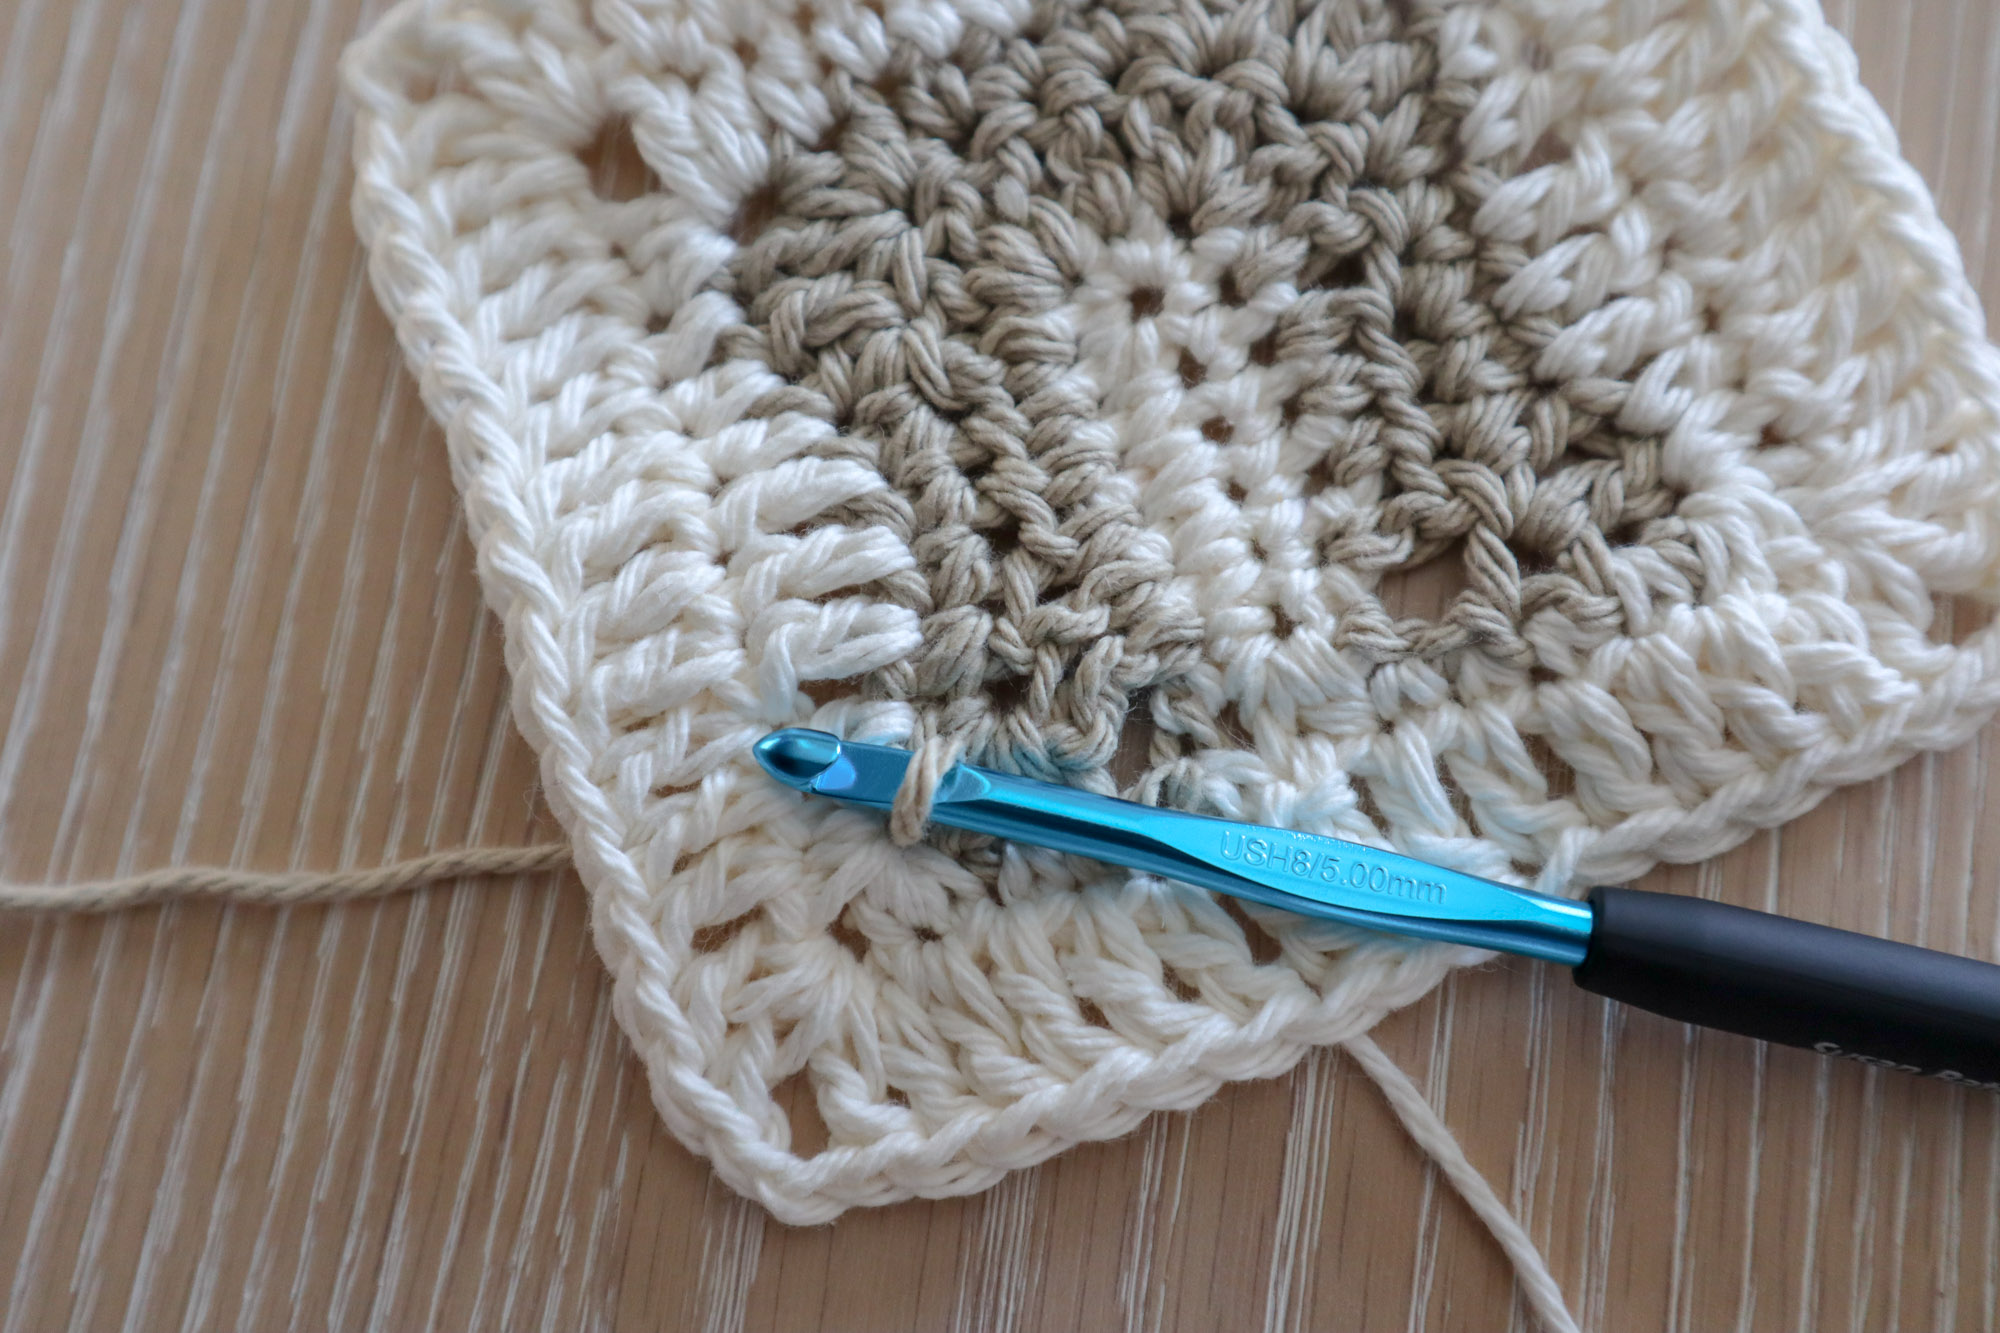
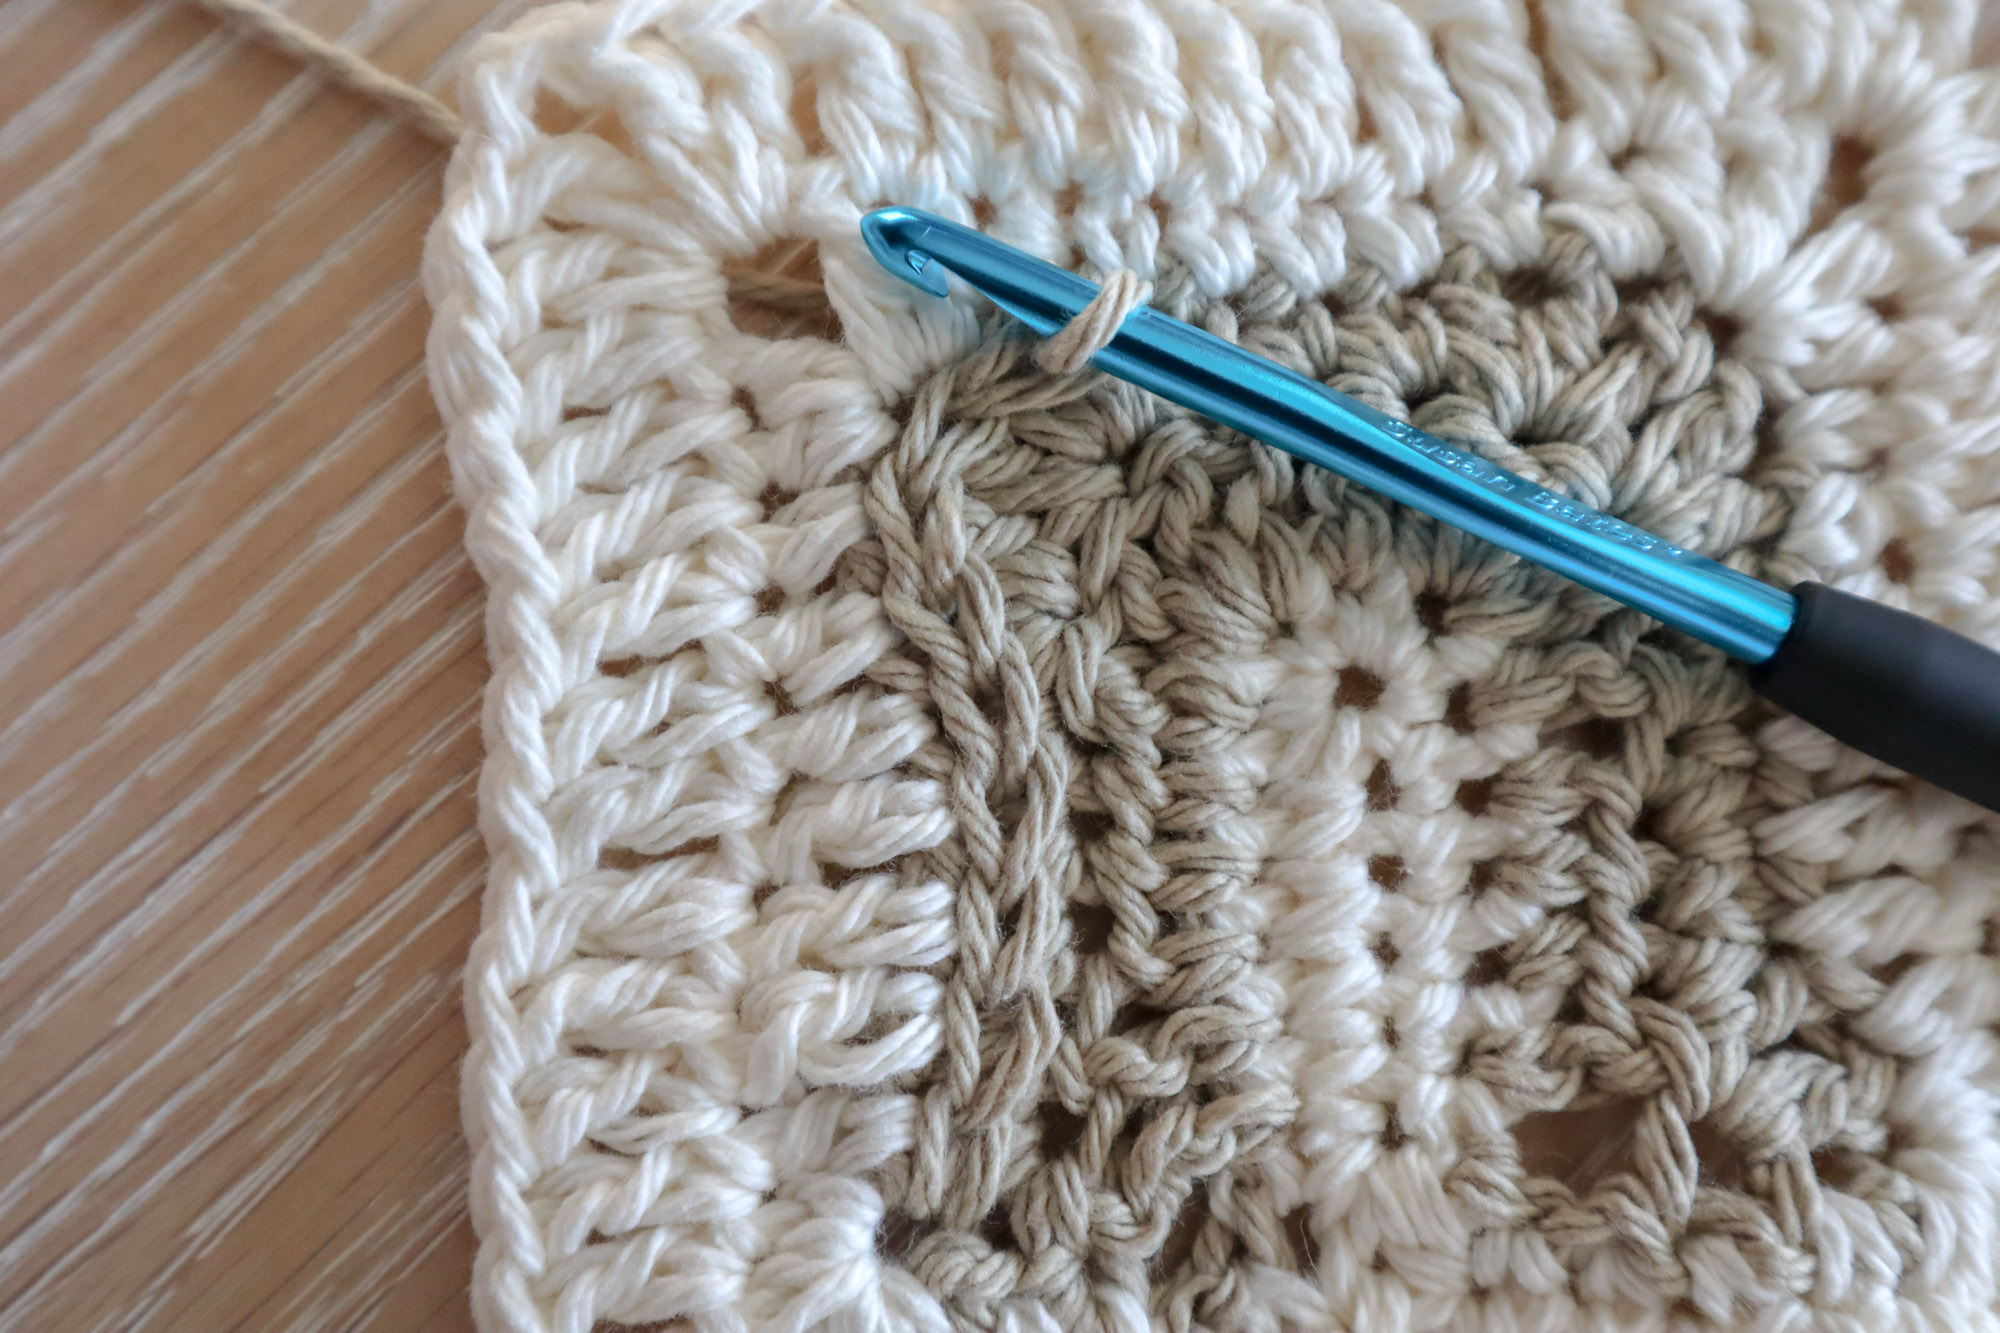
Keeping the yarn in back work in surface crochet around the outline of the horseshoe shape making sure to highlight the distinctive points on the ends. This has the added benefit of closing up the gappy stitches at the bottom of the horseshoe.
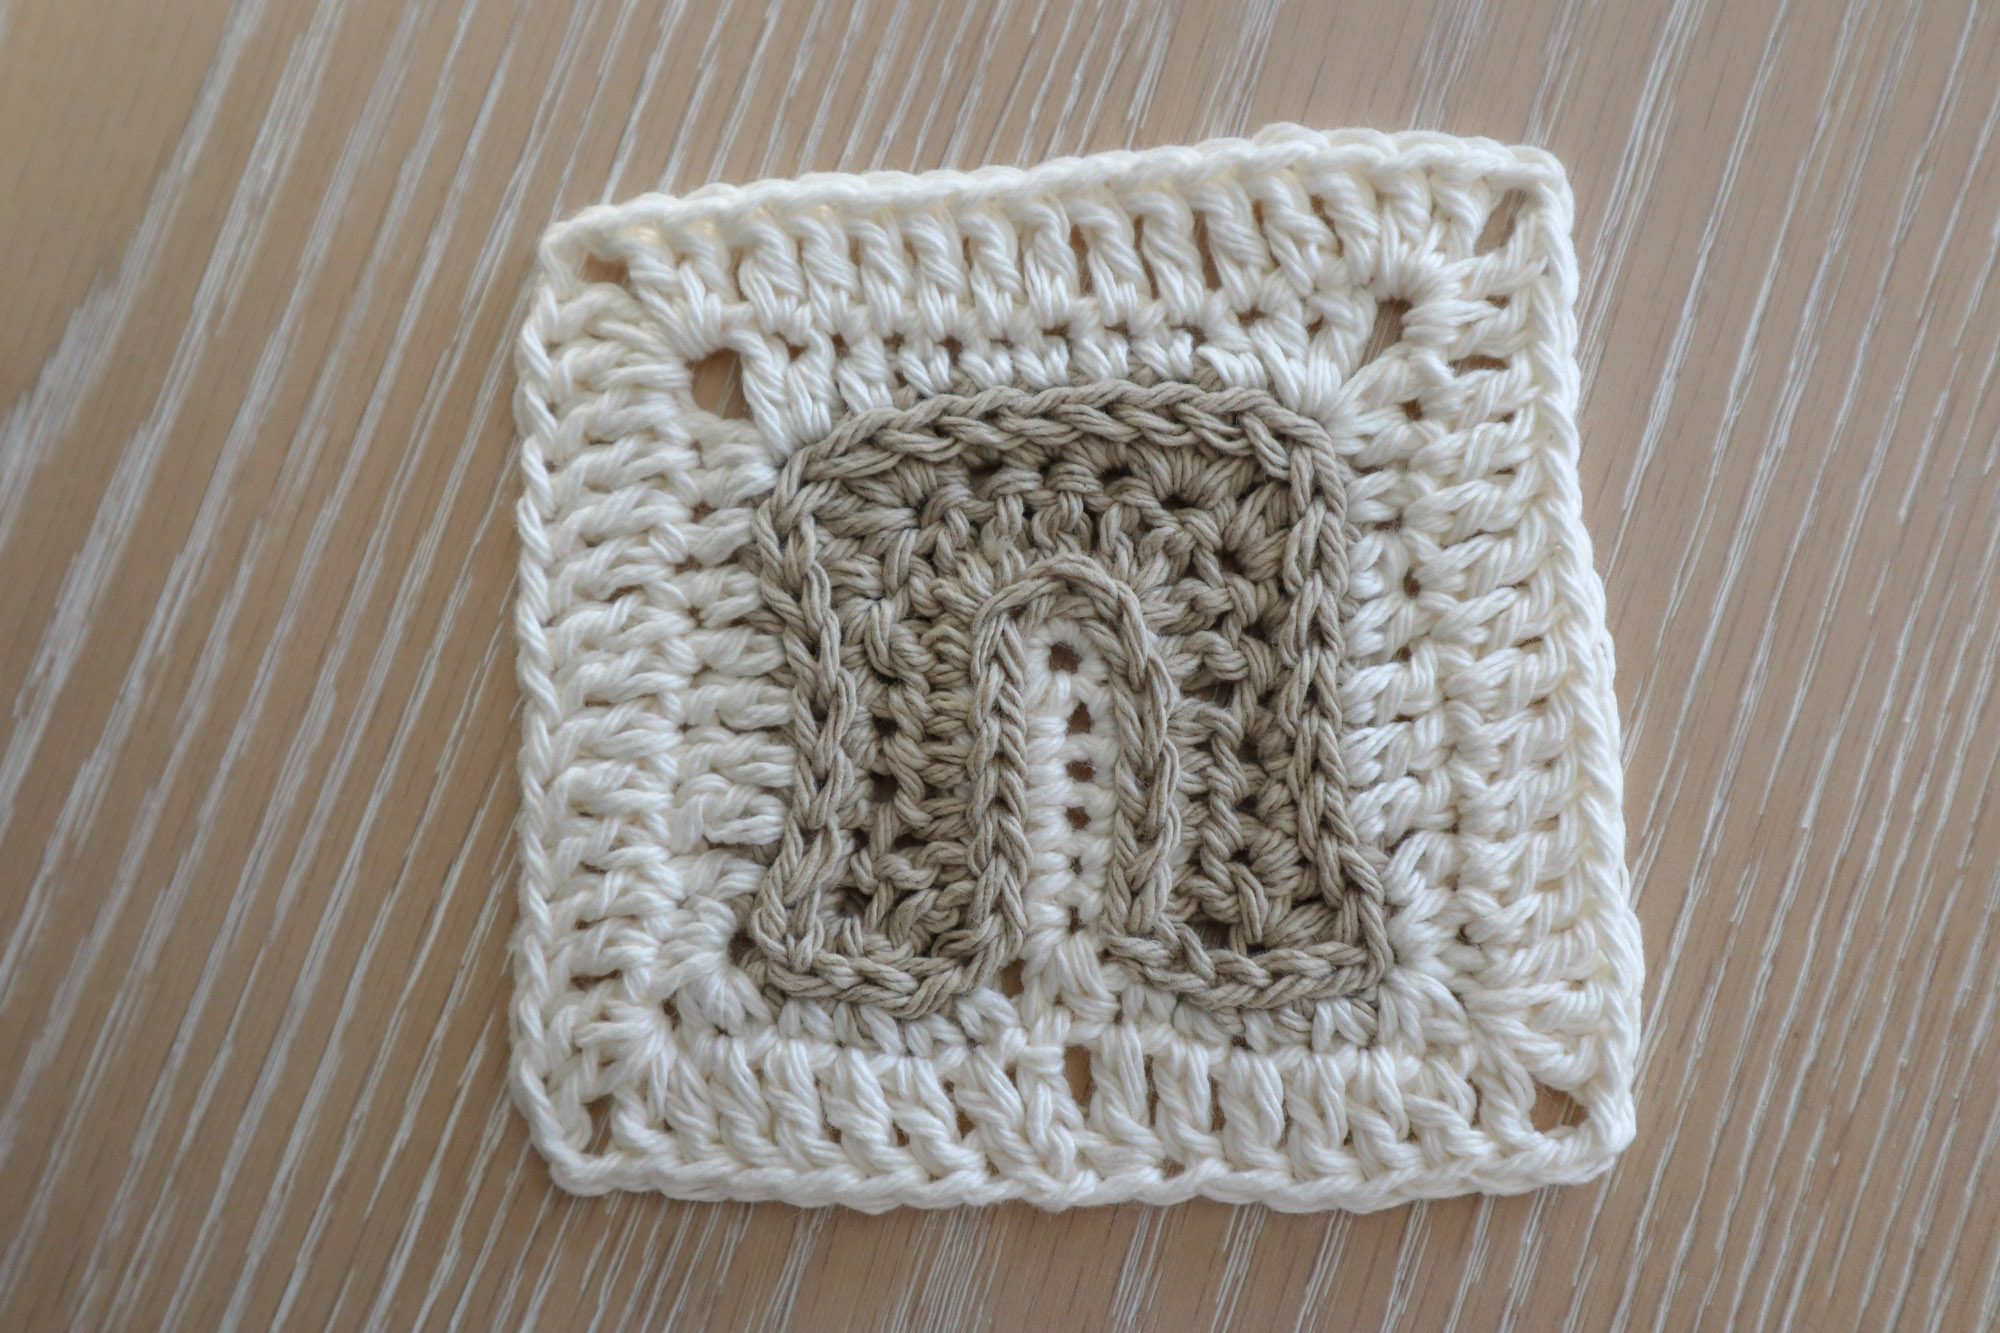
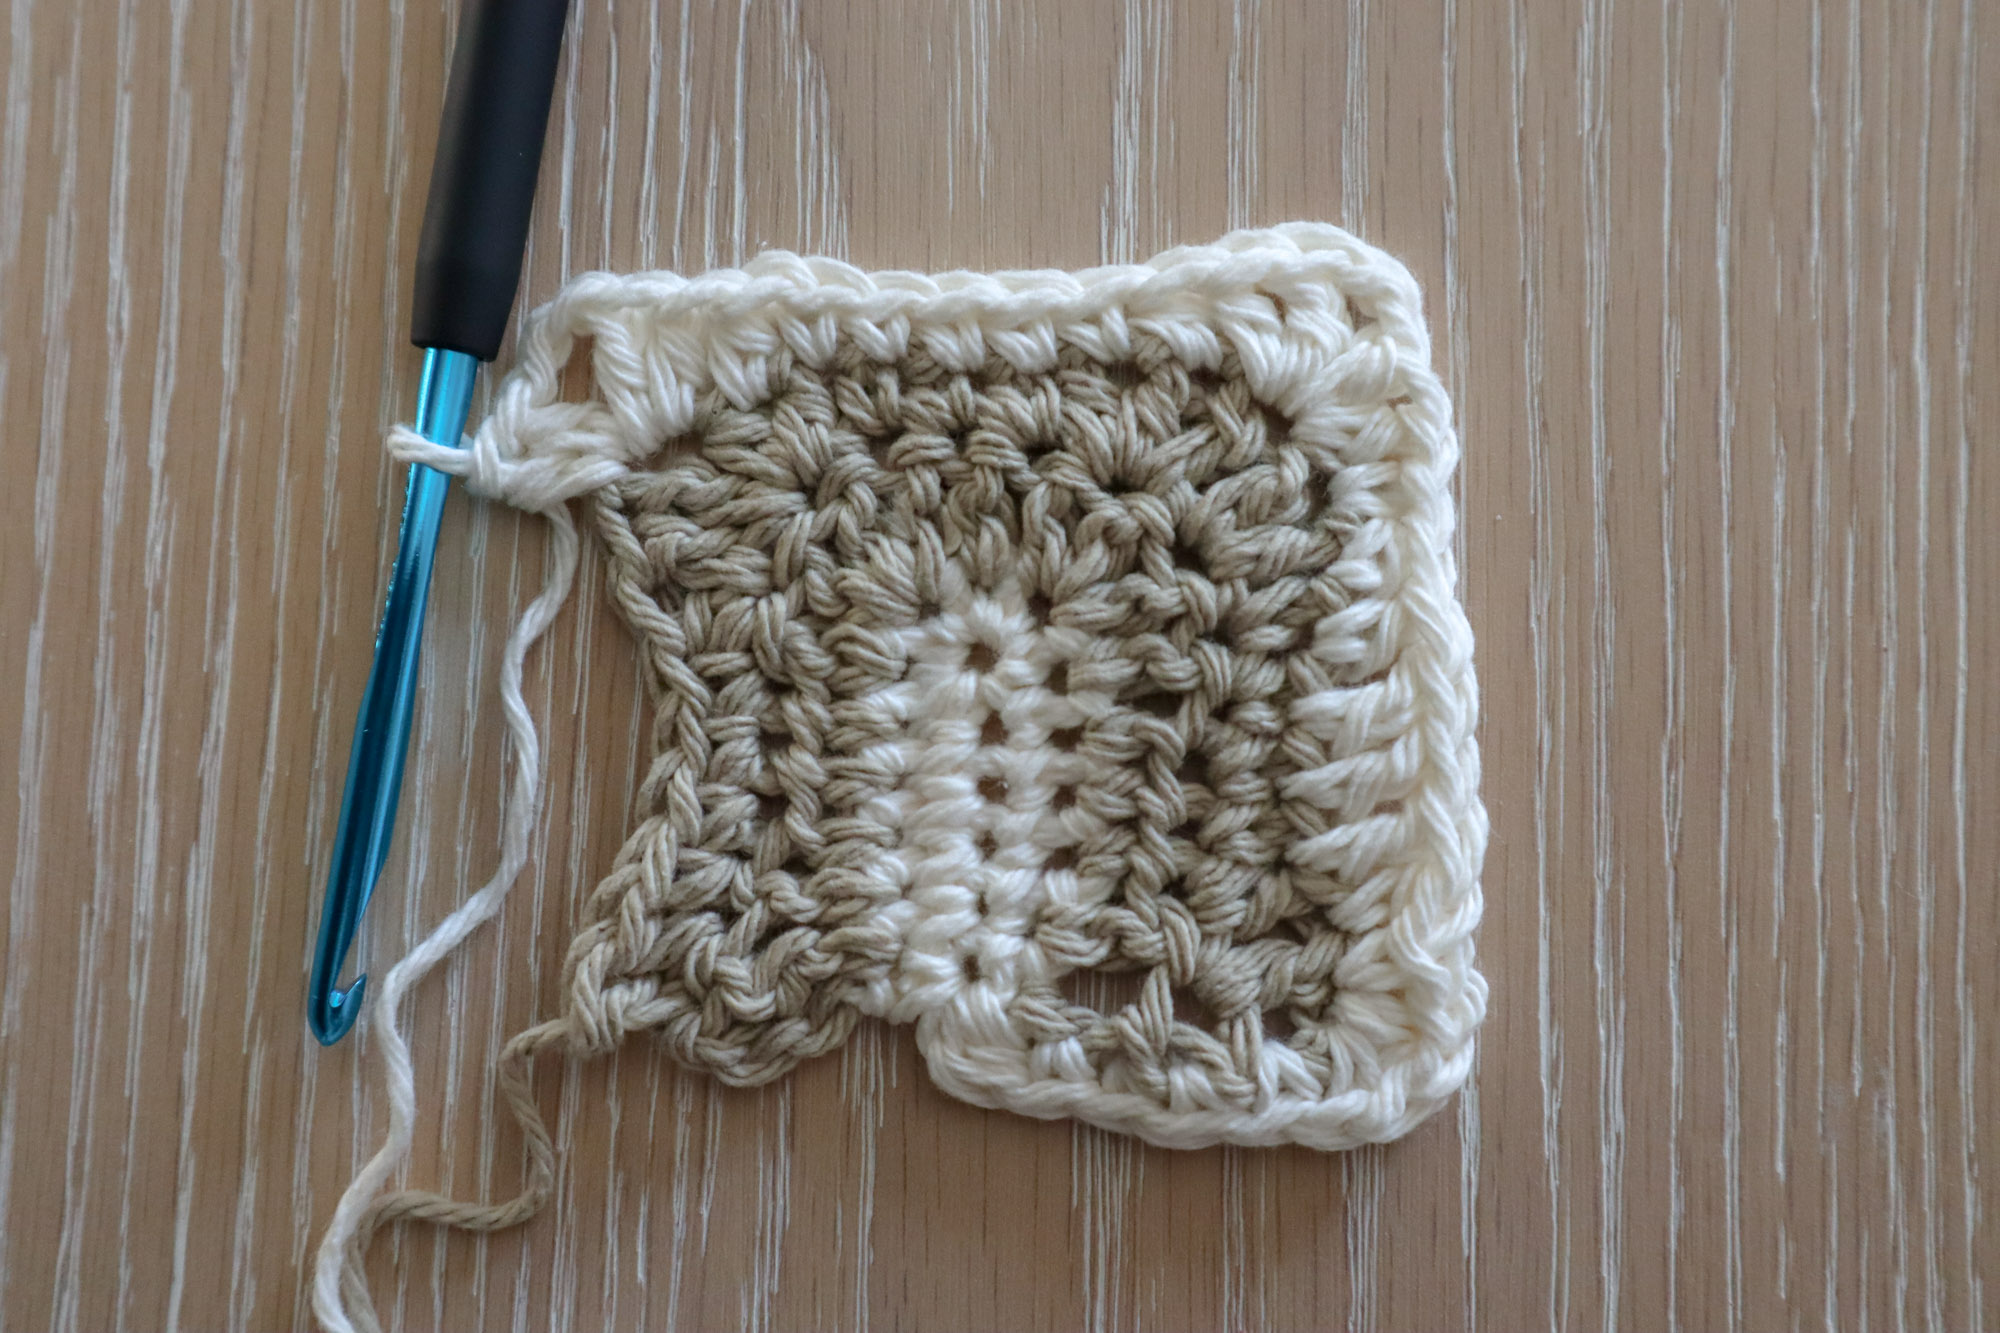
Horseshoe Details
In a third, contrasting color, stitch the nail hole details using a tapestry needle.
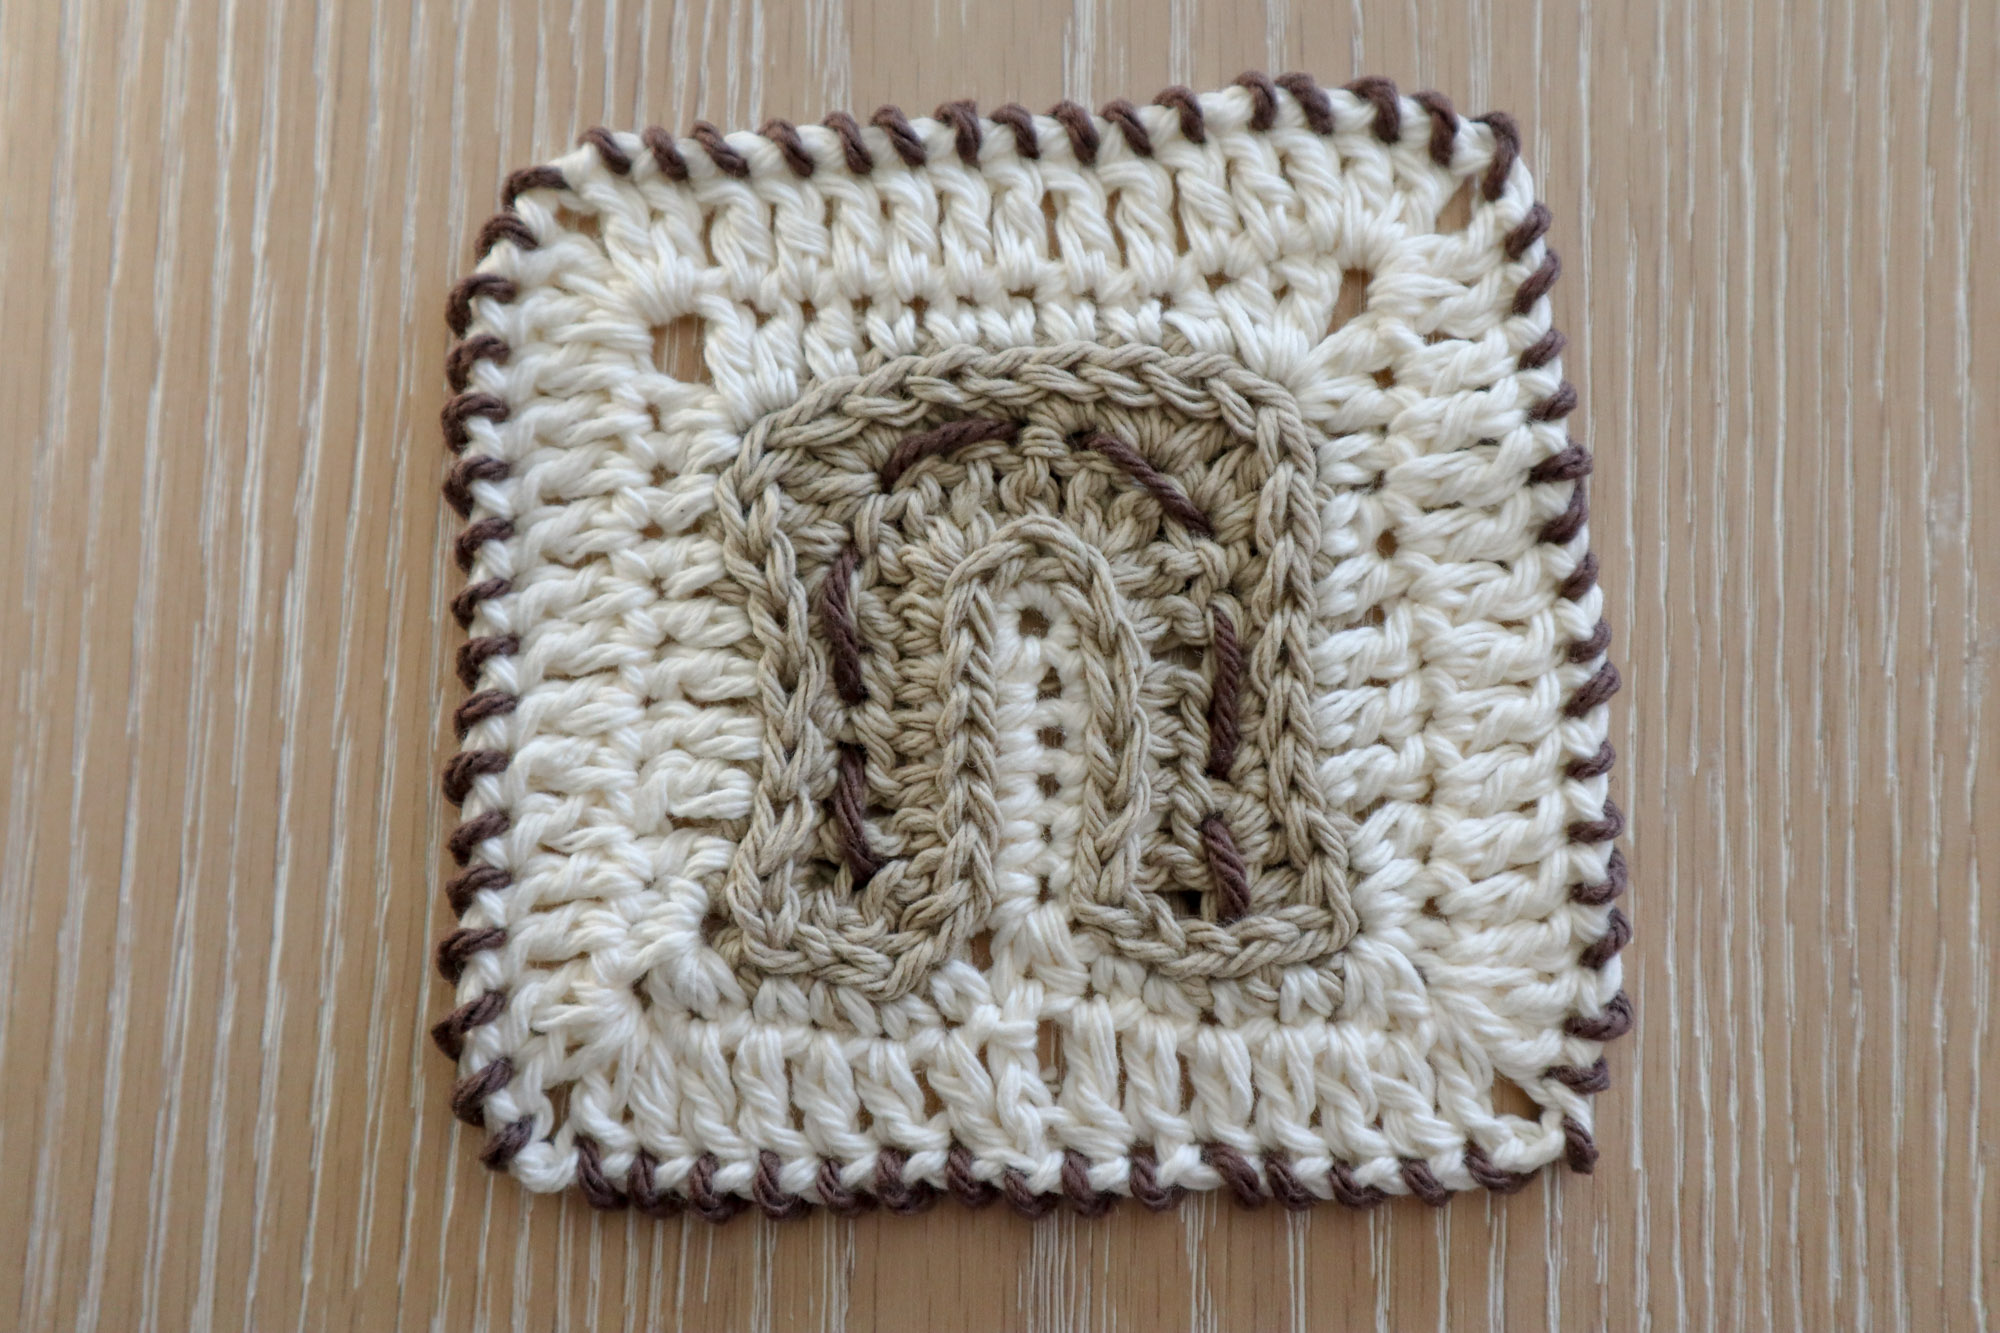
I added an optional whip stitch border around the outer stitches to add a rustic, country charm! This may or may not work for your project depending on how you’d like to join your granny squares.
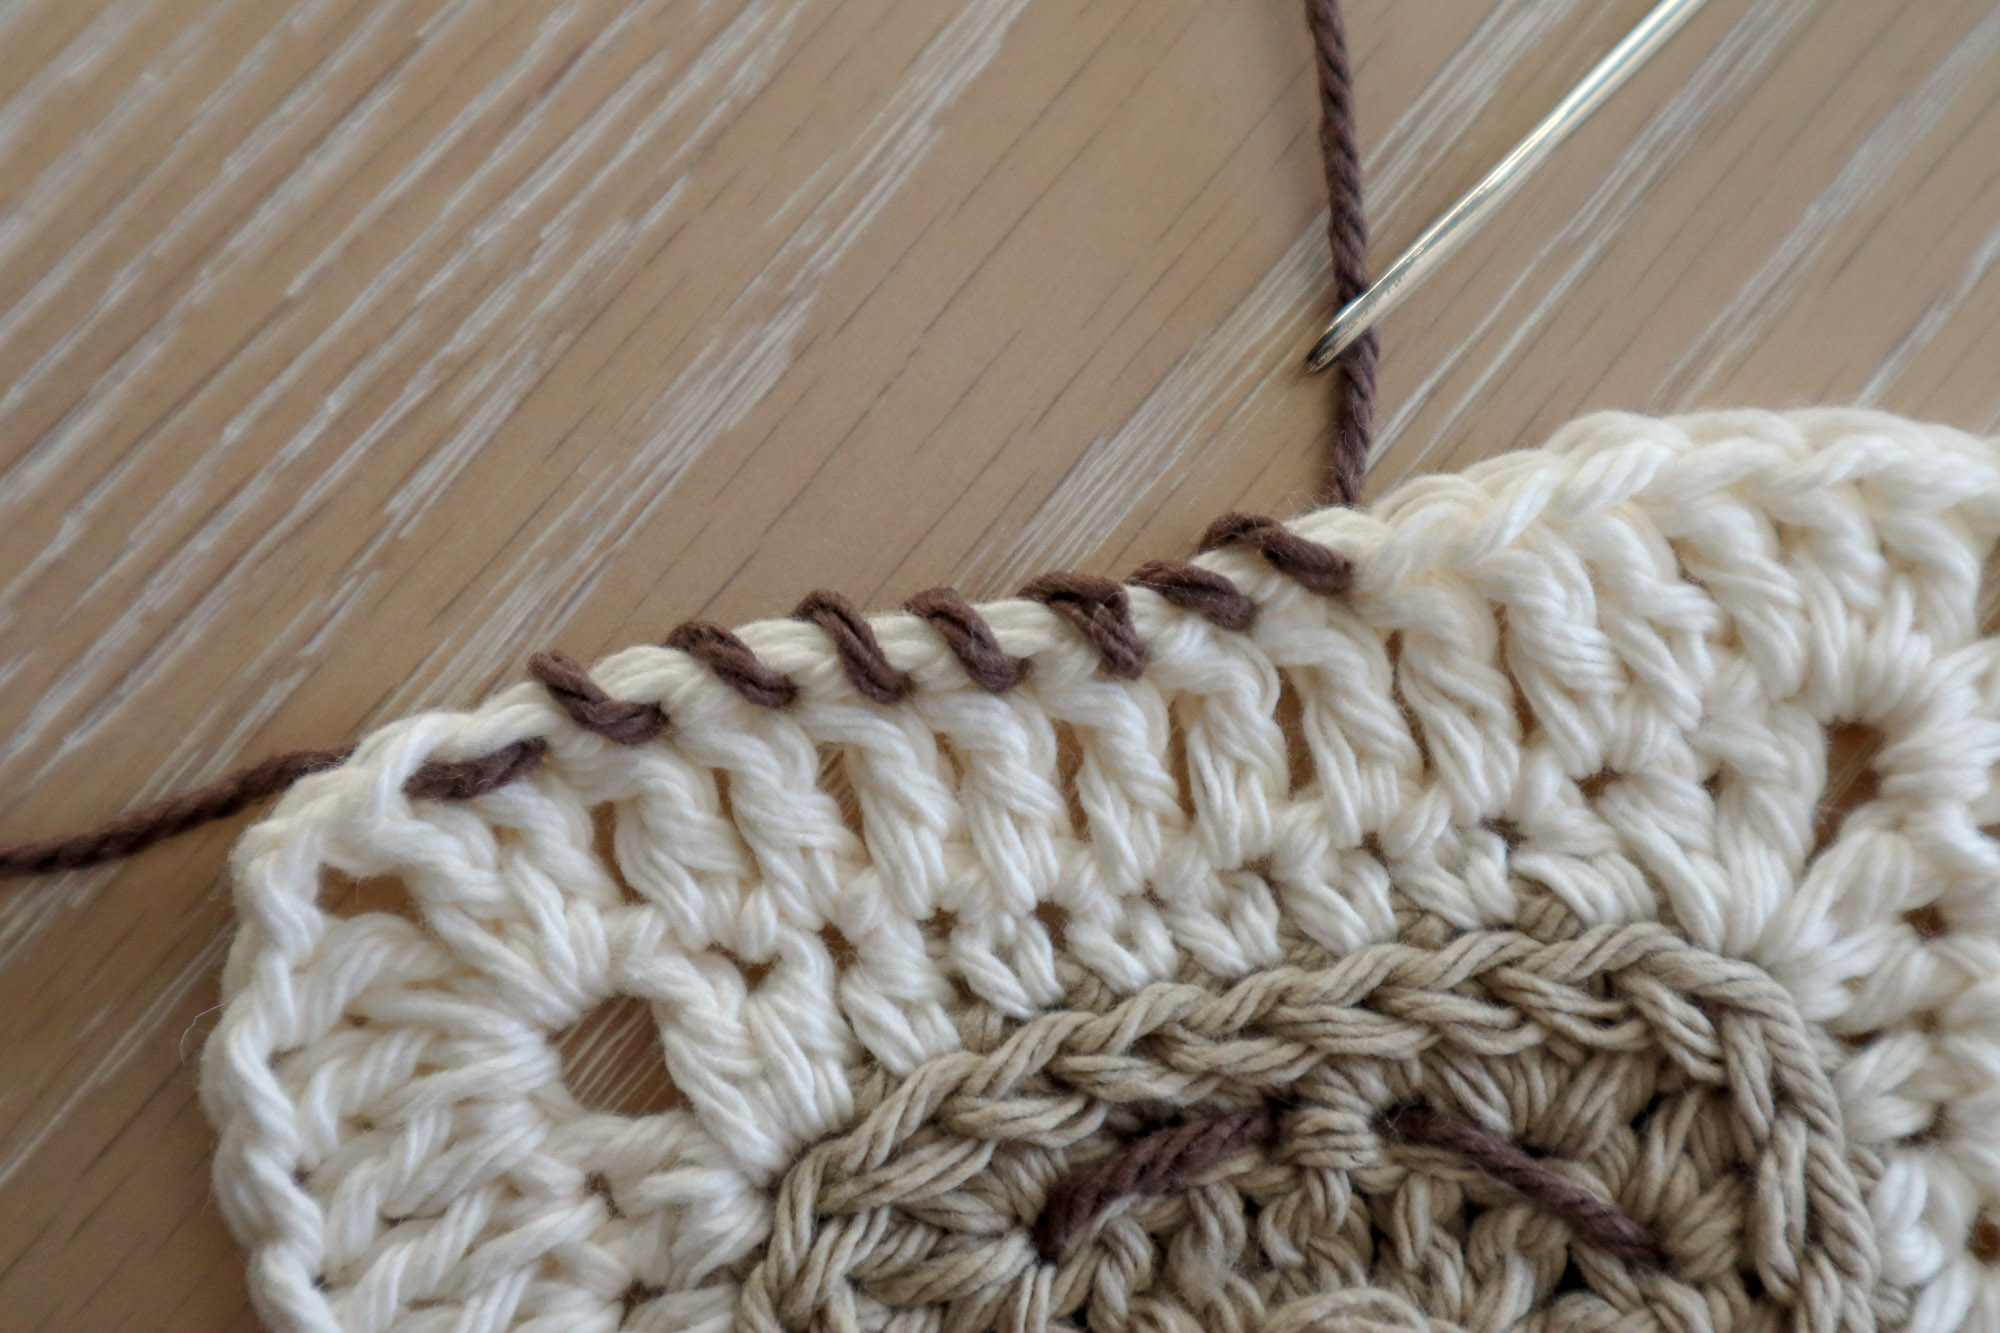
If I wanted to seam this square to others, one option would be to add the whip stitch detail only around the front loops. That way, the back loops remain available to be sewn to other stitches.
Optional Flower
I added some leaves by repeating row 1 with thinner green yarn and a smaller hook. I improvised a little flower that, admittedly, looked more like a star but there are zillions of flower tutorials out there. A little rose would be an adorable addition and give this square major Triple Crown vibes!
And there you have it
The rootin’est tooten’est granny square you ever did see. I especially love the horseshoes exaggerated chunky shape, which gives it such a playful spin. It can be a symbol of good luck for your home, a declaration of love for horses… or both! If you make one, make sure to tag @grannysquarefair so we can see your spin on it! ’till next time!
Pin for later!