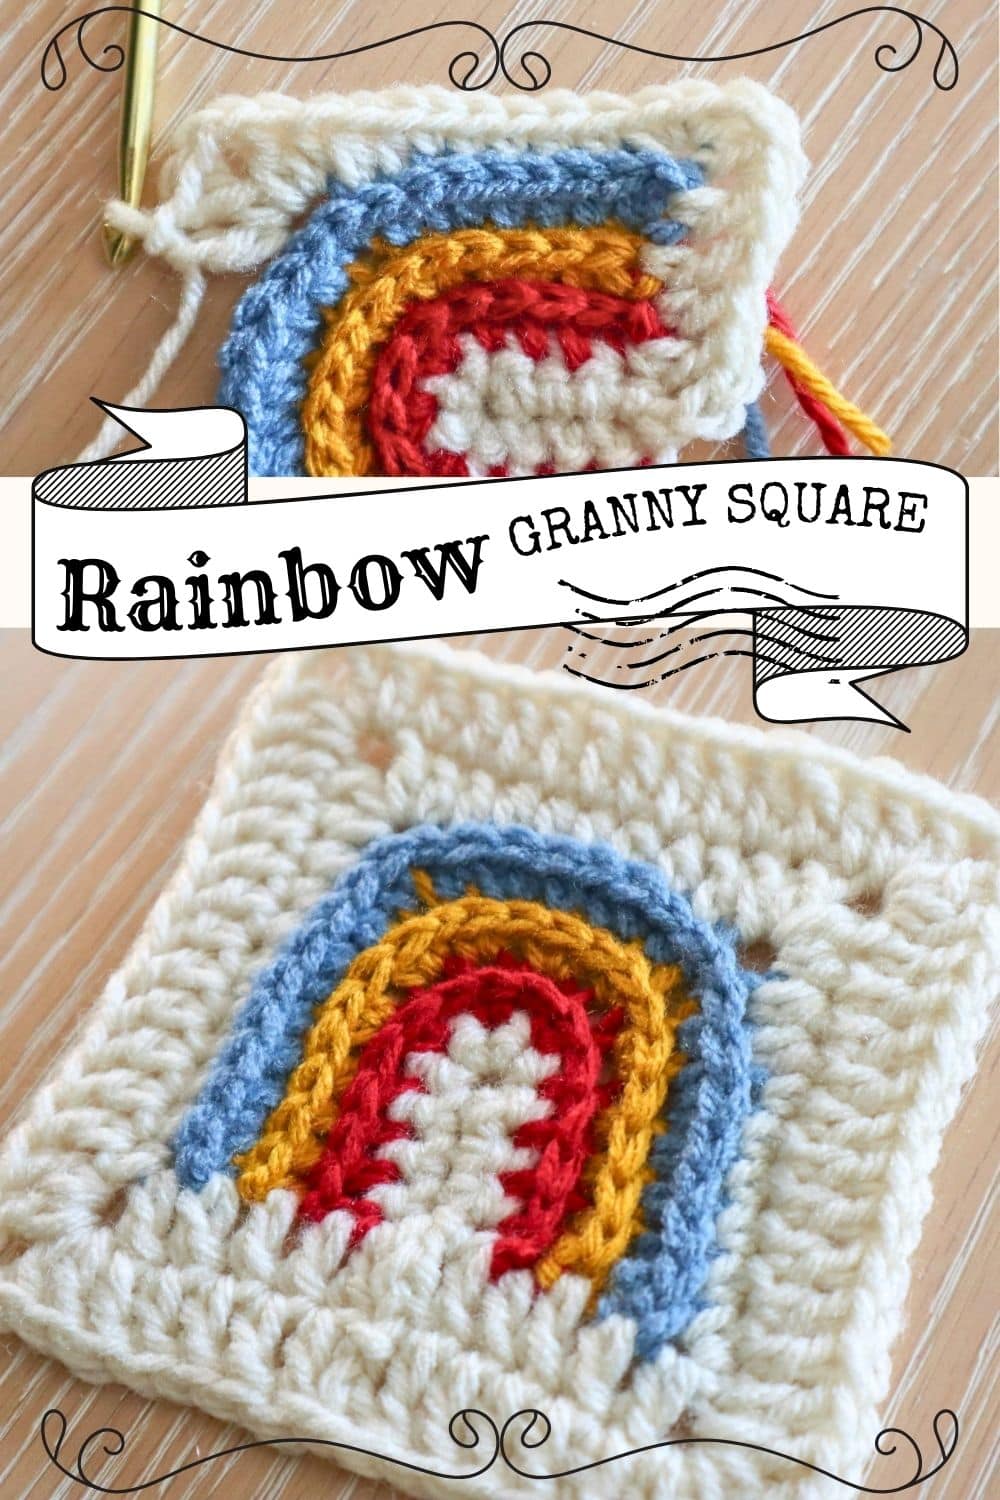
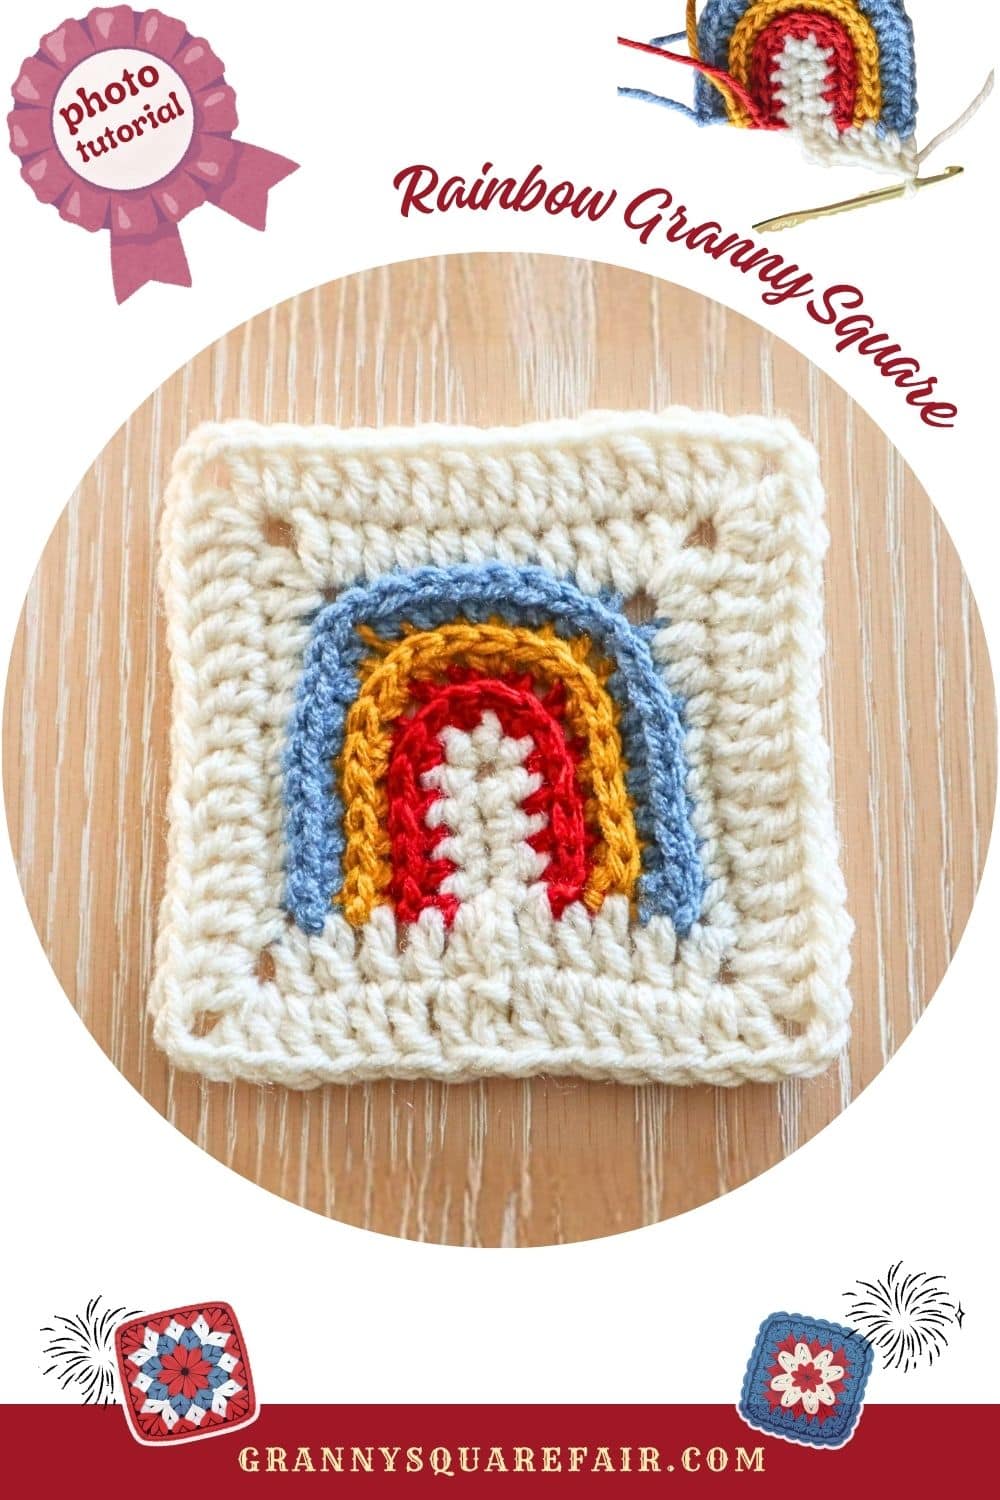
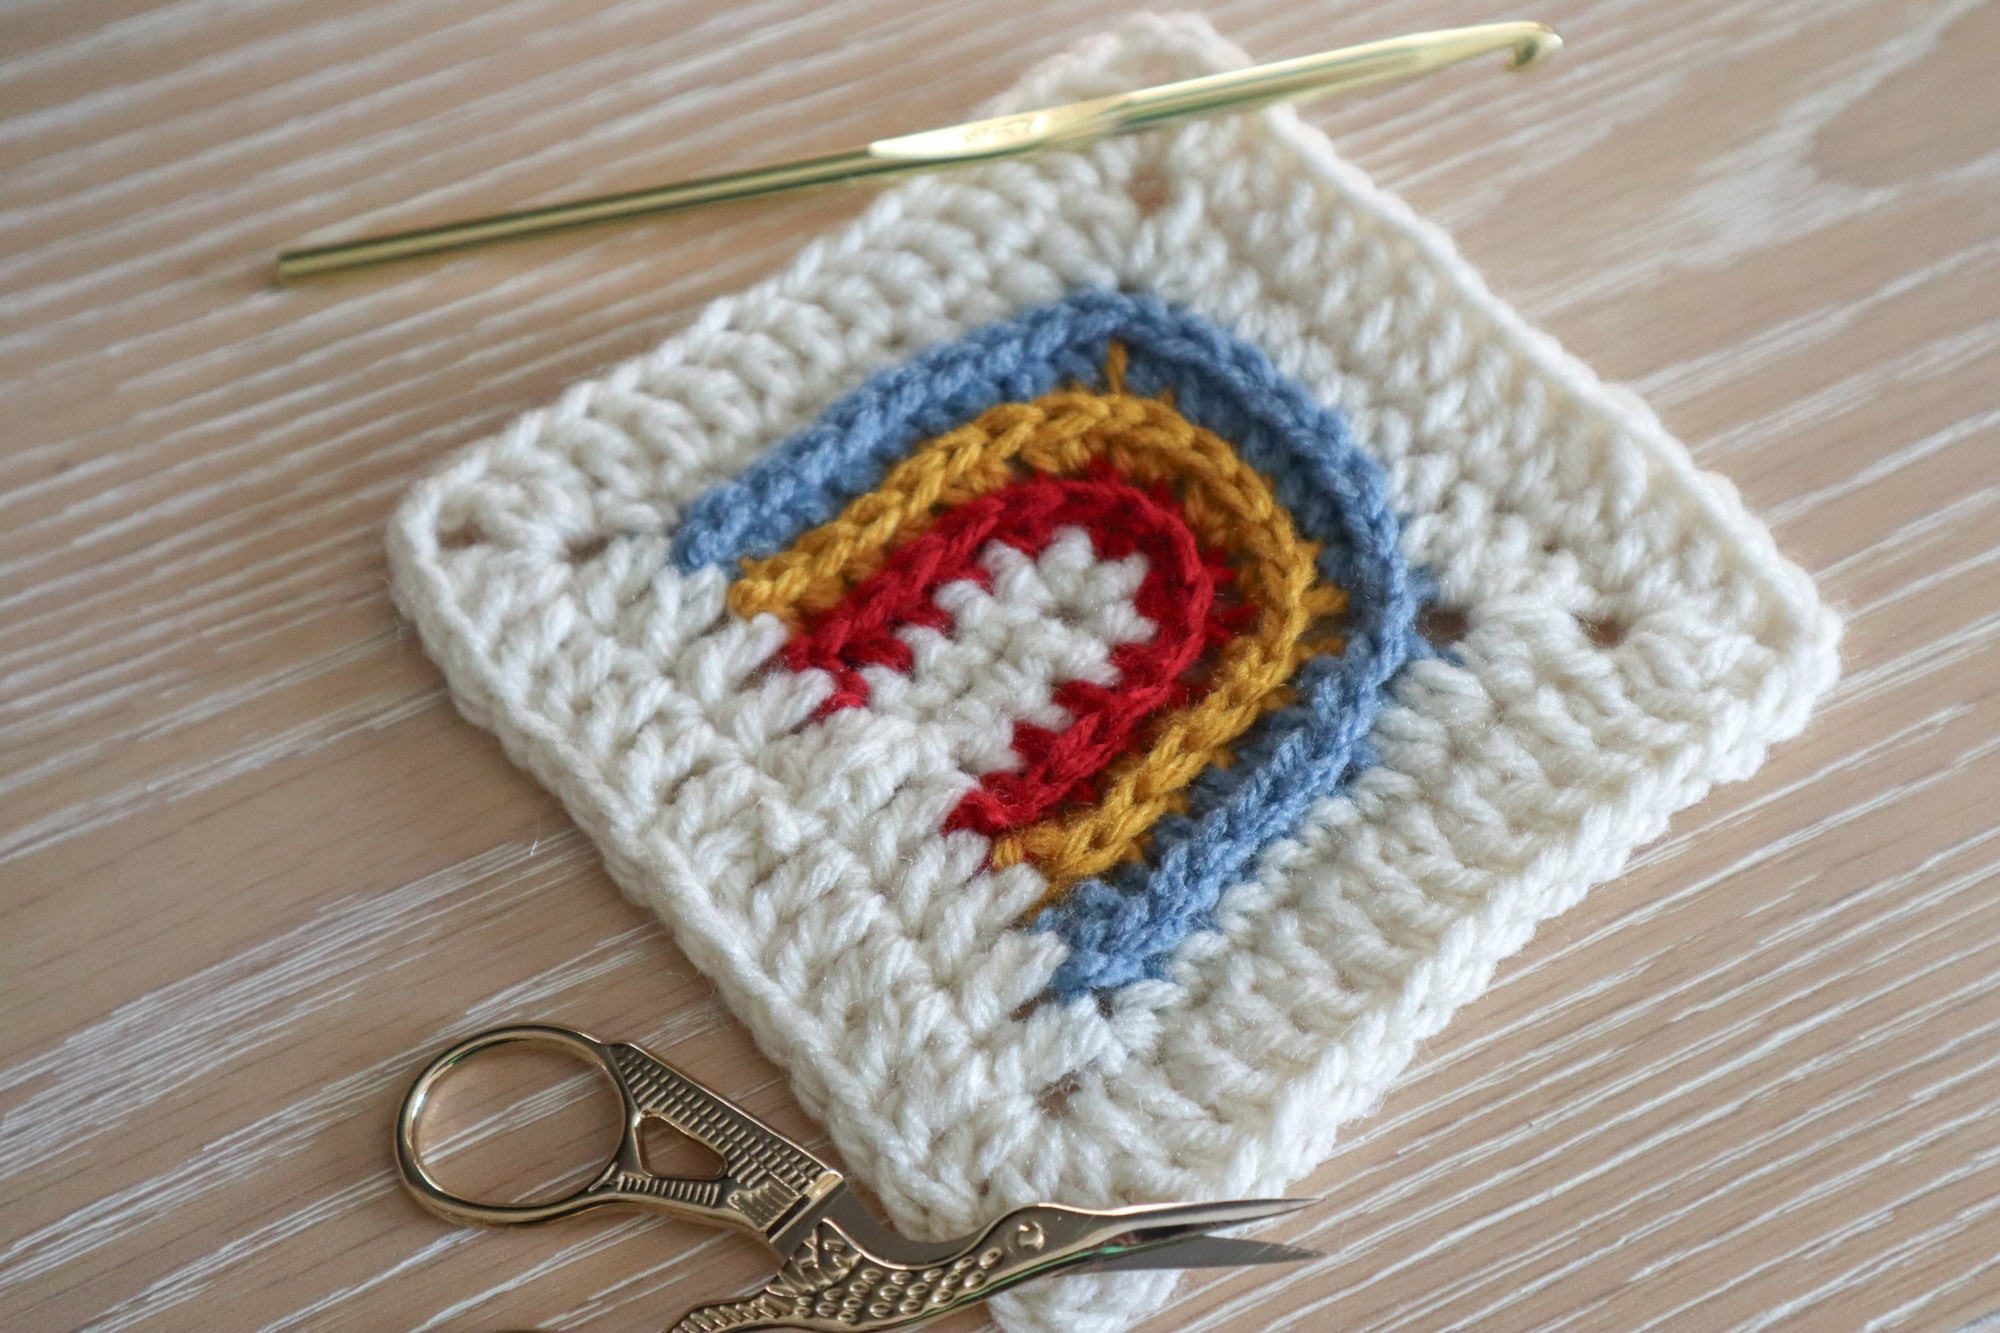
Rainbow granny square
If there’s one square that’s earned its place in the cute granny square hall of fame, it’s this one! The Rainbow Granny Square is a smile-maker any way you slice it! Bold, cheerful, and versatile. A great square for gift recipients young and old.
Jump to:
This is a great stash buster because you can use tiny lengths of yarn, especially for the littlest of the rainbow… bows?… rays? What do we call each color of a rainbow, anyway? Well whatever you call ’em, you also get to choose your color combos to make your unique rainbow square! You can go super traditional like I did or go for trendy muted colors. Crocheters choice!
Skill Level
Intermediate — While this granny square only uses basic stitches (single crochet, double crochet, treble crochet, chains and slip stitches), it does require you to have a good handle on counting your stitches and keeping track of where to put them.
Stitch Abbreviations Used in the Pattern (U.S. Terms)
| Abbreviation | Stitch Name |
|---|---|
| ch | chain |
| sl st | slip stitch |
| sc | single crochet |
| hdc | half double crochet |
| dc | double crochet |
| tr | treble (triple) crochet |
| back bar | I refer to the “back bar” in this pattern. This is referring to the loop that is behind the “back loop” of a typical stitch. Usually only seen in the half double crochet. Working into this back bar is also called the “camel stitch.” |
| st(s) | stitch(es) |
| sp | space |
| rep | repeat |
What You’ll Need
- Yarn: Any weight yarn you love – I used four colors of worsted (4) weight acrylic.
- Hook: Use a hook that matches your yarn label’s recommendation. I used a 4.5mm hook.
- Notions: Scissors, sunshine after a light rain
Gauge & Size
Gauge is up to you and your yarn and hook size! After 5 rounds, in my 4 weight yarn and 4.5mm hook, my square was about 5″ across.
Pattern Notes
- We first work a little piece in the border color to build our rainbow on. Then, we’ll work each ray of the rainbow, changing color with each stripe, and then square the motif using our border color.
- Turning chains may or may not count as stitches depending on the row/round.
- We may or may not turn our work depending on the row/round so the pattern requires paying close attention to this.
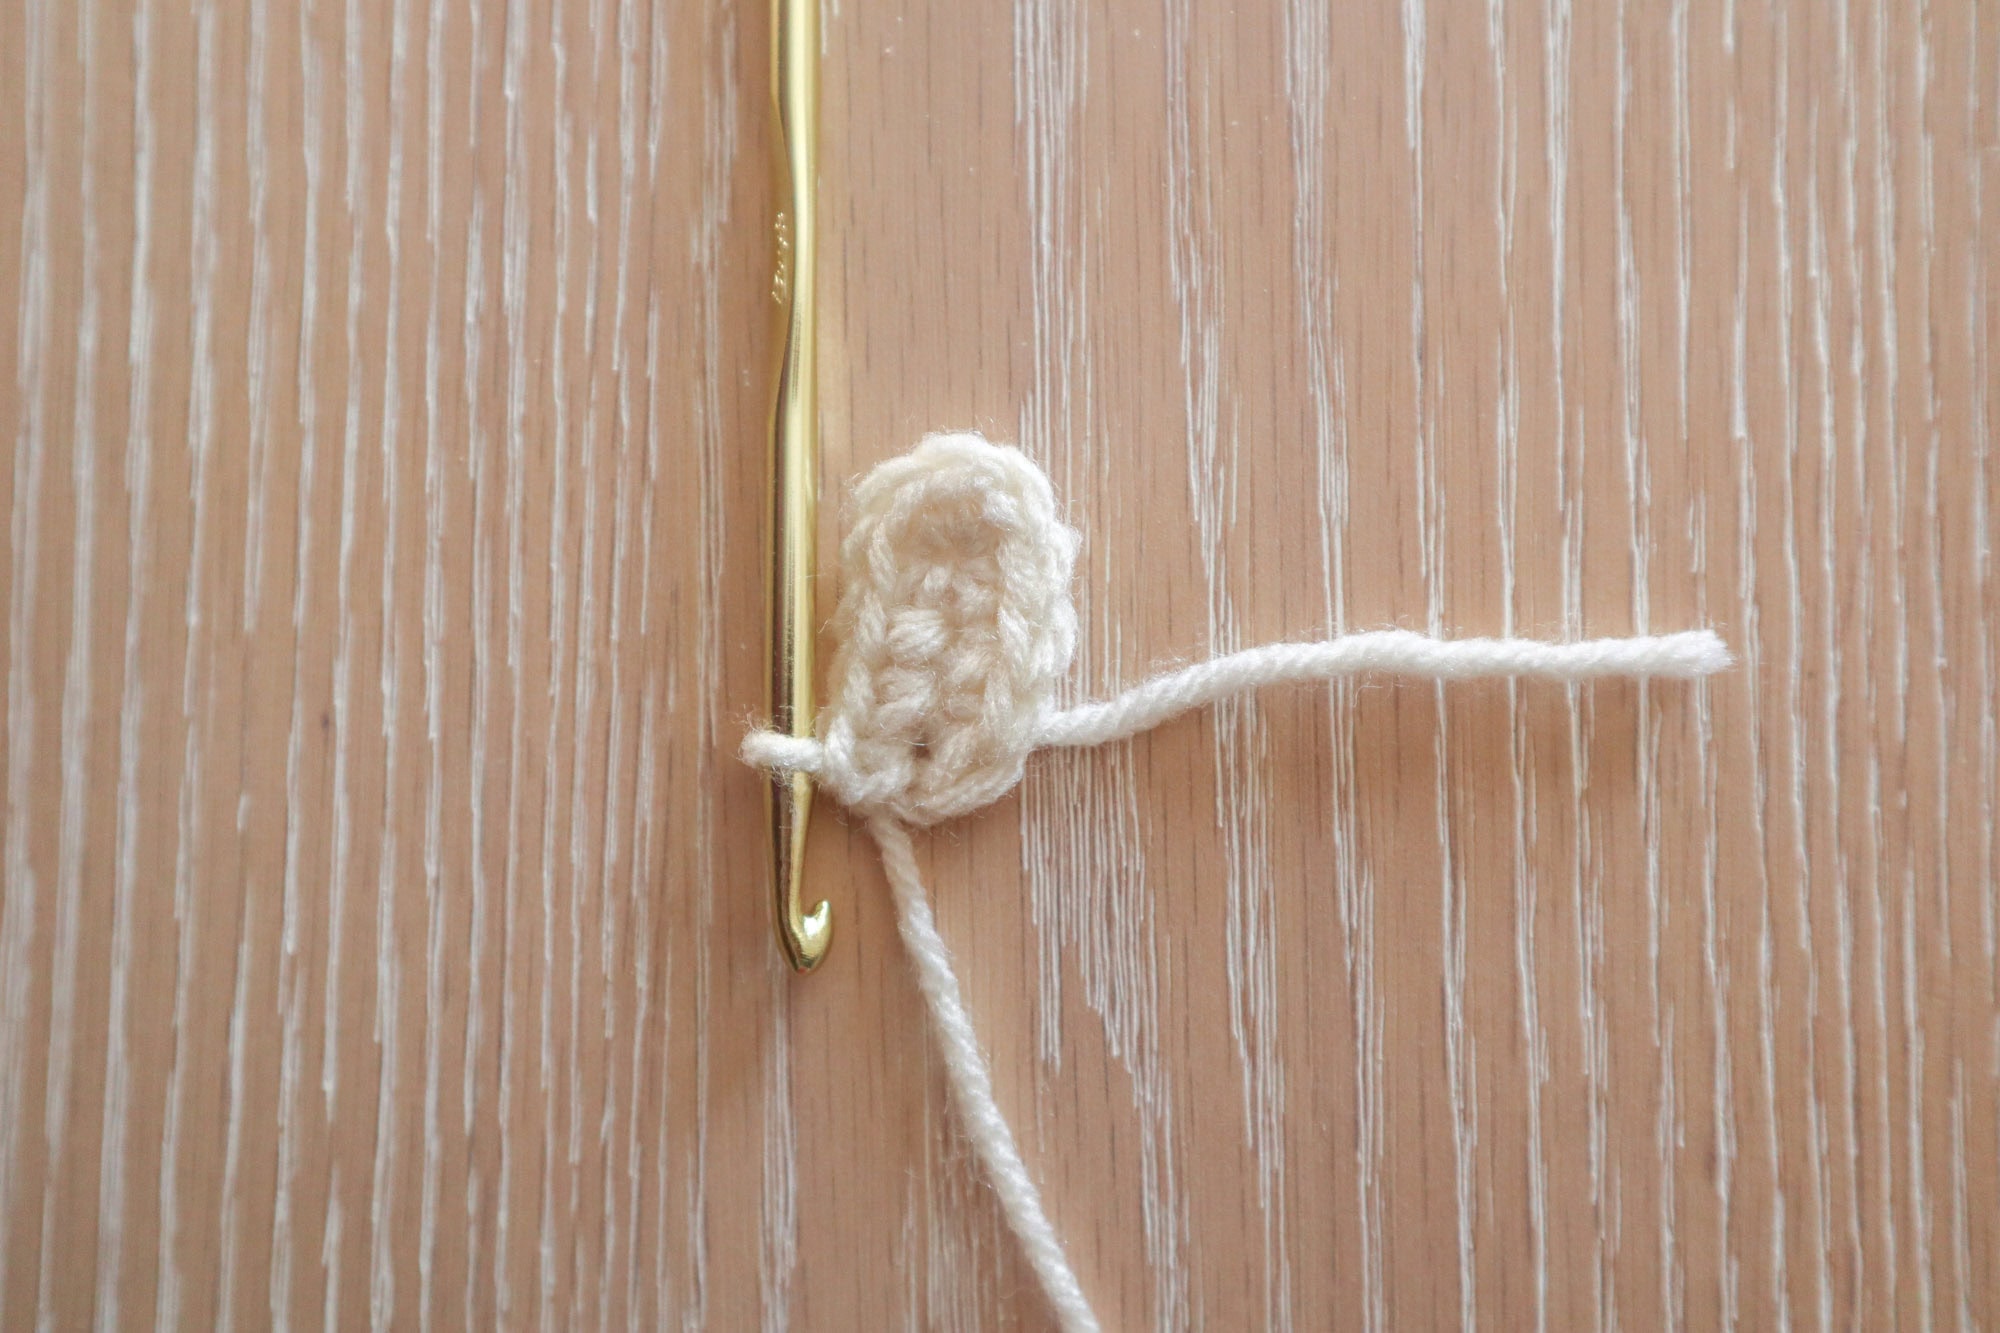
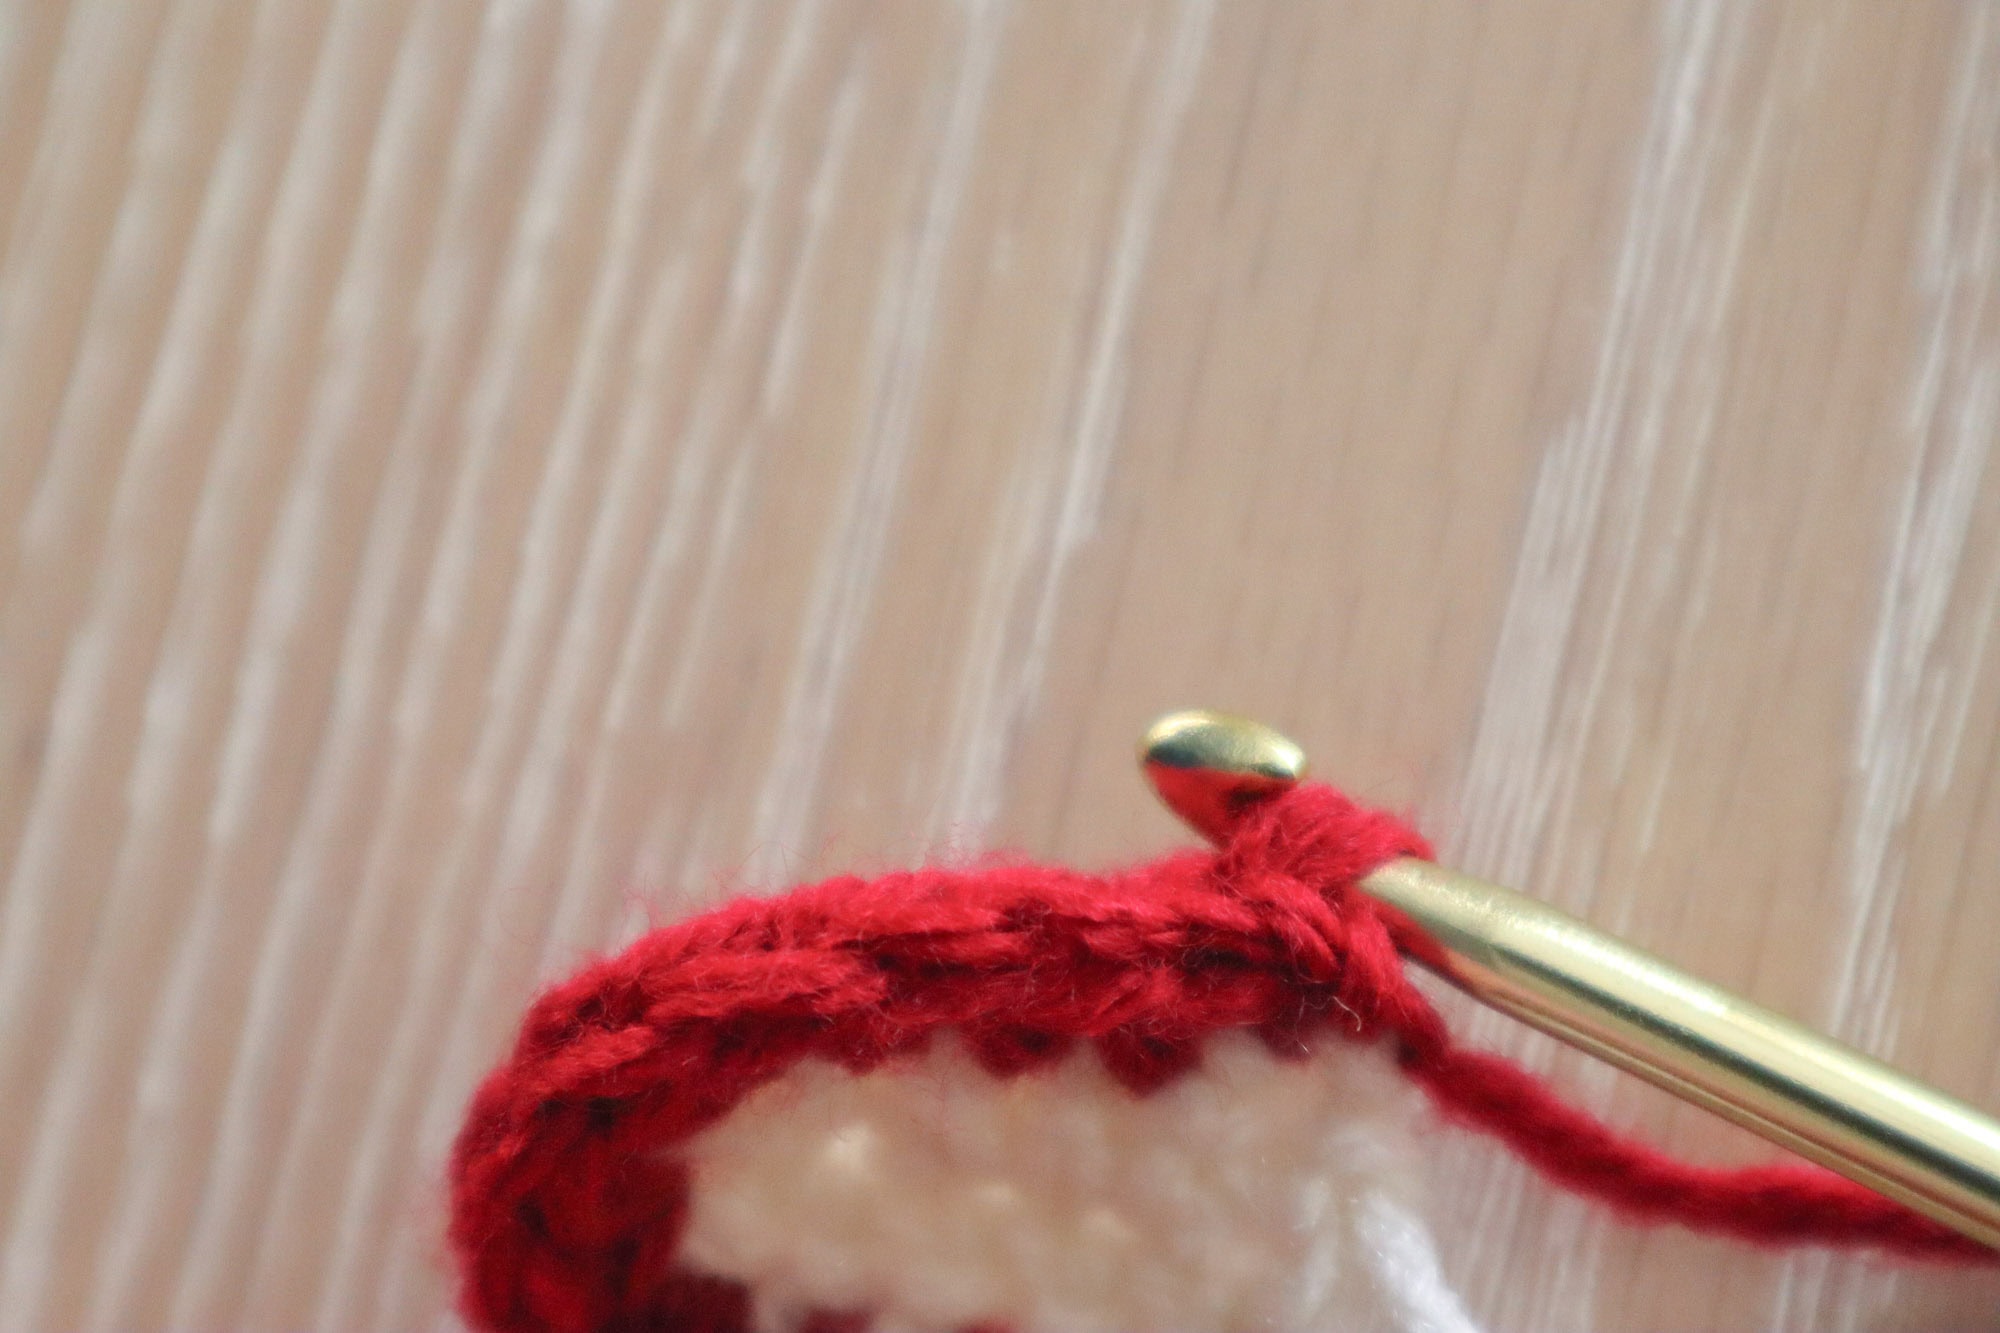
Row 1 – Center to build rainbow on
In border color, Ch5. Skip the first ch, and work 1sc in each of the next 4 chs. In that last chain, work 4 more sc (5sc total in the last chain). Tilt your work to work along the underside of the foundation chain. Work 1sc in the underside of each of the next three chains. (11scs total)
Do not fasten off border color. You may pull the next color through the loop on your hook to close it but keep the border yarn attached for later.
Row 2 – First stripe
Pick up first rainbow color, ch1 (doesn’t count as a stitch) and turn. Work 1hdc in each of the next 4 sts. In each of the next 3 sts, work 2hdc. work 1hdc in each of the last 4 sts (14hdc). Fasten off first rainbow color.

Row 3 – Second stripe
Without turning your work, go back to the first stitch of row 2 and pick up second rainbow color in the back bar (camel stitch) of that first hdc.
Work 1hdc in the back bar of each of the next 4 sts. Working in the back bar of the next 6 sts, work 2hdc in each. Still working into that back bar, make 1hdc in each of the last 4 sts (20 hdc). Fasten off second stripe color.
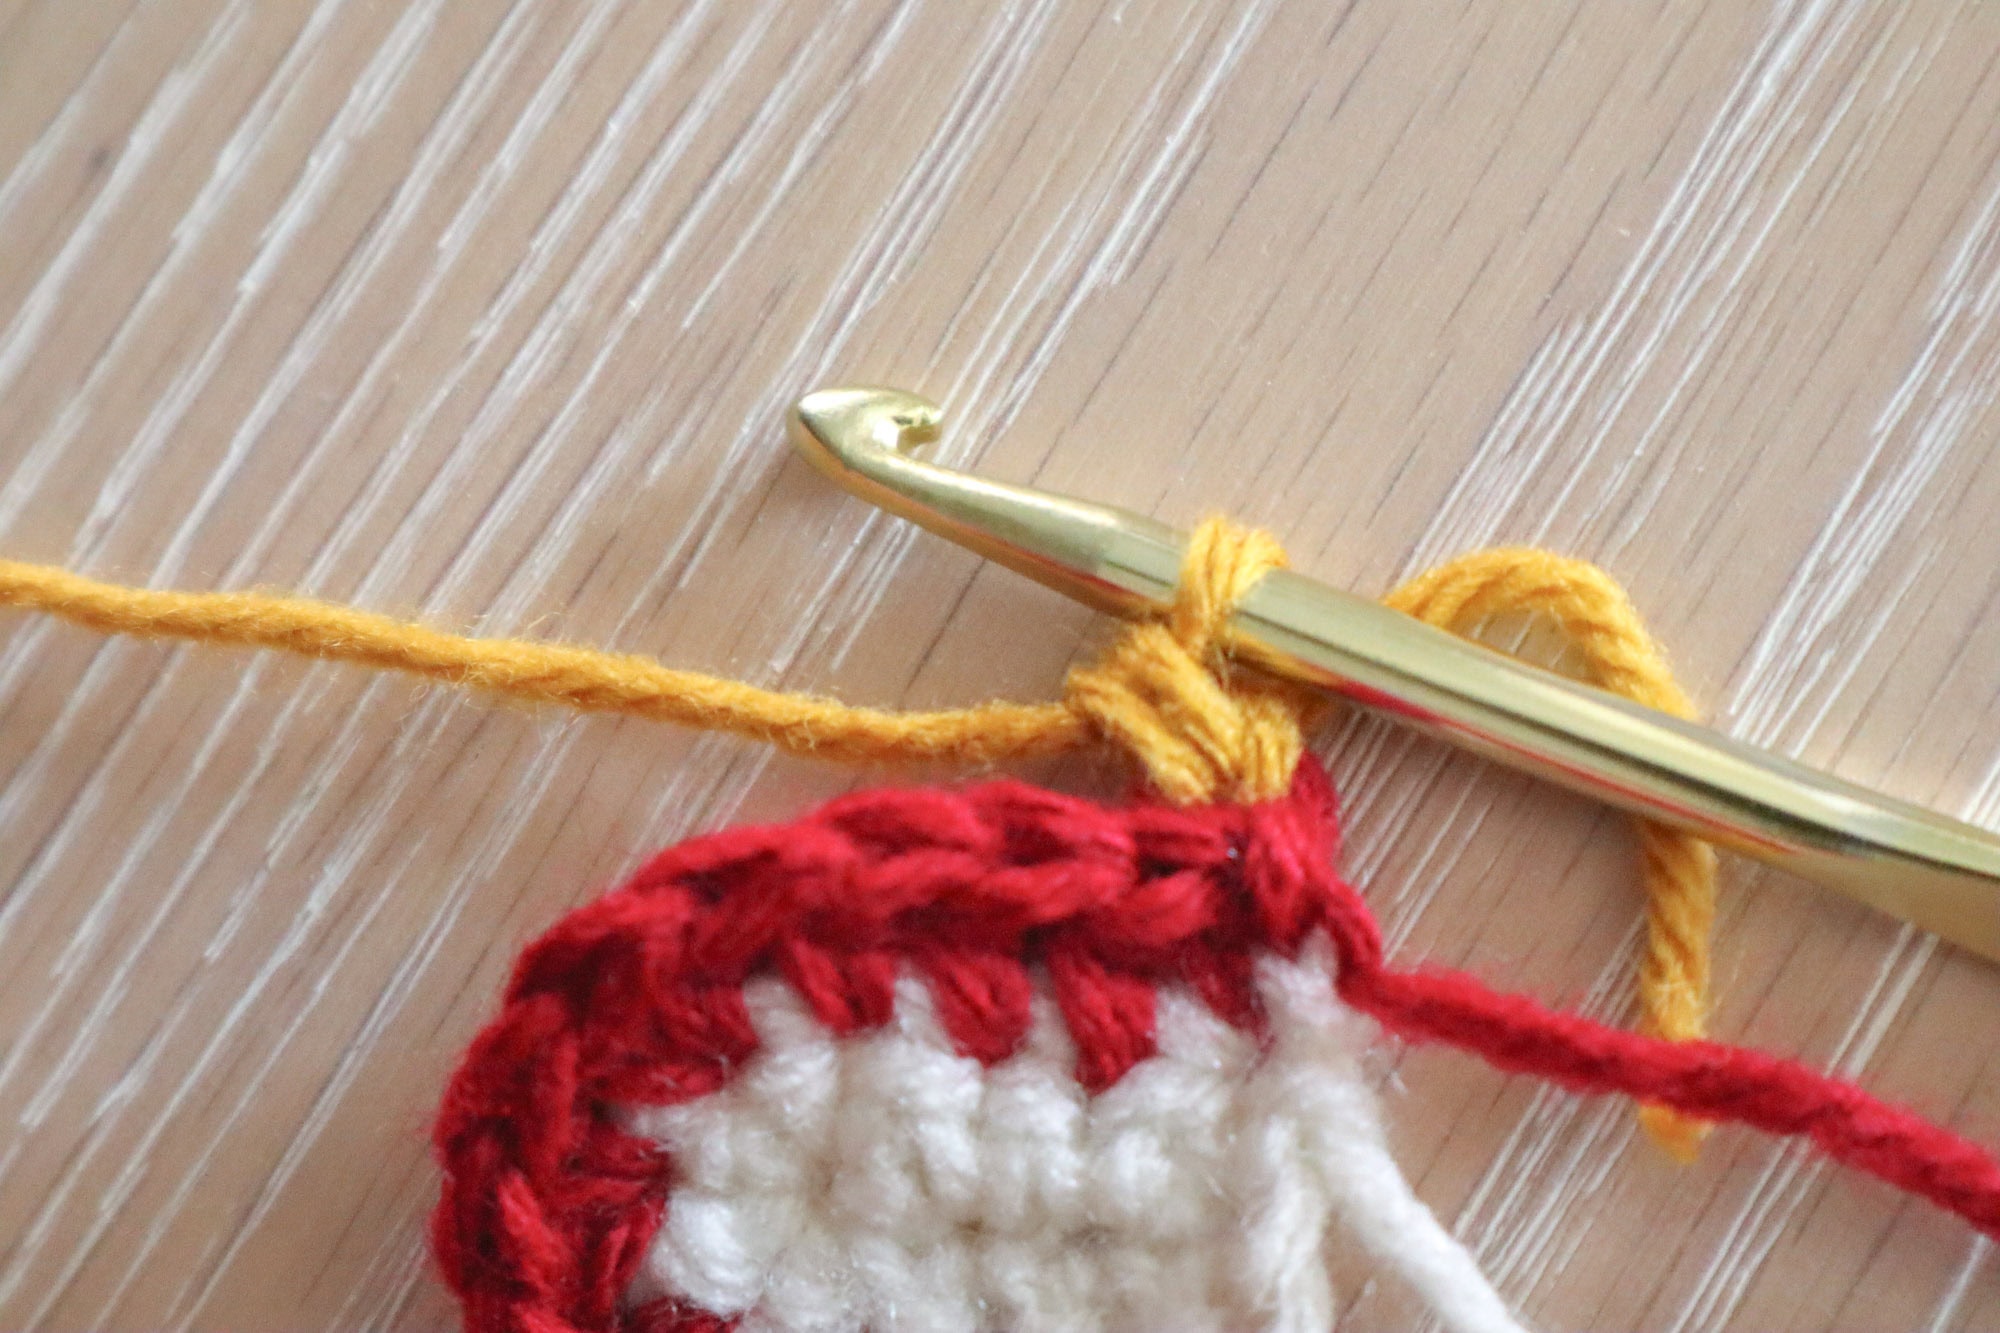
Row 4 – Third stripe
Without turning your work, go back to the first stitch of row 3 and pick up third rainbow color in the back bar of that first hdc. Work 1hdc in the back bar of each of the next 4 sts. Working in the back bar, across the next 12 sts, alternate 2hdc, 1hdc. Still working into that back bar, make 1hdc in each of the last 4 sts (24hdc). Fasten off third color.
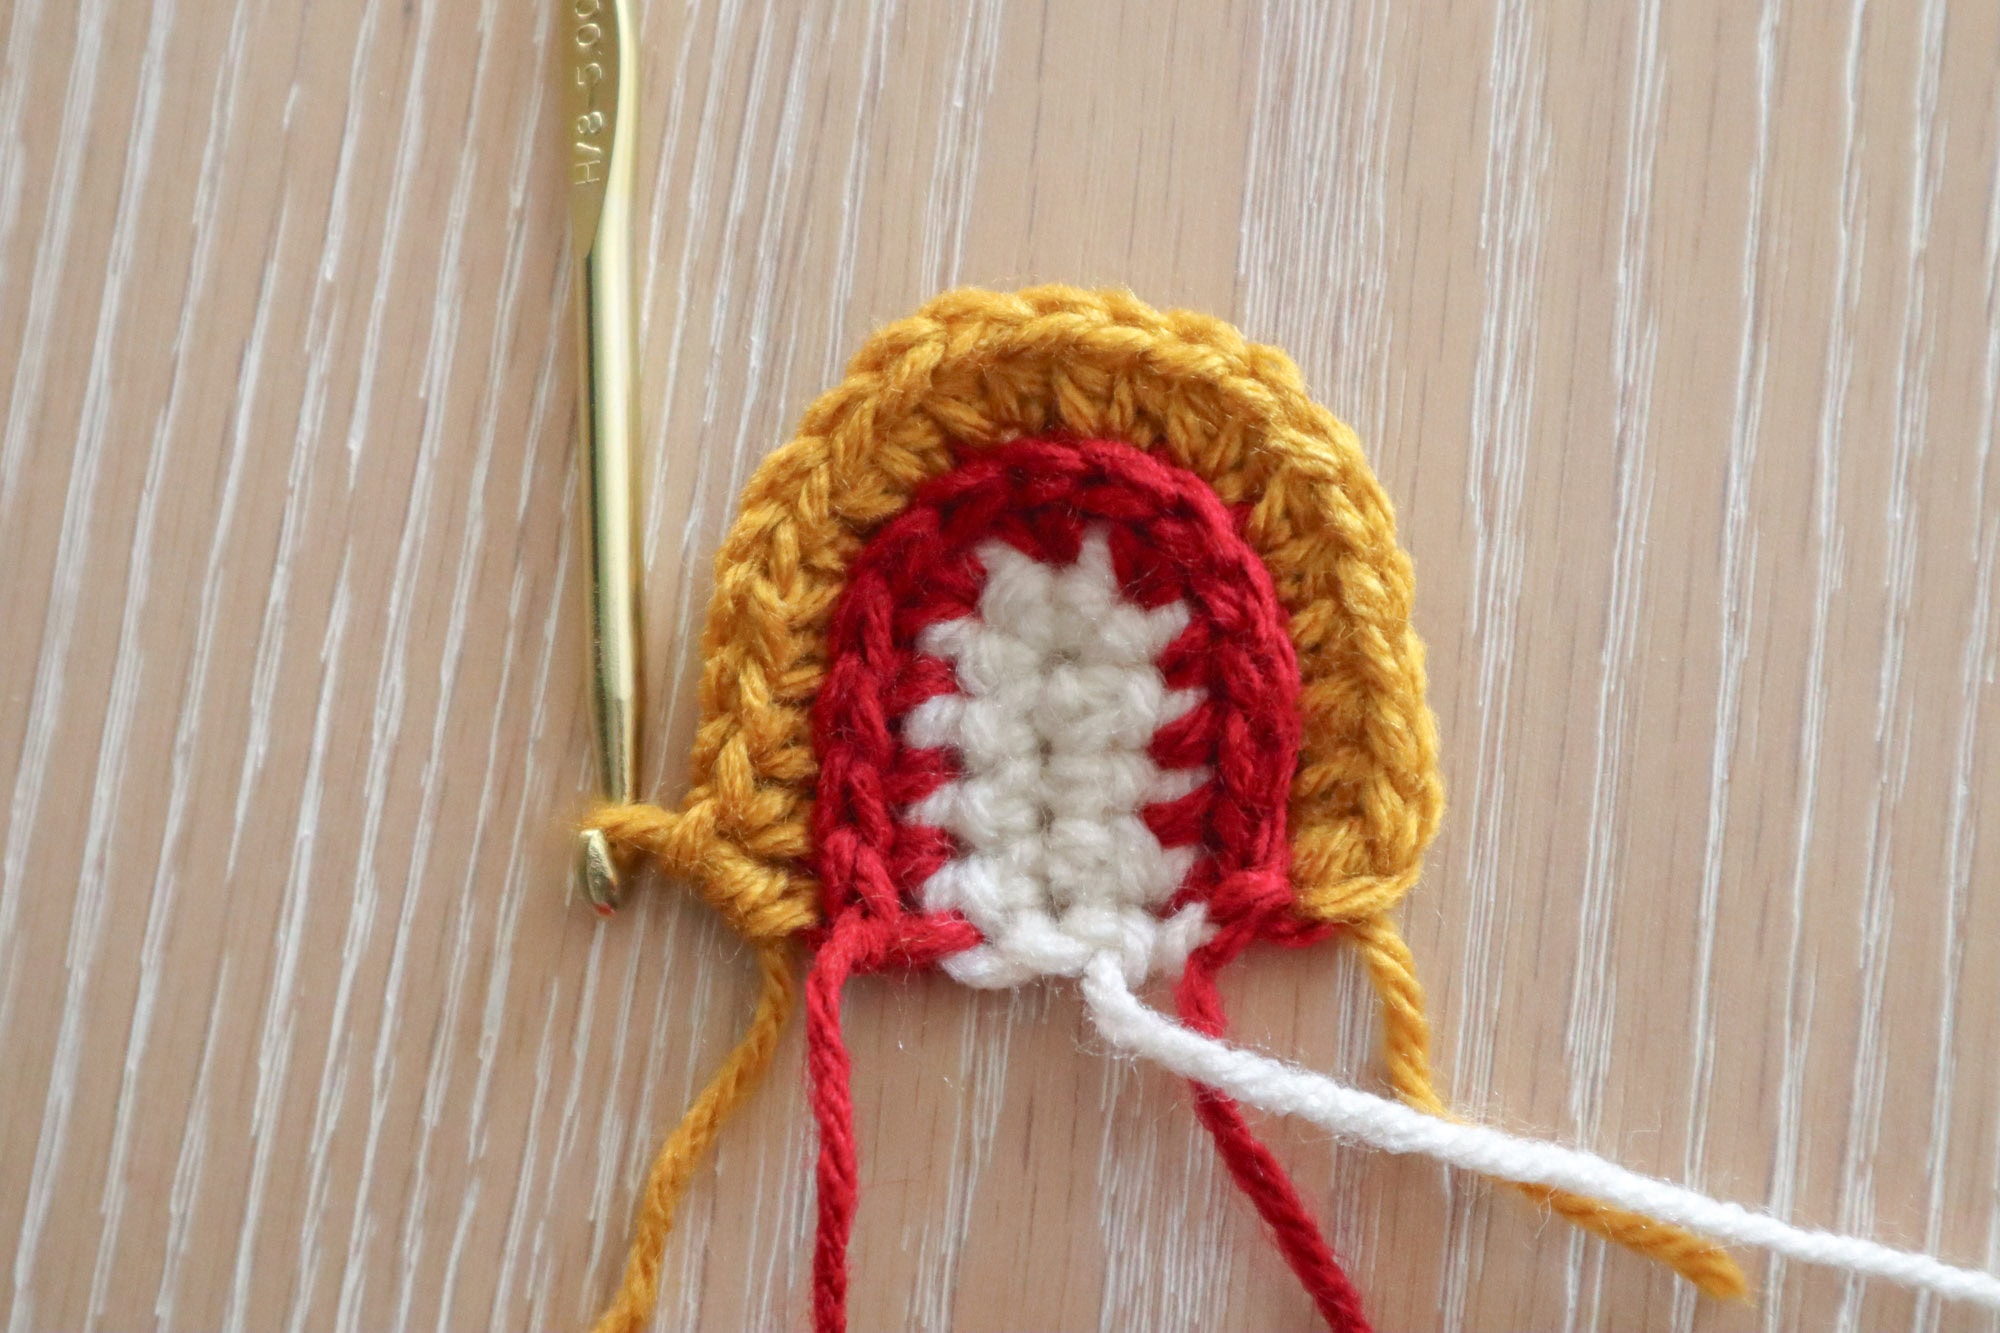
Round 5 – Squaring The Rainbow
Pick up the border color in the center bottom edge of the starting piece. Ch3 (counts as 1dc) and make 5 more dc evenly along the bottom of your rainbow, making sure to put the last dc in the back bar of the first hdc from row 4. Ch 2 and work 2sc in the same back bar. 1sc in the back bar of the next 5 sts, 1hdc in the next 2 back bars. Into the next back bar, work 1hdc1dc, ch2, 2dc to make a corner.
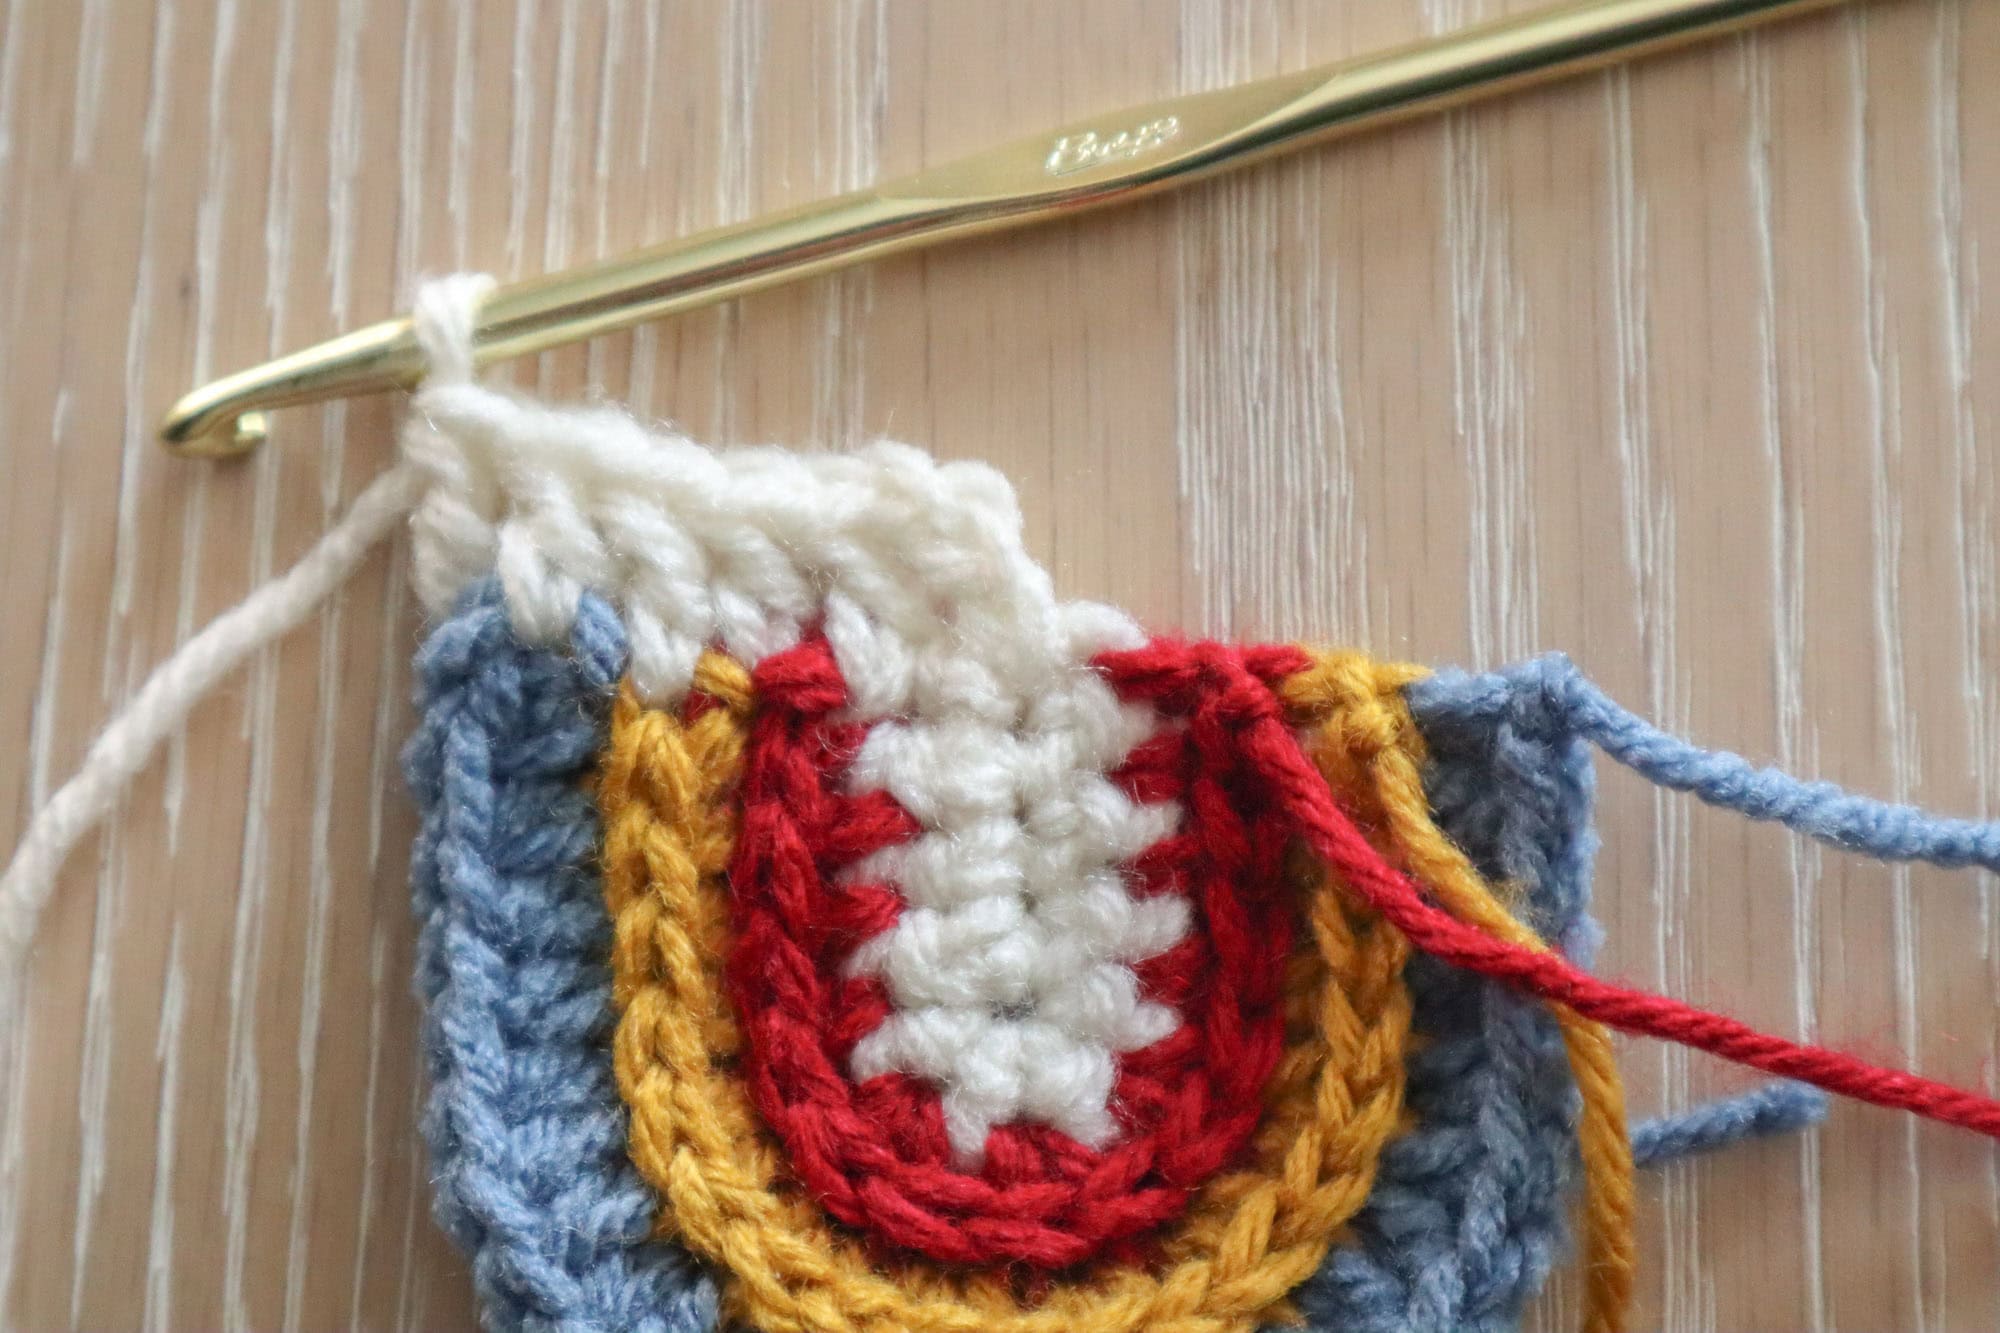
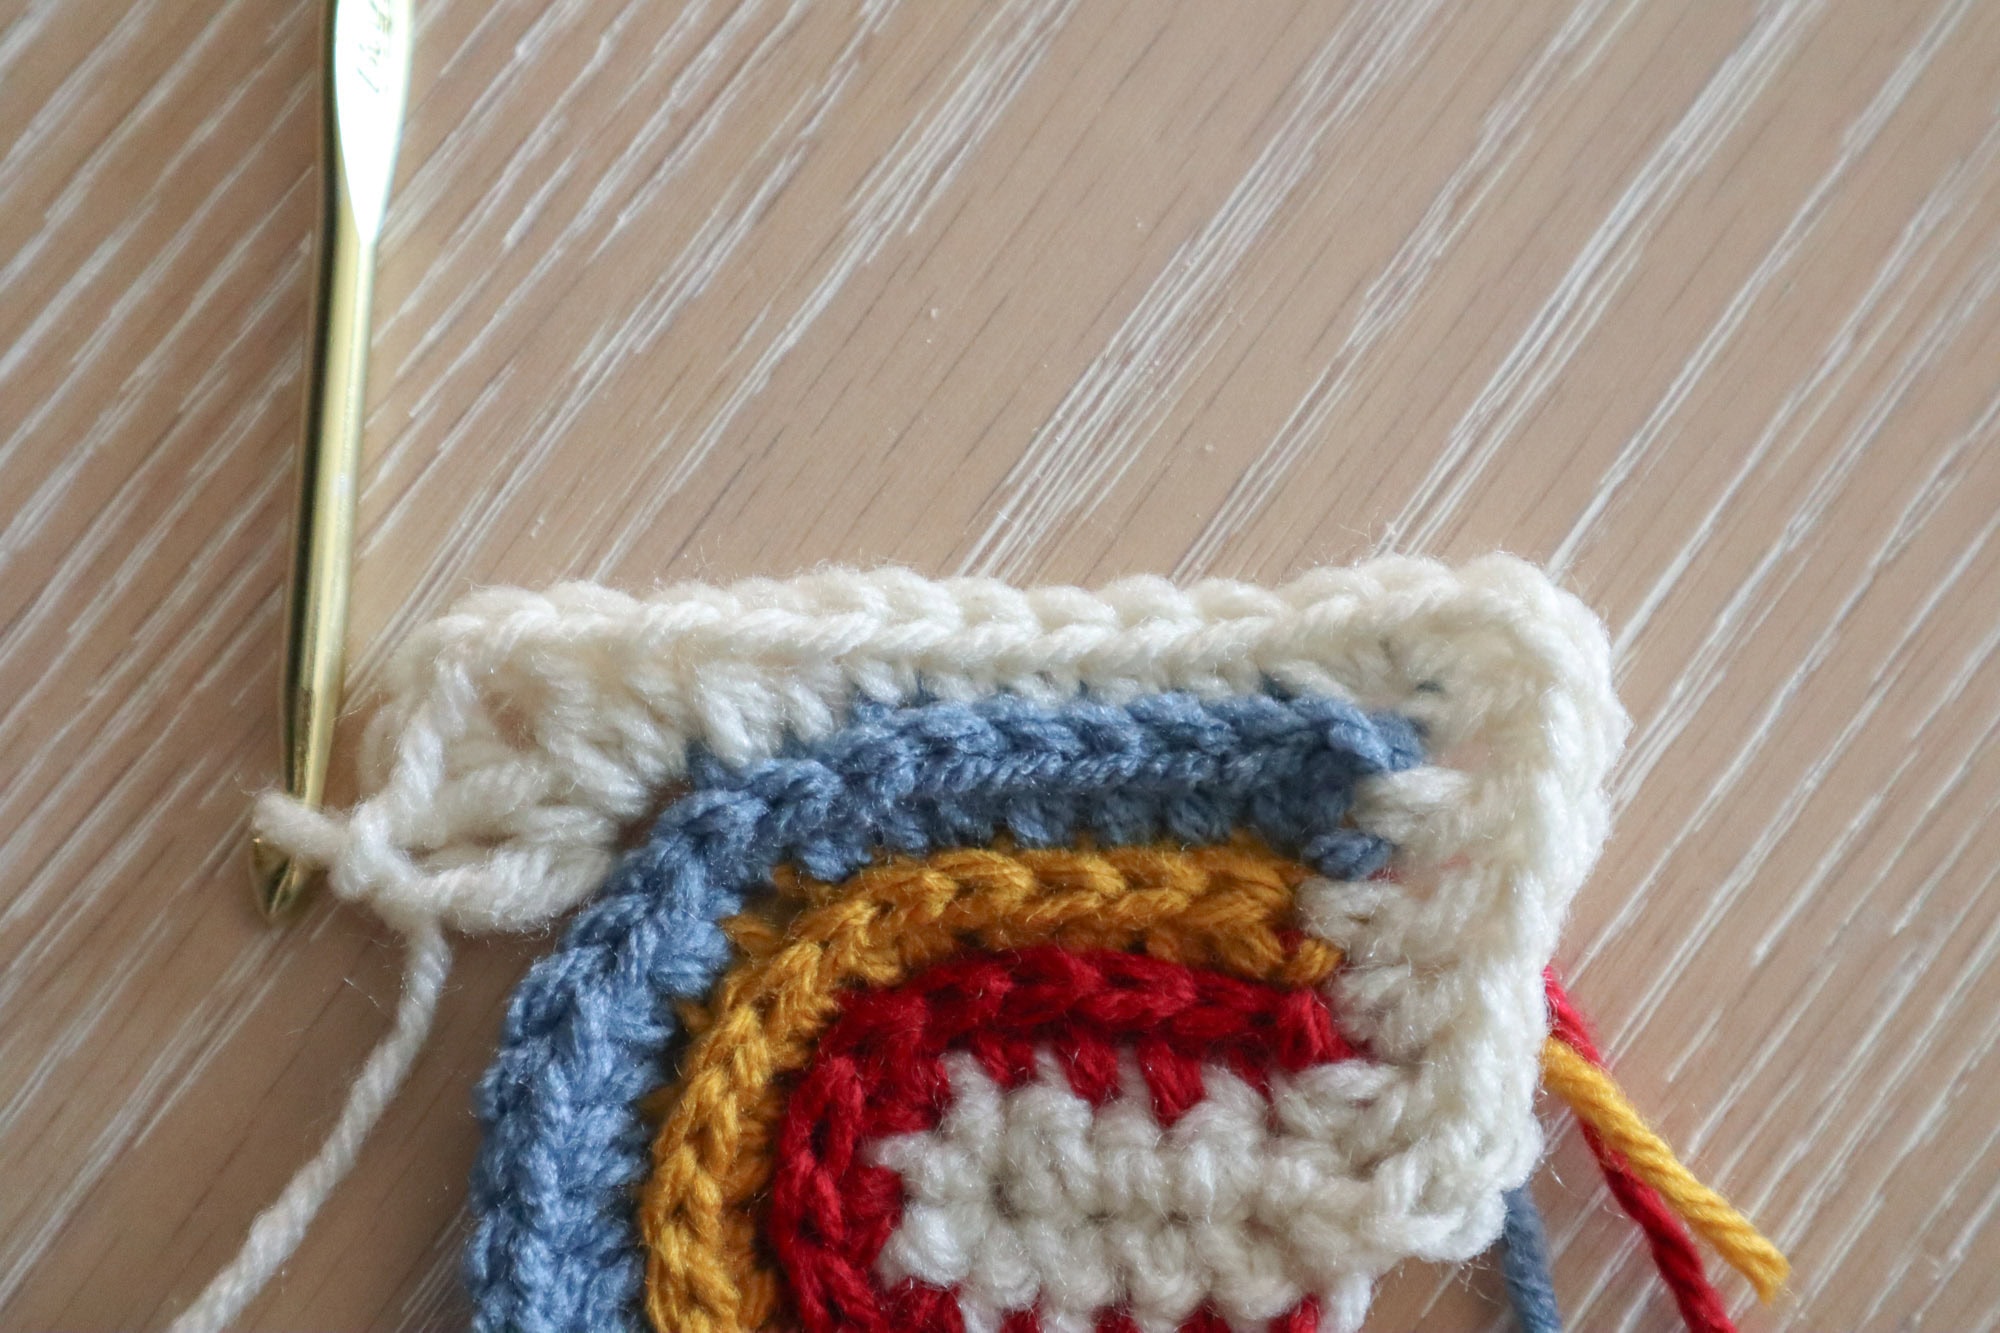
Across the next 7 sts, still working into the back bars, make 1dc, hdc 5, 1dc. Into the next back bar, make a 2dc, ch2, 1dc1hdc corner. Across the next 9 back bars, work hdc 3, sc 6. Ch2 and evenly work 5 dc across the bottom edge of your rainbow, starting with 1dc . Sl st to the top of your starting ch3 to complete the round.
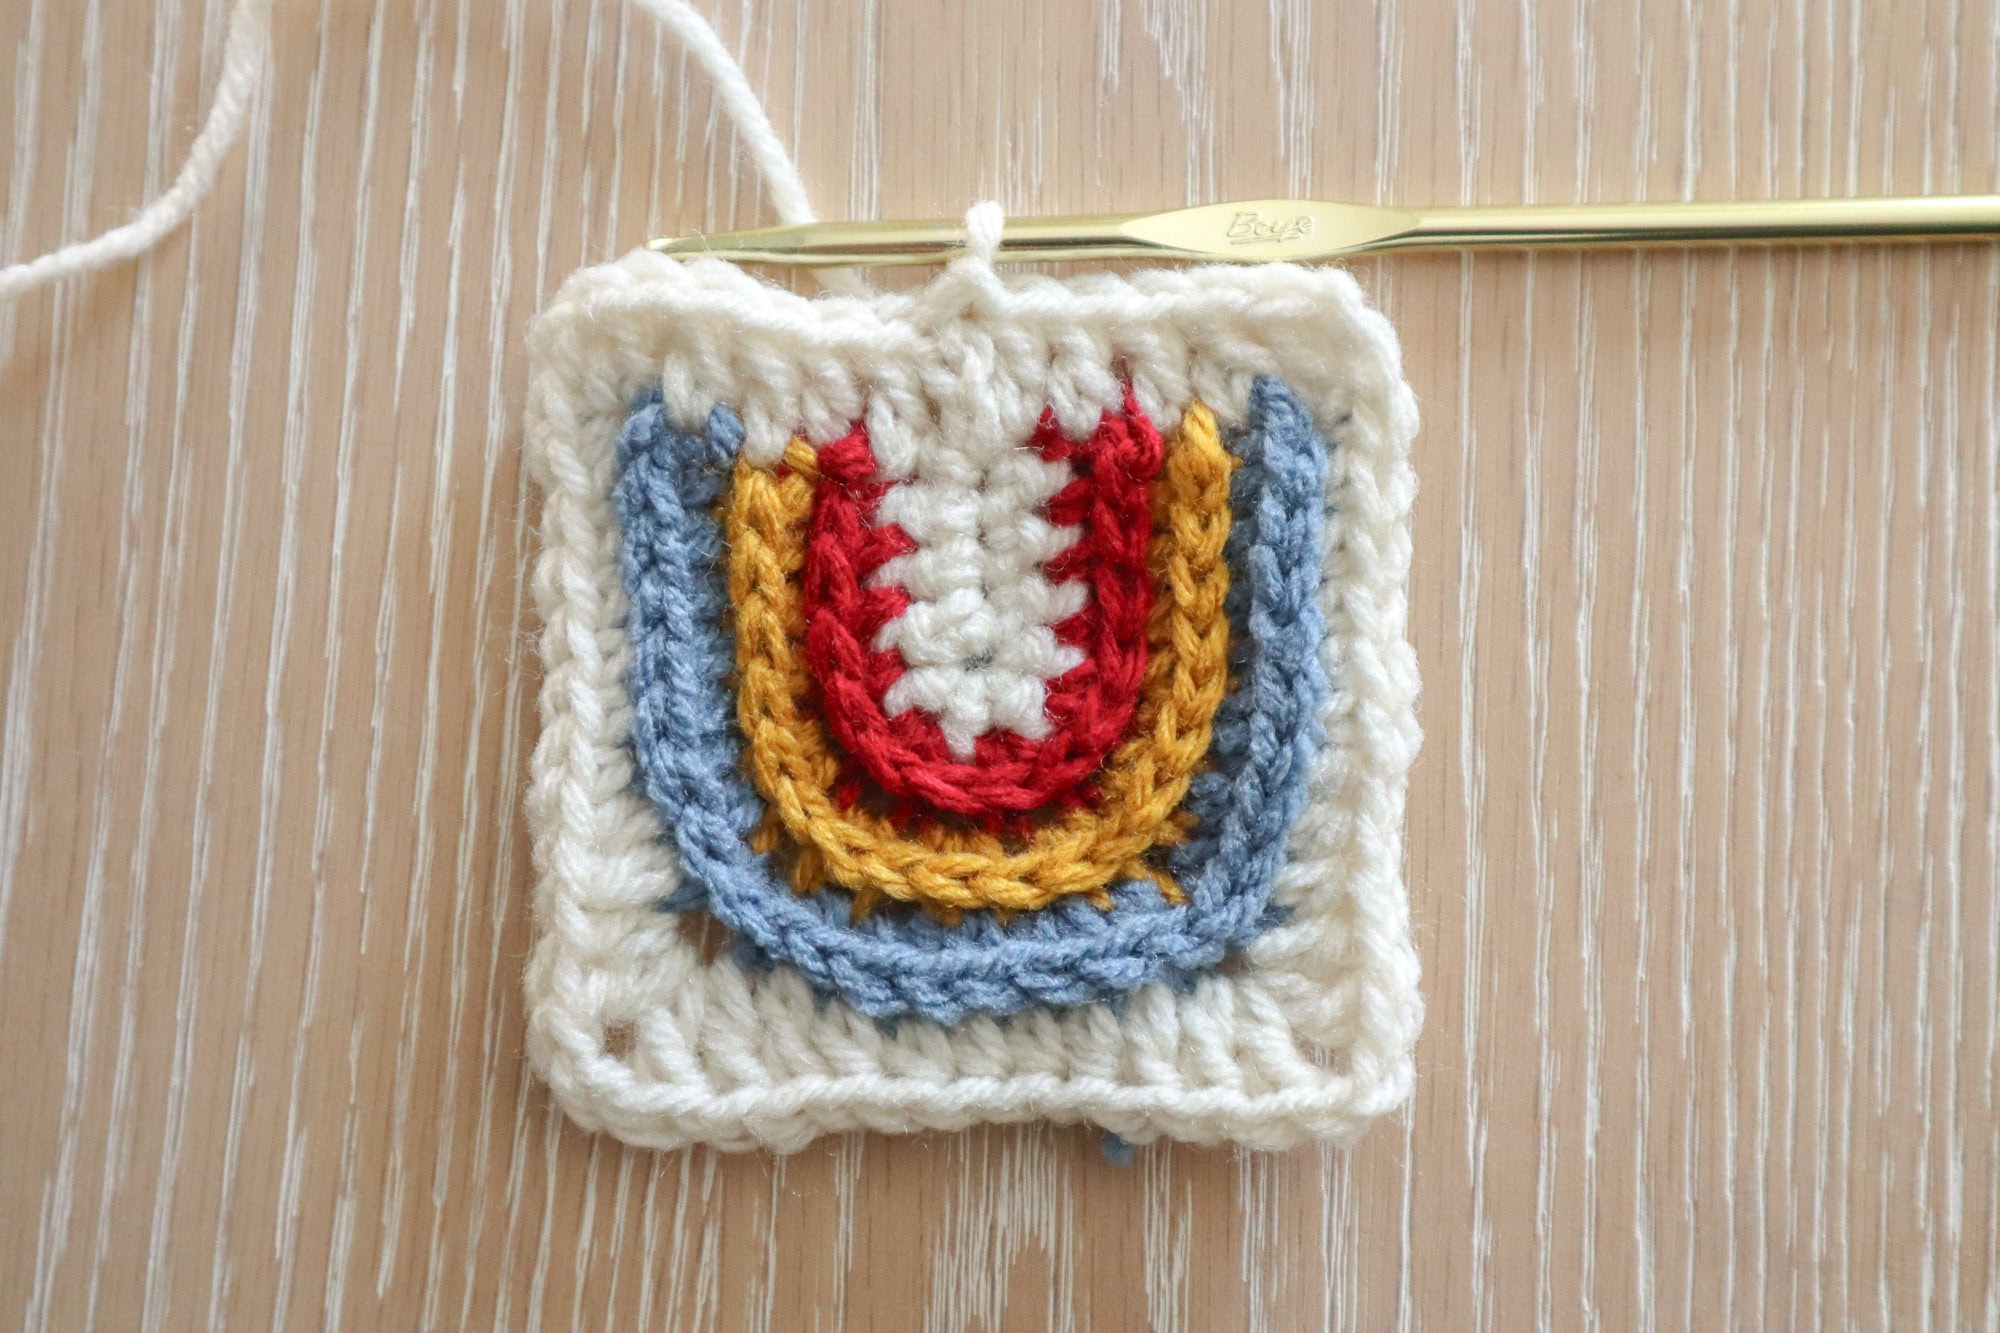
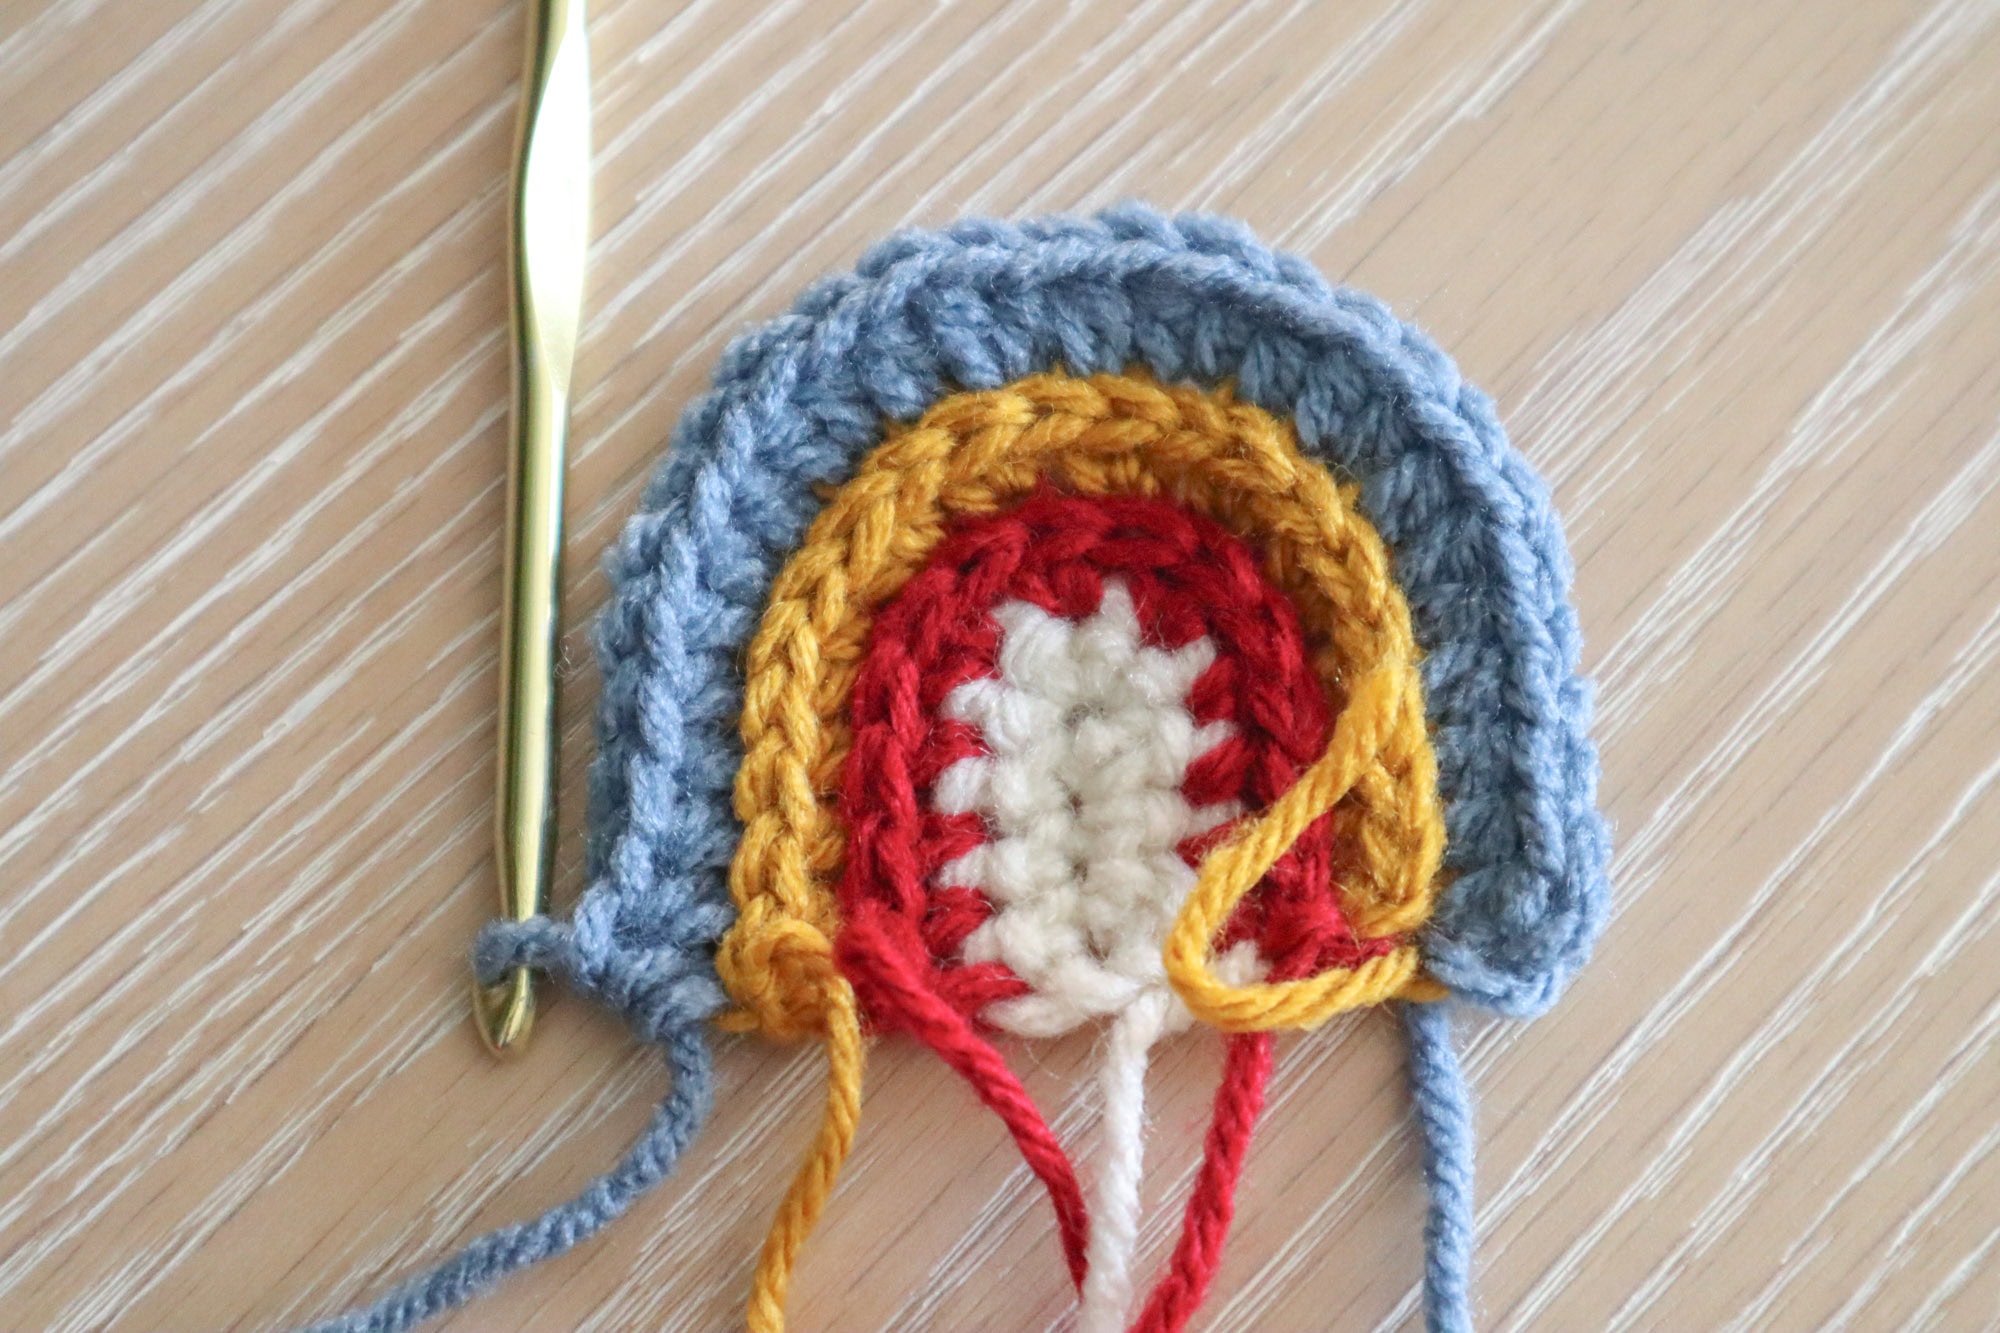
Round 5
Ch3 (counts as 1dc) and work 1dc in each stitch from the prev rnd. Into the ch2 corner, w ork 2dc, ch2, 2dc.
Continue working 1dc in each st from prev rnd and work 2dc, ch2, 2dc into corner ch2 spaces. Sl st to starting ch3 to complete the rnd. (15dcs between each corner)

Finishing
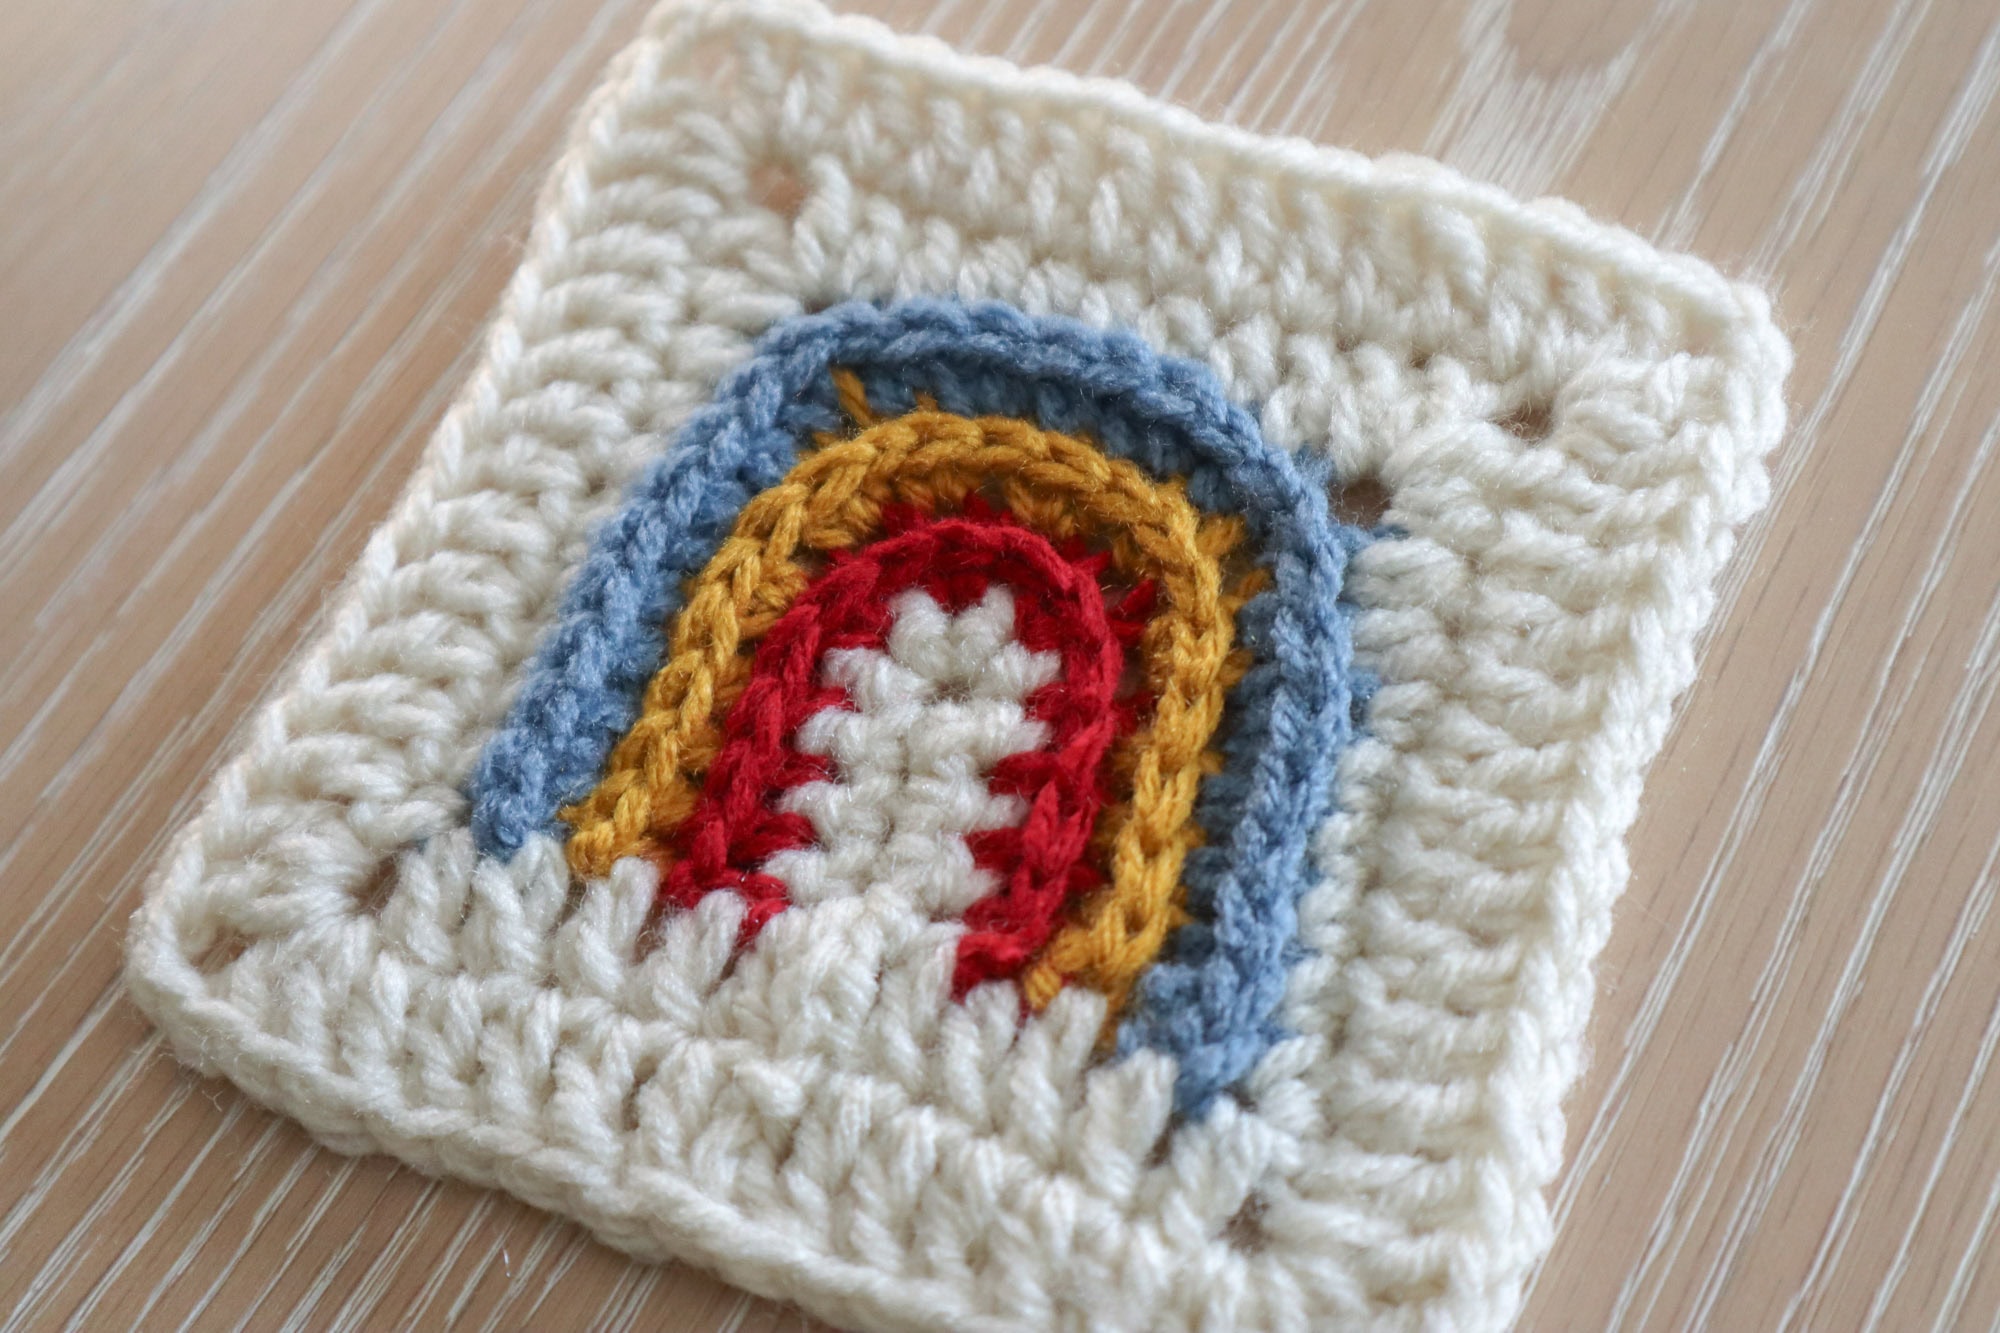
Consider weaving in your ends as you go for this square. With those color changes, you will have quite a few ends to contend with! And if you save them all ’till the end, you’re gonna regret it (trust me). This square usually fairs just fine without blocking. So just crochet and enjoy!
And there you have it
Your very own mini rainbow granny square! With just three stripes, you can really make this one your own by choosing which three colors make the cut for your “rainbow.” Will you go modern beige rainbow? Pastels? Or try to keep it traditional? If you do make your own rainbow granny square, please tag @grannysquarefair so we can see your spin on it! ’till next time!
Pin for later!